The inside diameter measures 19 mm, which is 3/4". I have some 3/4" concrete-work rod lying around that I bet I can adapt for use as an interior mandrel/anvil. I was afraid I was going to have to purchase something like drill rod, doubling my investment before I even got started, but this'll work if it will fit—and I like the price! It's also already tapered on one end, I'd just need to clean it up and polish it a bit.
Update: Sunday, January 18, 2009. I took the wire brushes to the concrete form stake and got all the rust and concrete off of it. I also ground off the flare that had been pounded into the hammer end. It fits into the flute OK now, though there are a few high points on it left to address. (This stuff isn't precision drill rod, after all!) I'm thinking it's going to work out. I also had a look at the keys, I don't think they got bent and it's only about five screws or so to remove all of the keywork from the body. The worst damage is where the crimp went into one tonehole, that promises to be interesting.
Update: Thursday, January 22, 2009. Seven, screws, not five. I pulled all the keywork off the body. There was a bit of stress on some of them: due to the bend some screws (the long ones) didn't want to come out. One of the plates carrying some of the posts had even peeled partially loose from the body due to the stress, but I think I can reflow the solder once I've taken care of the bend. I put all the screws and keywork in three labeled baggies: head, middle, and foot, and with any luck I'll be able to reassemble it when the time comes! The key pivots (the screws) were all very gunky and desperately in need of a good cleaning and oiling. The body under all the keywork was also pretty dirty and in need of polishing. The pads don't look quite as good as I'd thought, but perhaps they'll still serve. I'm still quite optimistic. I want to get a good photograph before I actually start on the bend.
Update: Friday, January 23, 2009. I got out the copy stand, photoflood lights, and a 50 mm lens from a 35 mm camera to use as a close-up magnifier on the little Olympus D-300L. (Someday I'll have a digital Canon EOS body that can use my good macro lenses.) Using all this I was able, with some difficulty, to take some 'before' pictures of the flute:
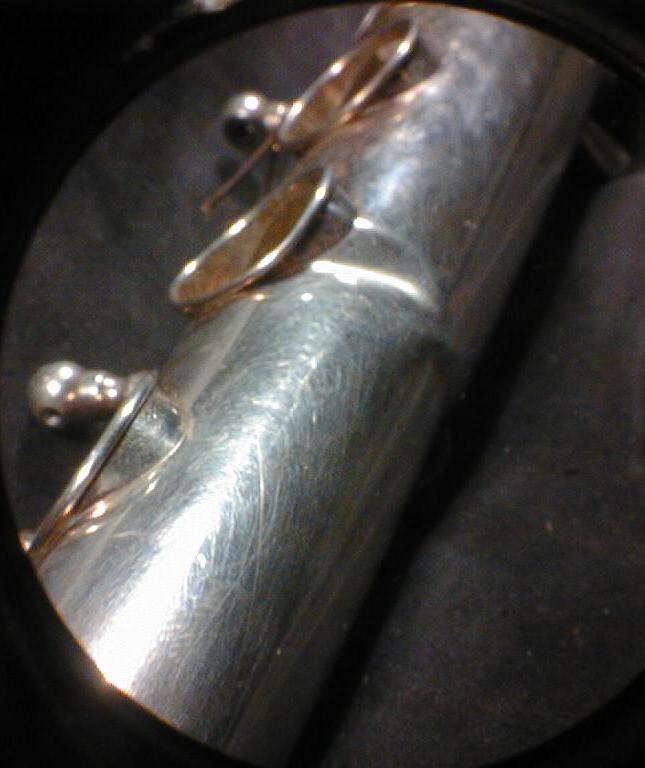
| Bow | (Bow in body) | |
| Body crimp | (Including one deformed tonehole) | |
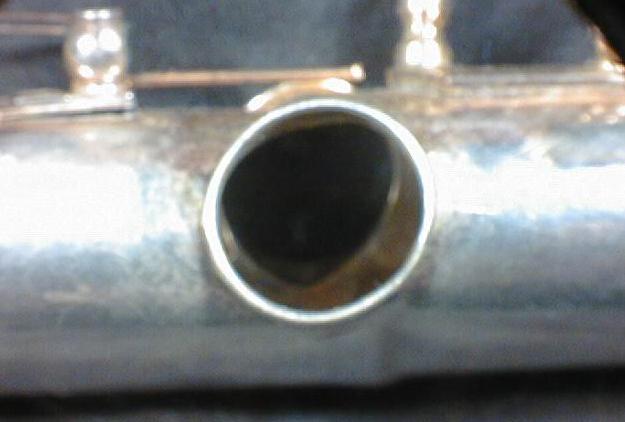
| Tonehole | (Other side of above, out of round. Also note cracked pin support solder.) | |
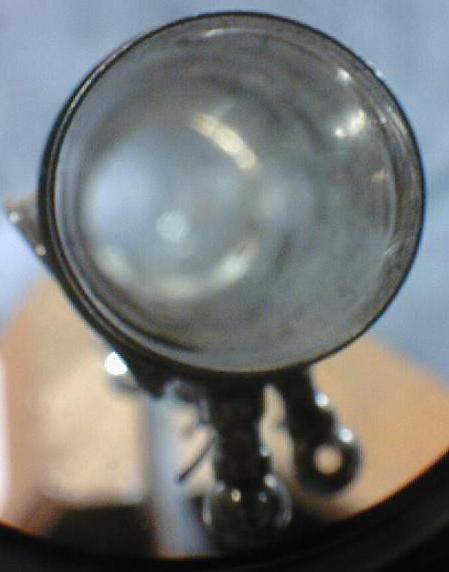
| Bore | (Hard to see due to limited depth of field, but you can detect the bend via the lenticular shape of the blue background seen through the bore.) | |
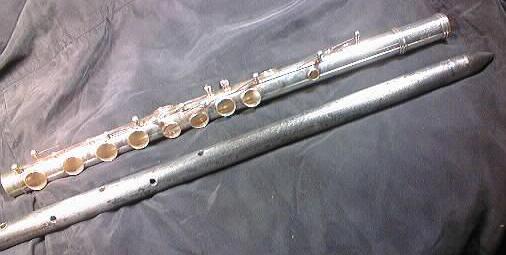
| Body & tool | (Mandrel [Concrete stake]) |
Excellent, now for the two damaged toneholes. The toneholes were out of round, and their lips weren't planar. I used the tapered nose of an Allen wrench from a socket set (with the bit removed) to go into the tone holes. With the mandrel inserted close by to provide support I tapped and twisted the socket nose into the holes, rounding them. I then ran the mandrel further into the body. I stuck a flat magnet over each tonehole in turn, it gripped through the flute body to the steel mandrel and I could hold the body up to the light to see any gaps. The two toneholes' lips weren't planar, so I used the hammer to tap the high points down gently. I then repeated this whole process a few times to get things as good as I could. We'll see if it's good enough once the flute is reassembled. The formerly rounded lip surfaces are flattened a bit in spots, I hope that won't be a problem.
While working on the body I could see that the post adjacent to the one that had cracked loose was also loose, so I've got a bit of resoldering to do. This promises to be the trickiest part, I don't want anything to fall off the body!
With the body taken care of it was time to check the foot joint, which was a little loose. Given that the tenon end of the body was 'too small' according to the mandrel, I threw caution to the wind and used the mandrel to open up the tenon a bit. That tightened up the foot joint, eliminating its tendency to rock. The head joint seems fine, it is heavier than the body so I guess it didn't bend during 'the incident'.
Update: Wednesday, February 4, 2009. Took to shop for resoldering. (Discretion being the better part of valor and all that.)
Update: Tuesday, February 10, 2009. The cat's out of the bag. The shop called, and Jill decided to go pick up the instruments (the euphonium and the metal clarinet) herself. "What's this flute? It is not a good instrument." Oh well, I'll still keep trying to fix it. (Personally I think she's wrong about its relative quality. It's by no means a great instrument but it should, when cleaned up and working, be a decent one. Better than we need, certainly.) He soldered one of the two loose posts, but seemed to have missed the other one right next to it. $20.
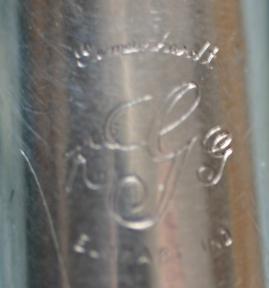
Update: Thursday, February 12, 2009. I polished the head joint and body, removing all the grease and tarnish. I needed a Q-tip to get around the springs and toneholes. It actually looks pretty good. I can see now that the headjoint is stamped STERLING, which finally settles that question. (The joint's tenon under its protective storage sleeve was not brass colored, and flicking the open end yielded a dull thunk rather than a clear ringing, both of which implied silver rather than silver-plated.)
Update: Friday, February 13, 2009. I took it back to the shop to get the rest of the soldering done.
Update: Thursday, February 19, 2009. I got out the Leatherique cleaner and rejuvenator oil bottles (for car upholstery) and tried some on one of the sets of pads (the middle). The cleaner got off some dirt, and the oil seems to help remove the tonehole dents that are set in the pads. We'll see if this turns out to be a good idea or not, I left some oil on the pads to soak in and float off the dirt. A treatment of cleaner is the next step. The next morning I wiped the pads off with more of the cleaner, the Q-tips came away dirty. The dents are mostly gone, and the dark ring is gone too. The skin surfaces are still intact, so that's good. Time will tell if this was a good idea or not.
Update: Friday, February 20, 2009. I cleaned the middle keys with Hagerty's silver foam and found that one of the tubes was bent a little. (The tube wobbled a bit when spun in the fingers, the long steel axle screw did not.) Probably the one that straddled the crimp. I'm hoping that a little gentle hammer work will put it right.
Update: Thursday, February 26, 2009. I picked up the flute from the shop. No charge for the soldering, because he missed it last time (and I had told him about it), but I did throw him $5 since he gave me a ratty old dead key for the metal clarinet .
Anyway, in the evening I got out the bent key and tried to straighten its tube using the small hammer and anvil. I made it better, but the long screw would still bind on its way through. I tried drilling using the numbered drill set, but it would just start to heat up and bind rather than remove material. I backed off one size, to #44, and oiled the drill bit and rubbed dirt on it; I then used it as a hone to open up the inside of the tube. That was somewhat successful after a time. (The material that came out of the center was black, does that mean the key is silver too?) The key rocks smoothly on its axle now, at least in some orientations. I'm going to try assembling the flute at this stage. If it's still not loose enough I'll do more later—it's generally somewhat easier to take a little more off than it is to put it back on once you've gone too far!
Update: Thursday, March 5, 2009. I put back the 'middle' section. The very first key to go on was the bent one. As its tonehole had also been bent I spent some time re-bending its pad cup and the lever to get everything to mate again. I also removed the pad and spun it 180° to match its high side to the low side of the tonehole, and I put a shim of paper under one side to prop it up even more for a better fit. The key works well on its shaft, and (by eye) the pad now seals. The other two keys went on uneventfully, and all look (to me) like they'll seal.
Update: Friday, March 6, 2009. I finished putting all the keywork back on, it was pretty uneventful. (There is a correct order to do them in, of course, else it's a lot harder!) I cleaned them all with the silver polish, dried them, and oiled all the pivots (M1 5W20). The pads all got cleaned and reconditioned with the Leatherique. The springs were all pretty easy to hook back with the small screwdriver, no problems there. It appears that there is a bit of cork missing from one of the levers, as one of the keys (the head-end one with the adjustment screw for operating its neighbors) opens too far. It looks like I can just take off the thumb keys (for access) and glue a bit of cork back on the stop lever. Next time, perhaps. In theory this instrument could now be played, though I'm not done. There's still the foot joint to go through.
Update: Wednesday, March 11, 2009. I took off the wonky key (which was able to come off independently) and glued a bit of cork from one of Jill's dead oboe reeds (a stepped-on one that I think she had given Daniel to play with) onto its stop lever. I used automotive weatherstrip cement, and when it was dry I trimmed off the excess cork and put it all back together. It was nearly perfect as-is (the pad opening matched all the others), I didn't have to sand the cork thickness at all. I then adjusted the pad screws on the body to make all the pad pairs close simultaneously. So far as I know I'm now 'done', except for a CLA of the foot.
Update: Thursday, March 12, 2009. I disassembled the foot and did the clean and lubricate dance all over it. It didn't seem to need any adjustment, which is good 'cause there really isn't any except for bending or shimming. The foot joint was still a little wobbly on the body so I used the mandrel to try to open up the body tenon a little more. Gently! It seemed to help a bit so now I'm finished, I guess. Jill tried playing it when she got home and got out a few notes. (Much better results than I got when I tried.) She again pointed out that she can't play the flute, and suggested I try it on someone who does. Well, at least it's nice and shiny anyway.
Update: Friday, March 13, 2009. I checked the position of the long sticks-out-the-middle-of-the-side key (the bent one) using the Blessing flute as a reference and decided that it was still bent down a bit, so I bent it out just a bit more to match.
Pictures (after):
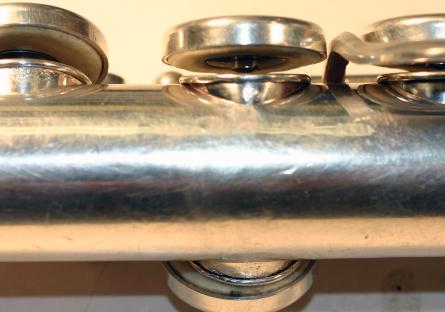
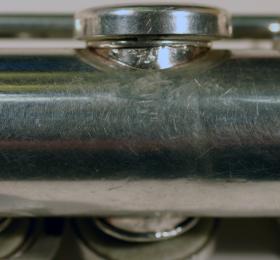
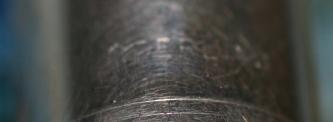
| Crimp site | (view A) | |
| Crimp site | (view B) | |
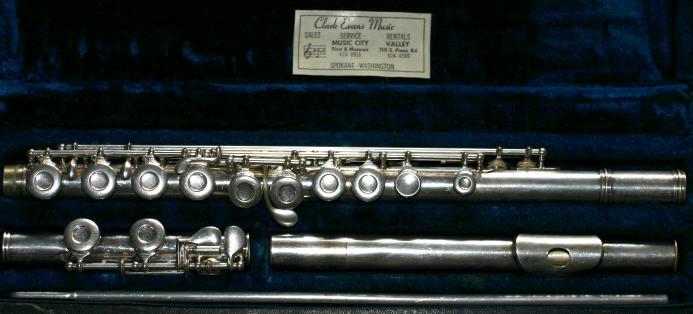
| In case | ||
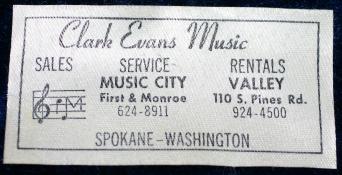
| Sold locally! | ||
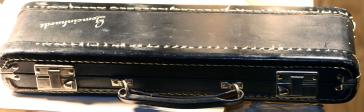
| Case exterior | ||
| Sterling head | (hard to see) | |
| Head stamp |