They're expanding our parking lot at work, and they're creating a bunch of fill dirt in the process. I have a Mog with a dump bed, and a need for some fill dirt. (A terrace on our hillside to put firewood on that's near the house but not next to it as it is now. Better for fire and infestation prevention.)
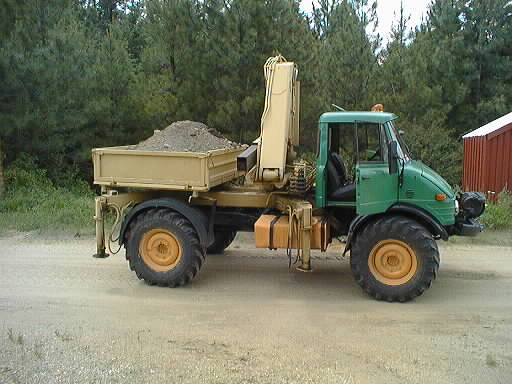
Seems like a natural, doesn't it? The construction guys were all over the Mog, and were happy to load excess dirt into it. One problem: the bucket is wider than the bed is long, if you're side-loading like they're used to. But from the back it's a foot wider, and just about right. He put three bucket loads in (small ones), and made a nice heaping bed full of dirt/rocks.
The Mog hardly noticed. Until I drove off at lunchtime. It wallowed a bit, and was definitely more ponderous feeling. I don't know what a heaping 5×6×1 foot bed of dirt weighs, but it's a substantial fraction of the Mog's 12.5k# unloaded weight. I was running one gear lower than normal over most of the drive home. I had to drop to 3rd (the lowest 'road' gear) to get up the hill to the house. No problem, other than it being slow, and I still had two more lower gears had I needed them.
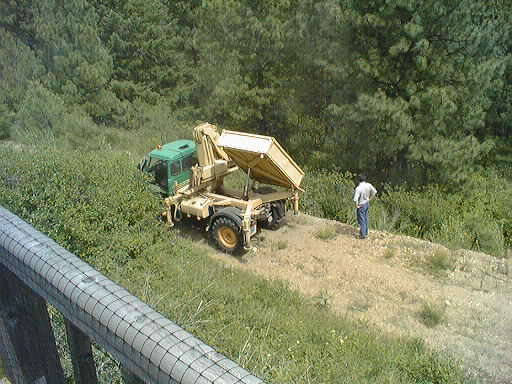
I backed the load into place, pulled the two front dump pins and dropped the rear gate. The bed dumped great, without hesitation. Then I was off back to work. The only problem I had was that the parking brake can't hold the loaded Mog in place with its back partway up the small (but steep) hill I'm building on. So I had to keep my foot on the brake, and do all the outside fiddling first before I backed into place.
I ought to be able to easily get two loads per day, and they're going to be working here all next week. Good thing, because that heavy load of dirt looks pretty insignificant lying there on the ground. I'm going to need quite a few more loads.
Pictures:
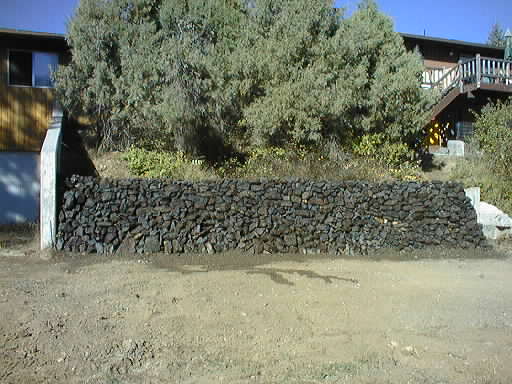
All this junk was free, and will make a nice functional addition to our home. I'm going to have to rent a Bobcat or something for a week in order to actually build the terrace, I hope it can be finished this year.
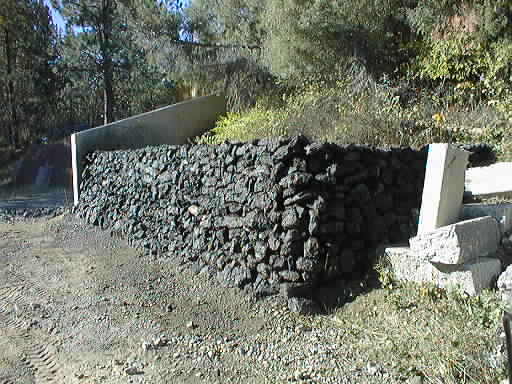
A Bobcat is a twitchy beast. Very hard to control well, and pretty lightweight; a bucketload of dirt makes it want to fall over on its face. Still, it's much preferable to a shovel! Its real problem for me was lack of reach, the bucket's right next to the front wheels, so you can't reach over a rock wall (for example!) to dump dirt well behind it. Often I had to just place the bucket on top of the wall and unload it with a shovel. A tractor with a front bucket would have worked better here. Though it would be much less maneuverable and require a lot of multi-point turns, its greater stability and reach would have been assets. The Bobcat was so twitchy that I knocked down a chunk of wall with the bucket, and had to rebuild it. That section won't be as strong as the rest, I'm afraid.
Still, the terrace came out fairly well I think. I had just enough rocks and dirt to do the job. Time will tell whether the rock retaining wall will hold up. I have a backup plan, though. If it is a problem I'll just get some more rock and build another retaining wall right next to it. The effectively thicker wall that results should be fairly stable.
Pictures:
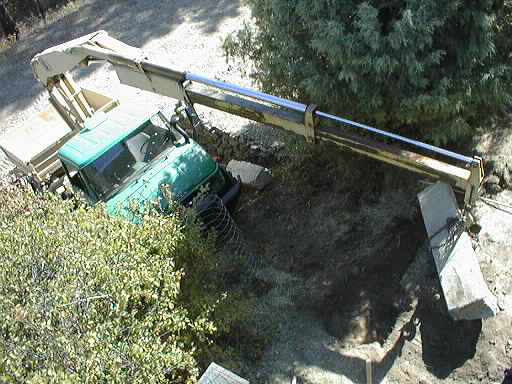
The Mog's crane was a little too short to reach the top from the access road, so we started at the top and worked down. This let us drive the Mog partway up the hill for extra reach. It'd sure be nice to have the manual extension pieces for this crane!
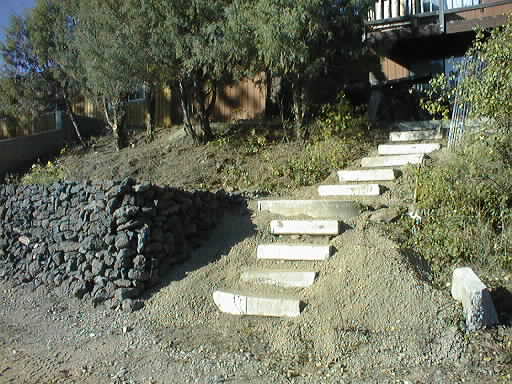
We made the top two steps the long ones, they also serve to retain dirt at the top of the hill. All went well until after the terrace level. At this point, to make the step down from the curved retaining wall of the landing the proper distance required that the next step down be mostly above the existing level of the dirt. And, from this point down it was the same at nearly every step. We built the steps up on rocks, but this was unsatisfactory. So we went off in the Mog and bought one load of fill dirt, which we used to bed around the lower flight of steps. It also was used to fill the landing at the terrace level. Unfortunately for me, this last dirt had to be unloaded with a shovel, and not the dump bed. All 4400# of it. At least the Mog is tall, and the shovel work was all downhill.
The bottom two steps were the 'bad' sections, one is bowed slightly and has a divot out of the face, and the other is chamfered. But, they work well enough, and were the last two intact pieces we had. One section had broken when dumped there, my wife wants to make a small seat out of it.
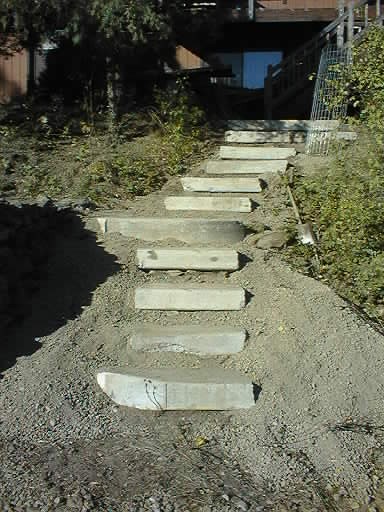
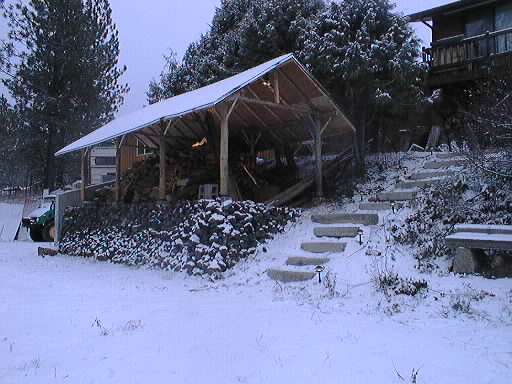
All that was left for me at this point was some chainsaw work to remove excess brush from the area. The dump bed on the Mog came in handy again. The job is not completely finished, because my wife plans to do some landscaping to gussy up the area. Also, we'd probably like to put in some low-voltage lighting. And of course there is still the little matter of a shelter for the firewood that's destined for the terrace. But that'll wait. I think we'll see how the terrace itself holds up to winter before we load it up. The steps are very solid, and a real pleasure to traverse. Especially when we remember the controlled fall that used to be how you went down there!
Pictures:
My wife was very skeptical at first, but I think she has changed her mind. She seems to really like the steps now. They are very solid, and being concrete they will last a long time. The price was right, too!
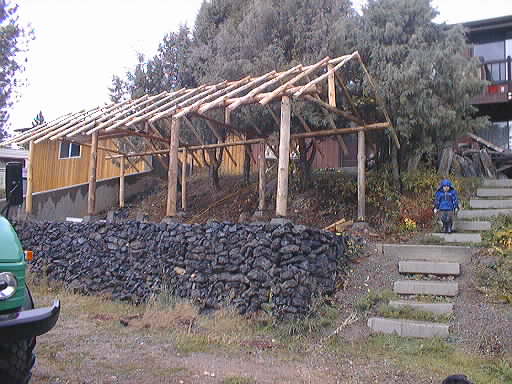
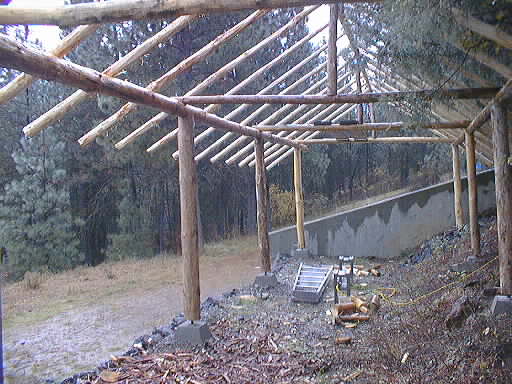
Racing the weather, because this is a lengthy endeavor, I finally get the frame up. The Mog's crane was used to lift the two large side poles into place. The smaller ridge pole was light enough that I could pick it up myself. That's a lot quicker than deploying the crane!
In the minuscule amount of time in any morning before work, I am able to get four rafter poles stripped and nailed into place. But there's a lot of them! Time is against me, because my parents are coming to visit for a week and are bringing their wood splitter. But the shed's not ready for them yet.
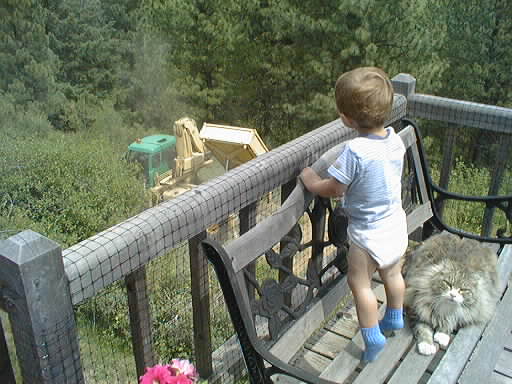
Daddy's little helper. Really. Putting up the rafters is tricky, what I did was to miter them together on the ground and put a nail through the joint. Then I put both poles up top and climb up, where I drape the pair over the ridge pole and drive the nail in one pole back into the hole in the other. That holds them together well enough until I can get them spiked into place. Clear? Well, the fun part came when I dropped one of the poles. It came down on the stepladder and knocked it over. There I was, stuck. Not that it's a huge problem to swing down to the ground, but doing so would wrack the as-yet-unbraced frame more than I'd like to. Enter Daniel, who was playing nearby. (Not underneath, due to the risk of droppage.) I called him over and asked him to help Daddy. "Pick up the ladder, Daniel." I said. He tried picking it up from the middle, and said it was too heavy. "No, go around to the end and pick it up there, it won't be so heavy." He did! "Now, walk towards the ladder, pushing it up as you go." He did that too! The ladder was back up, and I could climb down to get my pole. (After the gigantic hugs and thank-yous!) My boy's not even three years old yet, and already he's a real helper. I was so proud I could bust a gut.
I did manage to get the frame up before they got there. But there's still no roof!
Pictures:
The sheathing goes fairly smoothly, considering the rustic construction of the frame. One mistake was that the ridge pole wasn't a very good example of its breed. I should have taken care to find a straighter one. Also, in spite of my efforts a creeping error in the rafter spacing has necessitated trimming some of the 4×8-foot 1/2" plywood sheets so that they would fit. (We used plywood "blows", defectives, as that's cheaper than chipboard, and I really don't like chipboard. Most of the defects were on the small side, I don't anticipate any problems) I should have bought and used a long enough tape measure to always measure from the same reference point.
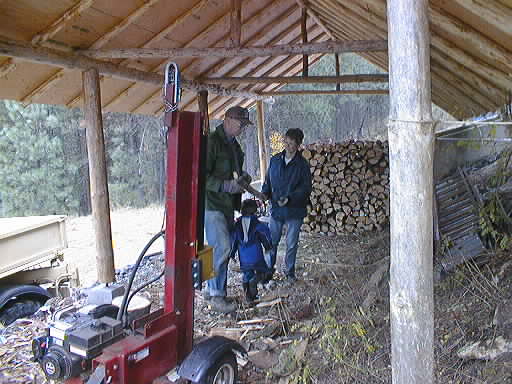
But with the help of my parents, the sheathing is up, and even tar-papered before their last weekend with us. The shed needs roofing badly, but that can be done later, by me. It's more-or-less waterproof, and ready to move into. The roofing can be done with the shed full of wood. The shed's not internally braced yet either, but we've got it tied off with twine and rope, so it won't fall over too easily. The bracing can wait a bit.
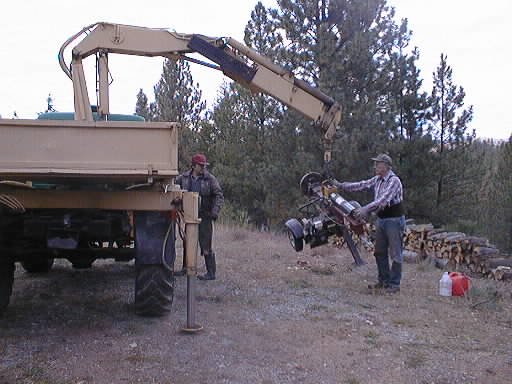
With the help of the Mog's crane, we lift the wood splitter into the terrace. That'll keep it optimally handy for the unloading/splitting/stacking process. We have a little bit of wood around that needs splitting, they'll start on that.
Pictures:
With the help of my father we fall the two big firs. One problem is that they're located on the half of the property I can't drive to. But with the Unimog's winch we yard the trees across the creek. My dad was originally skeptical that the trees were too heavy, but the Mog just grunted and pulled them across and up the hill. I think he was impressed! It sure made the job a lot easier. The bigger tree is about two feet across at the butt, and had more than a cord of wood in it alone. We kept the big end for a chopping block.
One complication was that as I was cutting into the biggest dead tree, I smelled honey. When that piece dropped off, there were a bunch of crawling things that fell out. Bees! Good thing it was cold. We gave it up for that day, and the next day they had crawled back into the remains of the tree. We just cut off that section of tree and yarded it (using the winch) off to the side. They can have that piece. If they survive the winter there, they'll probably move. Their property value dropped when the tree did!
There was a lot of wood in those two trees. We got into a nice rhythm where my dad split, my mom stacked, and I supplied rounds to them. Tiring work, but satisfying. Because these were standing dead trees, they're not fully green. I'm hoping we can get a good burn out of it all, since we don't really have much fully dry wood left. Just the elm.
We also cut up some smaller fallen dead pine trees. All told, there were between four and five cords of wood. We craned the splitter back to the road, and they loaded up and went home. (It's far.) I was very grateful for their help, I don't know where I would be without it.
Pictures:
One thing is that the choice of material had become obvious while doing the sheathing. The rustic construction is just too irregular to make using the large panels of metal roofing practical. My other choice was three-tab asphalt, so at least that decision is made. More work, however, and doesn't shed snow as well. Too bad!
I bought the roofing, nails, and drip strips. I decided to put on the uphill side first, because you can work from the ground initially, and then lay planks to the ground level and work from them later. The trees, however, are something of a hindrance. The roofing goes on slowly: it's dark outside, and cold, and windy and raining half the time. What unpleasant work! I can get two to three rows of shingles on per work day. Fine, but there's twenty-something rows (per side) to do. This'll take forever. And the downhill side is really far up there, that's going to take some thinking on how to do that safely and well.
Before I go on to the other side, I need to brace the shed. I cut a bunch of small pole pieces to prop in all the corners. This is slower than you might think, I can get about three or four done per morning.
Pictures:
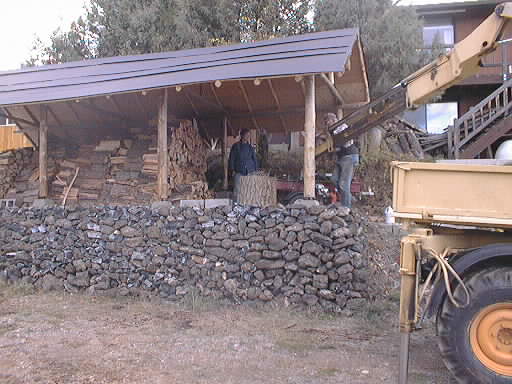
Those last six rows are going to be interesting. But my in-laws are coming, and their timing is nearly perfect. Father-in-law brought his work clothes, and he goes up on the scaffold with me on a Saturday, when I can get this thing finished. With his foot propped onto the roof surface, I can stand my foot on his knee and sit on the roof to lay shingles. The work goes very smoothly at this point, and we're done (except for the ridge cap) in no time. For the ridge I just climb up on top, and he cuts and throws me flaps to nail on. The ridge goes very quickly. I only have to be careful not to scoot back too far!
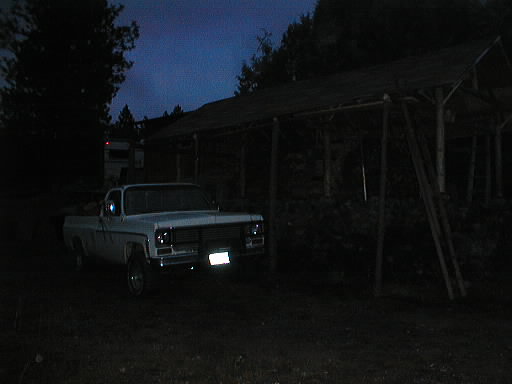
And I'm done! (Well, I'm never done. I've still got a pickup load of rounds to unload that I got from a coworker, and the scaffold needs to come down. Also, we need lights...)
Pictures:
I want to put a hot tub on that same hillside someday, so instead of running only a light circuit out there I want to put in a subpanel. That'll make adding the hot tub easier in the future. Because I want a gas-heated tub, I think I can make do with merely one 10-gauge 220 V circuit out there. Electric heat would probably require bigger wire, but that's pretty expensive. I decide to gamble on a roll of 10-gauge, and hope for the best. It can be rewired later if that turns out to be necessary, it's not like it's that hard to do.
Stringing the wire out there actually goes much faster than I thought it would, and hanging the subpanel goes slower. It figures. I have to tap into the downstairs subpanel, because the upstairs one is so full. I don't want to make putting the outlets in the garage harder than I have to. The downstairs panel has lots of room, though. In fact, due to the way things are laid out, it's even slightly easier to get to the lower panel since I have to go through less studs to get there.
I put the wire into PVC conduit. It's laid directly on the ground, and conformed to the terrain using a heat gun. The ground level is a bit low here, come spring we'll put some more dirt in and the conduit will end up buried. This section of ground is very isolated and protected anyway, I don't anticipate any problem. The conduit ends just below the roof support pole, so the wire exits the conduit in a protected place. The electrical panel is at the other end of the woodshed, it's an easy run along the pole. I have a 15 A circuit for the lights, and a 20 A circuit for the outlet. (Service to the panel is 30 A.) That leaves four breaker spots left for future expansion. The hot tub would probably use three of these.)
I put in a timer switch so that you can be hands-free when you leave the woodshed. I don't want a motion light because of the dog. I got the timer for 75 cents at Goodwill, if it doesn't work out I think I can afford to throw it away! I put in an outlet on general principles. This will be a good place to plug in some low-voltage lighting, or maybe some Christmas lights. Handy for the electric chain saw too. I put six PAR floodlights up at the ridge (in three fixtures). One is aimed directly at the chopping block, the rest are aimed around for effect. These PAR's are more spot-like than floods if you ask me, but they'll do.
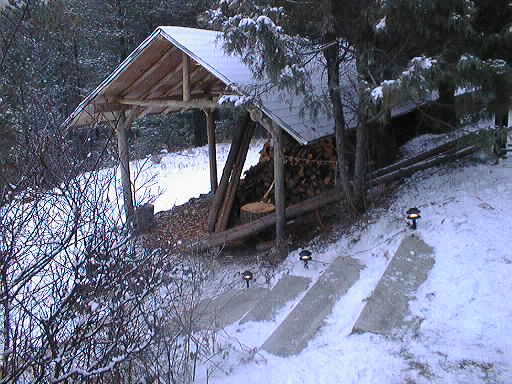
The lights work great! For a final touch I bought a cheap low-voltage lighting kit. Same thing we've got around the front of the house. I put up six lights down the steps, and one over by the bench. Nice. They're just on their own (cheapo) timer right now. Later I might hook them into the computer like the other ones are. Pictures:
(Well, not all finished. The low-voltage wiring needs to be better concealed, but the ground is frozen right now. And we get a lot of weather coming in the far end onto the wood. I'm probably going to have to make some kind of screen to cut down on that. Might be a good use for those scaffold poles. We'll see. But the important thing is that the shed is done enough for this year, and only minor improvements are left to do, unless something goes wrong.)
Christmas lights! My wife thought a row of icicle lights along the visible gable end would be nice, and of course she was right. They do look nice! I plugged them into the other outlet, wired through an X10 controller so they can be computer-controlled like the rest of the Christmas lighting. I was a bit worried that the X10 signal would be weak out there, but so far there's no sign of that. Knowing that this works means that I can convert the transformer/timer of the low-voltage lighting over to X10 control, at my leisure. That'll mean those step lights can come on at dusk (a varying time) like the other computer-controlled walkway lights do.
Having used the woodshed for awhile now I can say it is working out well. The 15-minute light timer switch has been ideal for its intended use. If hanging out in the shed ever becomes something we need to do much of, I may put another regular switch in parallel with the timer so that the lights can be left on. It's surprising how fast 15 minutes passes when you're out there talking. And there's that annoying ticking...
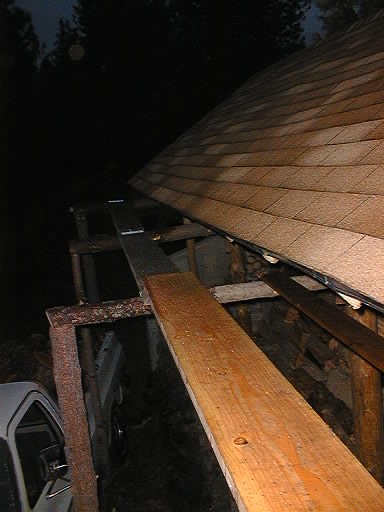
I also put up many more crib poles (vertical) between the uphill eave pole and the ground, pretty much completing the set. These help prevent the wood from slumping out into the rain on the uphill side, and allow for much taller stacks.
For the other side of the stacks I threw a couple poles across the cross-ties, making a place (ceiling) where I can tie ropes. These ropes will drop down to the ground, and thence run under the wood piles. These ropes should restrain the wood piles from slumping on the downhill side, and allow (again) for much taller stacks. (We used more than half the wood that had been put in last year, so I needed to up the storage capacity of the shed a bit. The whole idea is to put in next year's wood this year, burning [this year] only that which has dried all summer.)
I only ended up putting in three ropes to allow fuller stacks. They protrude enough that you can't do that next to the vertical support poles (or you couldn't walk between the poles and the wood), and such extra-full stacks tended to belly out and want to fall over. More fine-tuning of this stacking process is called for, but as it sits now the shed is pretty full of wood. I doubt that even another half-cord of wood could be jammed in there without causing problems of some sort. I'd say that the shed does hold two year's worth of wood (a goal), but only if stacked well.
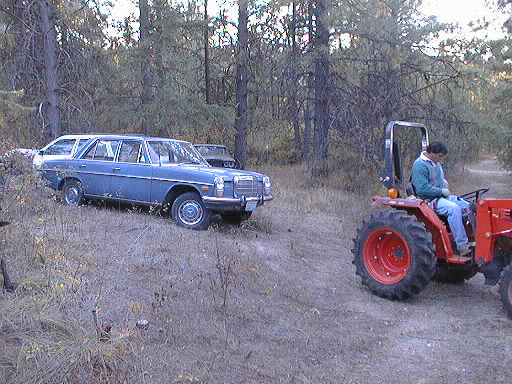
We borrowed a neighbor's new Kioti tractor that has a bucket on the front and a log splitter on back. This was pretty handy for splitting the wood, and I used the bucket to load all the bark into the Unimog's dump bed. (Which then was dumped on the burn pile.) It was hard to scoop up the bark directly with the bucket, what worked best was to use a pointed scoop shovel to chuck bark into the bucket by hand, thence dump it in the Mog. It took us three days to split all the wood (twelve trees of various sizes, and probably only one full day's work there, but just try finding one full day to dedicate to such a task), and it would have been impossible without the splitter. The green pine was very stringy, and really didn't want to split. Last year we borrowed my dad's, and this year the neighbor's. We are going to have to get our own, but they are expensive. Also, I have a fantasy about exploiting the extra-large hydraulic system of the Mog's crane, which should make for a very fast-acting system. I'd really like to build my own splitter, so I should get busy accumulating parts and information for this purpose. A year goes by pretty quickly!
With this done, the rest of this job was just the usual tree salvage process, it took three trips (one with the Mog's small bed, the others with the more-convenient pickup), and I had a nice stack of fairly dry fir rounds sitting next to the (full) woodshed. As the supply of dry wood for this winter was a bit short, this should help ensure we get through this winter.
I left the dry easily-split tip pieces with the neighbors for their use. They only have a few decorative fireplace burns a year, and do not heat with wood unless the power is out, so their wood needs are very modest. I told them to come up if they needed wood during a power outage, and I'd fix them up. Once the shed opens up a bit during the season, I might borrow the splitter again to split and move this bonus wood into the shed, or I may just split it with the axe as I use it. We'll see.
The shed does not hold two years' worth of wood, but only one. That became clear over the first few years of its use, especially after we tried heating exclusively with wood the year I was out of work. The current configuration is crib poles on both sides, and wood stacked as high as it can be. This means that rows underneath the cross-tie poles go only as high as the poles, but that rows between the poles go all the way to the roof. (This requires starting the next stack so you have a place to stand while finishing a tall one.) The 9' width of the shed makes for a deceptively small stack of wood, but because it is so tall (three out of every four rows) and because the stacks go out to the edge of the eave on the uphill side it makes up for it. I estimate that each stack averages out to nearly a cord of wood. The shed holds ten full stacks of wood, with two more partial ones at the access end, depending on how tricky you want to get with loading them. (It gets hard, with no place left to stand, at the end!) There is no way to access any row of wood except the one at the face, the shed is packed! My original vision of an airy open overlarge shed full of accessible wood stacks is defunct, this thing is a dense-packed storage container, though still picturesque.
The shed is also leaning a bit, probably from the unequal weight of the wood stacks acting on the asymmetric crib poles. (Downhill they're heavy and long, and go from the header pole to the ground. Uphill they're thin and short, and go from a small pole nailed underneath the edge of the eave to the ground.) It seems to have stabilized, though. The rock retaining wall has slumped inward a tiny bit as the dirt compacted, but seems stable now. Overall the project has been a great success, though the lack of capacity versus the voracious appetite of the wood stoves is disappointing. Oh, and gathering that amount of wood per year is itself a daunting chore!