A belated log of her SL's life with us.
The early parts of this log prior to the March 28,
2005 entry, intermittent and poorly organized though they may be,
were assembled from postings made to the original
mercedes mailing list and retrieved from their archive. Better this than
trying to rely solely upon memory!
...
Bent wrench used to access exhaust
manifold bolts. (The catalytic converters are in the way.)
...
Wednesday, August 2, 2000
Patient: A daily-driver quality '76 450 SL I
bought to eventually (maybe) replace the girlfriend's wretched Ford Escort. (OK, so I was temporarily out of
work and wanted a project car to keep me off the streets!) Hey, she
likes the color and thinks it's cute, so I'm on the right track there.
Symptom: Totally non-functional cruise control. (Actually lots of
problems, but we're only talking about this one right now.)
Treatment: Open hood. Hmm, isn't there supposed to be a cable going
from the VDO vacuum actuator to the throttle somewhere? Old cable was
ripped out by the roots, as witnessed by the frayed cable end and plastic
bits still stuck in the actuator. Order new cable from George Murphy.
Cable arrives and, unlike many of my experiences in repairing this
near-beater, fits perfectly. Thanks George! Lube up throttle linkages
and adjust cable to just remove slack. Go for drive.
New symptom: Wacky, spastic cruise control. (OK, I was kind of expecting
this—hoping for it really, since it means that it was nearly working.)
All symptoms (and prior history/advice) point to brain box. I know that
some can be fixed, and that if not, both repaired and re-engineered units
are available, my choice, so I shouldn't be afraid to try drastic measures.
We'll try the cheap fix first.
Now to remove brain box to give it an electrical enema. Heard about
tricky bolting-on problem from the list and can confirm same from
lying on my back under the dash. Box visible easily, mounting bolts
not so. Dim bulb flickers on: "Hey, I only want the box out so I can
bend open the ears and remove the circuit board. There's the
ears!" Bend open ears in situ and circuit board drops into my
hand. Nasty little bolts and box still in place, looking shocked and
disappointed.
Board looks OK. (All analog, with a myriad of resistors, capacitors,
diodes, and transistors, plus a couple of relays and one [I assume]
transistor array. [I didn't look it up.]) No scorching. Solder
joints look infinitely better than the 10-year newer ones I saw in my
560 SL's lamp-failure module, which were causing
problems. Re-solder all joints anyway.
As an EE, I'm aware of the little-known fact that some types of
capacitor routinely fail due to age, most particularly aluminum
electrolytics (which should never be used in anything that's
being built to last the ages). There's exactly one of these
on the board, a 47 µF 16 V unit. (Looks like VDO almost
got it right.) Yank it and throw it on the leakage tester. It takes
a long time to charge up. Not a good sign. Throw it on the
RLC bridge. Capacitance good, but dissipation factor is 75%, which is
really bad. It has far too much series resistance, and can't
really function much as a capacitor anymore. Throw crap part away.
Rifle junk box for a replacement. Found and installed, no problem.
(Yes, I tested it first.) Yank a couple of random capacitors of the
other types from the board and test, all good.
Time for a test drive. Temporarily re-install board and drive
off. Cruise control functions very well! (A little more noticable in
operation than the newer servo units in my other MB's, but that may be
normal. Anyone know for sure? Or, there may be other problems, even
that replacement aluminum electrolytic I just stuck in. OTOH, it
works as well as the factory one in my pickup truck, so who knows.)
Regardless, it's now functioning acceptably well. Time to button
things up and move on to the next problem.
(The girlfriend's complaints about the Escort
are two: no cruise control and no air conditioning. Now the 450 SL has both! Definitely a plus in the weaning
process.)
Friday, August 4, 2000
[The date of this entry is a pure guess. I know the year is
accurate, but as for the rest...]
I was able to resurrect the car's non-automatic (but electric)
antenna, which was very gummed up with (no doubt) residue from
previous lubrication attempts. I had to remove the mast from the
motor, and once apart I glugged lacquer thinner down into the mast and
repeatedly extended and collapsed it. Repeated until no more goo came
out, in the thinner or sticking to the mast. It took awhile. That
thing was filthy nasty inside, and very sticky before the cleaning.
Then reassemble. (In this case, I also had to replace the pinch roller
bearing in the motor assembly, which had rusted
solid. Boy, that was fun! A local bearing house was able to
measure the pieces [I had to use a hammer to break it apart] and
supply an exact replacement, down to the markings on it. [625, if I
recall.] Not cheap, but way cheaper than another
Hirschmann.)
[This antenna is now residing in our 250C
convertible, and works great.]
Friday, September 22, 2000
[The date of this entry is a pure guess. I know the year is
accurate, and the season is right, but as for the rest...]
The car had very poor acceleration off the line, and the transmission
made a whining sound until it was up to speed. It turned out the
stator splines were sheared off of the front of the transmission,
causing the torque converter not to multiply torque at low speeds.
The front piece of the transmission was not affordably available.
(Though in retrospect I think it could have been, via junkyard
channels.)
I replaced the transmission with a boneyard (Aurora Auto
Wrecking in Seattle) unit for $350 and a whole lot of screwing
around. 'Twas a labor of love, you see, and I was unemployed at the
time... (OK, I spent a little more because I replaced anything rubber
that I could reach during this job. Seals, flex disks, subframe
mounts, etc. At a bare minimum I'd do the rear crank seal and the
front transmission seal. The 'new' transmission even had a 90-day
warranty from the yard, and so far it's been working very well.)
Thursday, January 11, 2001
My (now) wife really enjoys driving her rolling-restoration '76
450 SL engagement present. However, every
time she drives our 300 SDL, she comments on
how cool the outside thermometer is. I may be dumb, but
even I can recognize an opportunity to make points as good as
this one. Now I realize that I could fit the big round-dial
thermometer from a later SL into the dash (I have a 560 SL), but I'm really not that fond of the way
they did it, and there's a nice little empty patch in the
450's dash just about where the temperature display is on the SDL.
So, just how stupid is it to attempt to put a temperature display in
that spot?
I've looked at the 126's display module, and it's too wide to go in
there. I've also checked out the auto-parts stores' thermometers, and
the LCD's are all way too tall to go in, plus there's the power and
backlighting problem to solve (don't want batteries). So, what I'm
left with is cutting (carefully!) the LCD out of the 126 display
module and running extension wires back to the module, which will
probably be screwed to the back of the instrument pod somewhere.
Friday, January 12, 2001
OK, the friendly parts guy at the local dealership scraped up a used
thermometer unit from a 190E which looks like it's going to fit the
450 SL perfectly (after cutting off some of the
mounting bracket). However, it's a Centigrade unit! My wife greeted
the prospect of her car reading in centigrade rather weakly, I
thought.
Monday, January 22, 2001
OK, I did it! It only took a couple of hours, and it looks like it
could have been standard equipment too.
On my wife's '76 450 SL instrument cluster there
was a clear window directly over the steering wheel, about 2" by 1/2"
in size. It was plugged with a piece of styrofoam with the front
painted black. This plug slides in and out freely. In appearance it
looks just about like the window that our 300 SDL
has for its outside thermometer. (My wife likes this thermometer.)
Obviously it's for some sort of display that a 450 SL does not have,
but some related car that uses the same instrument pod does. I'm told
it's for a column shifter PRNDSL display, probably for the 116 as that
car shares the same instrument cluster.
From a boneyard, I got a 190E temperature display unit, and a sensor
(with cable & connector) from a 126. (Long story here, but according
to the dealer the only difference among the temperature sensors for
differing models is the cable length. Perhaps a 190E sensor would fit
too, but I'm only able to relate what I did.) Were I
starting from scratch, I'd get both pieces from the same 190E and make
it work.
The display unit has a "Y" cable coming off of it, one end a 2-pin
that mates to the sensor, and the other a 3-pin for which I had to get
the mate from the dealer for $4. (You'll also need a few inches of
stranded wire, a small drill, and some soldering equipment and
experience.) The brown wire to the 3-pin is Ground, the center wire
is Illumination, and the other end is Accessory power.
I mounted the sensor in the front grill of the car near the AC
receiver/drier. This is not a great location, and I may move it later.
The thermometer works great so long as you're moving, but when
standing it gets too much hot engine air there. Perhaps under the
license plate or something like that will be better. The sensor needs
to be mounted so it doesn't touch anything, is shaded, and gets as
much fresh air as possible. It should also be protected from damage.
Not easy!
I then removed the steering wheel and instrument cluster, and routed
the sensor cable through the engine compartment up to the rubber
grommet through which all the vacuum lines go. This is an odd thing
with many 'tits' on it, through each of which one line goes. There
was one unoccupied site, which I nipped off with wire cutters. Then,
I carefully unclipped the plastic shell from the sensor connector so
that the pins and wires could be pushed through the grommet. (Note
how the pins go into the shell, although I think they could be
switched with no consequence.) From the inside, I pulled the cable
the rest of the way through and routed it so that the windshield wiper
arms wouldn't mangle it. There was still plenty of length to reach
the instrument cluster. I then put the connector shell back on.
The instrument cluster has to be taken partially apart. The
speedometer and the triple gauge unit have to come out. The back of
the gauge unit is a printed circuit board. Near the upper-right
illumination light on this PCB are three solder pads from which
Accessory, Ground, and Illumination signals can be tapped. I just
soldered on three 6" wires to these spots and ran them out a hole I
drilled through one of the blank spots in the PCB near there. (I
gleaned this information from the Haynes schematic for this car.) I
nipped them to length on the outside and soldered on the new
connector, then I reassembled the cluster.
The 190E display unit is too wide for the opening. It has a wide
plastic bracket with a couple of large holes in it, probably for
odometer trip reset and dash dimmer buttons. I cut the bracket with a
jigsaw (one of the small, high-speed buzzing desktop types) so that
about 2/3 of each large hole was gone. You need to be careful doing
this because the LCD's in these things are fragile. You could
probably also do this with a small vise and a coping or hack saw. The
display unit can then be wedged into the opening. I think the opening
tapers slightly, because it gets tight before it bottoms out. You
should see that the display is easily visible from the front of the
cluster, and is seated correctly. I then cut a small piece of metal
strapping and bent it into a "Z" shape, drilled a hole at each end,
and used small sheet-metal screws to attach to the existing mounting
holes in both the display unit and the instrument pod. This keeps the
display from backing out of the hole. I could have used two straps,
one for each side, but I didn't bother.
Finally, I just plugged everything in and put the car back together.
It worked! It looks great, works fine (except when not moving), and
even lights up at night, and dims (!) with the dash lights.
The only bad thing is that this thermometer is a °C unit, but
maybe she'll get used to it. Or I'll have to get a different display,
which is the big reason I used mating connectors. The swap will be
easy if I have to do this.
Monday, January 29, 2001
Automatic Antenna: The '76 has a power antenna, and it only goes up
and down with the dashboard switch. Later 107's have an automatic
antenna that goes down with the ignition off. My wife's always leaving
the antenna up, and for some reason this really bugs me. I purchased
an antenna and dash switch (with matching connectors) from a boneyard
'83 380 SL. (A later model would be preferable, as it turns out, as
the later antennas have a solid-state control unit versus the
mechanical switches in this one. It can't be set lower than a certain
height, which is quite a bit higher than the default position of later
antennae. Live and learn.) The switch fits into the dash in place of
the old one, but looks a little different in style. Less angular. You
have to run two new wires to the back of the car from the dash. I
picked up +12 (unswitched) from the glove box light, which runs to the
red wire of the new antenna. Another wire has to go back from the new
switch's blue/gray wire, going to the matching wire on the new
antenna. (The new switch's blue/red wire goes to the radio's antenna
control wire.) I pulled the black and blue wires out of the existing
switch connector, and used these two wires for the matching colored
wires of the new antenna. The final connection is the brown (ground)
wire from the new antenna, which I wired to the ground terminal below
the left rear taillight. I had to bend up some metal to make a bracket
to hold the bottom of the new antenna assembly in place, as the new
antenna body is somewhat smaller than the original. It works!
Headlight warning buzzer: The '76 doesn't have one of these, and my
wife's already left the lights on three times that she knows of. No
dead battery yet, though! This one is fun, but pretty easy, and can be
done entirely through the instrument pod opening. You need a
12 V relay, a small one is preferable. Mine was an old junkbox
unit that only needs 12 mA coil current. Anyway, tap into the
two wires going to the key-switch present connector (on the front of
the ignition switch). I think it's green/violet and brown. (The
brown is ground.) Connect one contact and one coil wire to brown, and
the other contact to green/violet. Run the other coil wire to the K
terminal of the headlight switch. (I think it's K, it has three
violet/white wires going to it and is for the parking lights.) Now
whenever the parking lights are on, it acts as if the key is still in
the ignition, and buzzes when the driver's door is open. The nice
thing is that done this way there is no warning if the engine's on
when you open the door.
Fog lights separate from low beams: I think the euro models have these
circuits separated, so you can turn on the fog lights without the
headlights being on, and so they don't go off when the high beams are
on. Anyway. I like them being separate. Pull the fuse block out and
turn it over. On F19 are a yellow and a yellow/green wire. Cut the
yellow/green wire loose and attach a ring terminal. Attach it to F15,
the one that's unused. (Hence my speculation about the original
intent for the fog lights.) Put back fuse block. Switch the 8 A
and 16 A fuses of F15 and F19, so that the low beams have the
8 A fuse. You can be nice and re-label the fuse map with a
pencil.
Rear fog light: The euro models have these, which in effect turns on
one rear brake light if the light switch is pulled out two clicks.
Useful under very heavy fog conditions. You need to run a wire to the
back of the car from the NS terminal on the rear of the light switch.
You also need to ground terminal 31 (the last one of four) on the rear
of the switch, and make sure you have the little light bulb in the
switch under the knob. Mount a socket for an 1156-type bulb so that
the bulb will be just behind the tail lamp 5 W bulb on the
driver's side. This sounds harder than it is. Connect the new wire
to the bulb's center contact, the outer contact is probably already
grounded if you bolt the socket to the metal piece of the taillight
assembly. Now when you pull the light knob two clicks out
the extra bulb comes on, and the little red center of the switch
lights to remind you to turn it off later.
Monday, February 5, 2001
Another installation in our quest for the perfect older car:
My wife has complained about the steering wheel ever since she started
driving this car. Too big, can't see over it, etc. We had the seat
height adjustment set to the top setting already, but it wasn't
enough. It felt too soft to me, and I seemed to list a little to port
whenever I drove it. I felt around underneath and found a broken
spring end. Aha! I searched the archives, and found that it appeared
that you can get a new lower spring frame for about $80, which sounded
OK to me if it would cure the problem. I called the dealer, and he
seemed to think the same, until he looked. $600! He apologized, and
understood when I declined to purchase one. Apparently the price
varies a bit from car to car...
So, this weekend I took the seat out, and took it apart. It comes
apart pretty easily, the worst part is prying open the hog rings,
which I accomplished with a pair of wire cutters. (Don't squeeze hard
enough to cut, but just enough to bite into the metal so they don't
slip when you pull hard.) Then the cover just slips off as described
in the archives. I was surprised to find the horsehair pad in good
condition. Not one, but two of the five springs were broken. I
took some heavy strapping metal, about 1/16" thick and made a splint
for the springs. These I hammered over the springs so that the break
was out in the air by itself. Easier might be to use a 1" piece of
wire conduit, slip it into place like a ring over a finger and flatten
it with a couple of hammers. (I didn't have any conduit.) I then
brazed the spring together and the splint to the spring. This tricky,
because too much heat can wreck the springs, but I eventually got it
to work.
The springs seemed collapsed a little, so I pulled hard and stretched
them out a bit so the seat would be thicker when re-assembled. I also
laid a couple of old towels over the top of the horsehair pad for
extra height. Finally, I went to the rag bag to get a pant leg and
some stuffing for it. Weren't any pants in it, but the jeans I was
wearing were blown out at the knees, so I cut one the rest of the way
off of myself and used it. This seemed to amuse my wife. I stuffed
it like a sausage with rags, and tucked it into place into the
springs. (The profile of the springs is like a '?' in shape, with the
dot at the back of the seat.) The roll of rags tucks nicely into the
crooks of the springs. I then reassembled the seat and reinstalled
it. Regular pliers were all I needed to re-clamp the hog rings, and I
hammered the channels shut a little more to hold the cardboard in
place better so the cover wouldn't pop off any more. While I was
there I cleaned and greased the tracks.
Success! The seat is much taller now than before, and firmer.
It's more like a foam seat, and this is due to the rags stuffed under
it. I might have overdone the stuffing a bit, but time will tell if
this needs correction. My hair now brushes the hardtop with the seat
set to the high position, versus being able to wear my fedora without
interference, but my wife is very much happier with it. She
says it's a lot more comfortable to drive than it was, and she doesn't
think that the steering wheel is too big anymore, nor does the angle
hurt her wrists anymore. Also, she used to keep the back set
uncomfortably forward in order to gain more eyeball height. No more.
I topped off the job with a Becker-ectomy and added a (used) Alpine CD
player and some rear deck speakers. She may end up pretty happy with
this car!
Wednesday, June 27, 2001
My wife's '76 450 SL suffers from what appears to
be low oil pressure, and it's very dependent on engine temperature.
On our road trip to Wyoming this weekend is the first time the
needle's not been pegged at 3 bar at freeway speed (it was hot going
over the mountains). Oil level was fine, and there's only 2500 miles
on that 'charge'. It has always dropped pretty low when hot, 0.5 bar,
but pegged the needle nicely up until now. It was better when not as
hot on the return trip.
Now, I know that on the diesel engines there are O-rings on the
stinger through the filter that can harden and leak, and this will
reduce the oil pressure. Easily fixed. Does the 450 engine have a
similar easily-fixed problem? I'm really hoping that this isn't the
sign of something really expen$ive about to happen.
Oh, the odometer reads 140 kmi. I believe this to be reasonably
accurate.
Sunday, July 1, 2001
My wife's '76 450 SL would emit gusts of
mosquito-killing smoke every time we'd start out from a stop. Bad
enough that traffic behind us would wait for it to dissipate before
starting out. It was quite embarrassing. The car also fouled one
plug, #2, and was essentially unusable it was so bad. I tried to
avoid cops whenever driving it.
I suspected the worst, but decided to replace on the 'what the hell'
basis the seals on #2 only. The seal kit for half the engine was
something like $6 at the dealer, and the valve spring compressor was
about $50 at Parts Plus, I think the tool rack was KD Tools.
KDT-3087 K-D TOOLS VALVE SPRING COMPRESSOR- $56.06 Tool compresses
valve springs on most overhead valve engines including GM, Ford,
Chrysler, Nissan and Toyota. Jaws adjust to fit over spring retaining
washer. An adjustable handle allows easy clearance in tight areas.
GM adapter included. use no. 3269 Fulcrum Rail if overhead cam is not
available.
(I had to do some searching for a compressor that is similar to the MB
model shown in the manuals. None of the other styles will work. Even
at that I have to tie a wire around it to keep it in shape while using
it, as it's not quite right for that engine. It has a foot-long
lever-over handle, two hooks that hook around the cam, and a couple of
arms sticking out that press against the spring. This is similar in
form to the one pictured in the MB service manual, but of much lesser
quality. [I went to the friendly local dealer and handled the one on
their rack. Its price was stunning, but it was made out of tool steel
instead of the stamped sheet metal of the one I bought. It was very
nice.]) I used the compressed air trick to hold up the valves.
Anyway, a couple of hours later the smoking was GONE!
It still uses some oil, and I probably should do the rest of the valve
seals someday. Also, if indeed the valve guides are also worn it will
eat the new seals in a relatively short time.
In this case, though, as 'short' is at least a year based upon the
evidence I don't see any reason not to just repeat this trick the next
time it gets bad.
Tuesday, December 17, 2002
Upgraded the headlights.
Wednesday, June 11, 2003
As a temporary measure to patch up the duct-taped-over hole in the
driver's seat bottom, I had installed a velour seat cover. My wife
hated it, and I can certainly understand why. So this morning as
another temporary measure I installed a bottom seat cushion
from a 190E in place of the original (holed) pad. ($16 at the U-Pull
for both complete seats. What a deal.) It doesn't quite fit, but it
sure works a lot better, and doesn't poke you in the ass or leave
sticky residue on your pants like the unadorned original. (The
visuals aren't really any worse than that nasty velour cover, either.
And the appearance is, well, hidden most of the time I'm in
the car.) It's even Palomino!
Wednesday, September 3, 2003
Too many cars... Anyway, after the success (?) of acid-flushing the
SDL's cooling system, I decided that my wife's
'76 450 SL needed it too. It had green stuff in
it, of indeterminate age, and was starting to heat up more than it
used to. As I still had 2.5# of citric acid left, I used it on the
car.
Getting the thermostat out is always fun. I ended up just removing the
alternator. This is easy, and makes the rest of the process very
easy. I just left the belt loose in there, sitting on the cross
member. It didn't move. I hooked up a battery charger to the car to
make up for the lack of charging, since it was going to be running for
half an hour or so.
I had the old, defective, thermostat still. (It opened too cold.) It
was a lot easier to wedge open than the SDL's thermostat, I didn't
need the valve spring compressor. Just needlenose pliers, and a
suitable length of .357 shell casing. With the pliers you can separate
the two halves of the thermostat. Then you just slip the brass collar
over the pin and reassemble. Voila! Instant flushing tool. (You can't
just take the thermostat out, because the bypass passage will be left
open and you won't get circulation through the radiator.)
The other tool you need is an upper radiator hose that's tee-ed into a
garden hose. From before I already had something, which was a suitable
length of hose from a junker, with a fitting poked through the side.
At this point, you follow MB's procedure. Run the engine with the
heater on defrost and fresh water running through the engine, for five
minutes. (I left the radiator drain open, and the cap off the
expansion tank. Water ran out of both.) Then, close the cooling
system and put in the 2.5# of citric acid, dissolved in a gallon of
water. Top off with water. Run for 15 minutes. Then, drain and
repeat the fresh-water flush for 5 minutes. Close her up and fill
with fresh coolant. (MB stuff preferred, of course.) Don't forget to
log this procedure, so you can tell when you need to flush again.
(Hopefully on schedule, before you would need the acid again to clear
out corrosion.)
Friday, January 30, 2004
I took the exhaust system off, to weld up the cracks in it. (I went
into shock at the price of a new resonator, so I repaired the old one,
and patched the small hole in the muffler and the cracks in the pipes
at the engine end. Ought to be good for a coupla more years at least.)
Friday, February 6, 2004
I've been tearing into my wife's '76 450 SL, and
I've moved on to the top of the motor. After chipping off the
rock-hard air hoses around the idle control plumbing (I have
replacement hoses in hand), I'm wondering about the operation of the
CIS thermostatic idle air valve. Is it supposed to close off
completely when hot? Ours doesn't, though you can see it close down
when heated (with a torch). This car has always had a problem
stalling and backfiring when cold.
I have verified the cold-start injector system, and I did
disassemble/clean the warmup fuel regulator. It seemed OK. I was just
wondering if the idle control valve leaked enough (when hot) that the
idle control screw has to be turned down too much to idle well when
cold.
Also, is this valve adjustable? It has an odd notch in the top that
would imply this.
Thursday, March 18, 2004
I'm gutting my wife's 450 SL these days, fixing
and upgrading a laundry list of items. Anyway, I noticed that the
heater box seems to have two cleanout hatches on the bottom. Nice!
Not there on the later ACC cars.
...
Monday, March 28, 2005
Per my promise to my wife, now that the new
560 SL is driveable, I began to reassemble this car. I bit
off way more than I meant to, and I got far too carried away
disassembling the interior. I had the heater box half out when I
stopped, and the car has sat this way for far too long. (Well over a
year.) I've forgotten many of the details of how it came apart, so
reassembly is going to be no fun.
This morning I was able to wedge the bottom of the heater box back
into place. It is not yet attached, and I had to cut another harness
wire in order to get it into place. What a mess! I will have some
difficulty getting the retaining clips back into place, and the heater
box reattached to the firewall and plumbed in.
But while I was there I was able to restore the right-side vacuum
valve (that controls coolant flow to the heater core) to
functionality, so at least that will work correctly once it's all back
together. That was more of an annoyance than you would have thought,
chiefly because my wife gets colder than I do, and to turn on her heat
(when I was driving) I had to turn mine on too.
Tuesday, March 29, 2005
Today I got the lower half of the heater box reattached to the upper
half, and the whole assembly reattached to the firewall. That's all a
PITA to do. I also had to fabricate a new sliding clip, because
during the interregnum I'd managed to lose one of the four that hold
the bottom of the box to the top. Also, the drain hoses were cracking
where they attach to the box, so I reinforced them with bicycle inner
tube and weatherstrip cement.
Wednesday, March 30, 2005
I replumbed the heater core, and reinstalled the recirculation flaps.
I got the heater controls connected back up, but the righthand
temperature control won't move. I hope I don't have to take the
heater box back apart again!
Friday, April 1, 2005
I removed the bottom of the heater box again, and found that one of
the two flappers had gotten a bit cocked, hence the jam. Fiddled with
it until it worked reliably again, then reassembled the heater box.
I'm now pretty much back to the point I should have been, had I merely
taken the car apart far enough to do only what I'd originally
intended. I now need to install the dome light relay, finish the
crack repairs on the dash, and install the dome light switch into the
dash.
Sunday, April 3, 2005
I installed the dome light relay. It's in the site that it would be
in a later SL, and looks pretty stock. I had to tap two wires in the
harness: ground and the existing entry light. (Power came from a new
ring terminal added to the fuse block.) The switch is laying in the
right place for the dash to accept, and the wires are strung up to the
top of the windshield. I'll test it tomorrow.
Monday, April 4, 2005
Setback! I tested the lights, and it works backwards. That is, the
upper dome lights come on when you close the door, and go out some
time after you open it. Checking the schematics, I now see that the
entry lights on an early SL have switched positive, while the later
ones use switched ground. I'm going to have to invert the trigger
signal to the timer relay. Another relay should do the trick. (How
annoying!)
Tuesday, April 5, 2005
I measured the current required to trigger the dome light timer relay,
and it's less than 20 mA, so a signal transistor can easily do
the job. I raided the junkbox, and grabbed a generic NPN TO-92
transistor and a 47 kΩ resistor. I also
found an old film can and punched three holes in the lid. I cut the
trigger wire to the dome relay and pushed the resulting two wires
through the lid, and ran a ground wire through the third. I grounded
the emitter, hooked the collector to the dome relay trigger wire, and
hooked the base to the door lamp wire through the resistor. Then I
put the can onto the lid, sealing up the goodies.
And it works! The dome light now acts properly. The transistor
circuit consumes negligible current when the lights are on, and truly
minuscule (leakage) current when they're off. A relay might draw less
current when off, but I didn't have any relays to spare. And they're
bulky, and draw more current when they're on. The transistor solution
is superior for this use.
Thursday, April 7, 2005
I did some more reassembly of the under-dash crap. I also
disassembled the shifter legend to clean it up, as it was looking
pretty dirty. I'm now pretty much down to the point where I have to
begin (again) working on the cracks in the dash, and re-painting it.
The cracks are currently overfilled with Leatherique crack filler,
colored with the paint, but I still have to profile the fills to match
the texture of the dash. That promises to be tedious! I also need to
cut a new hole for the dome light switch. Then the dash can be
reinstalled, etc.
Saturday, April 9, 2005
I removed all the bolt-on paraphernalia (vents, panels, etc.) from the
dashboard preparatory to painting it. Once the switch panel had been
removed, I found that it had two knockouts where more switches could
go. So, I cut the vinyl facing at the edges of one knockout and
punched it out. The new switch fits perfectly. I used a sharp chisel
to slice and punch through the dashboard behind the panel, using the
panel as a template.
I also dug out one of the repaired cracks (which was cracking again)
and re-filled it. I don't think the original job had been done
correctly, the other cracks have all been filled for months and have
not failed.
I profiled the remaining cracks, using a small sharp chisel to flatten
the crack to the surrounding level. At that point, I used the broad
tip of a semi-sharp carbon-steel butter knife (one of my favorite
tools, btw) to randomly scrape across the cracks so as to propagate
some of the pebbled texture into the smooth filled cracks. I don't
know how successful this is going to be, but it appears to me that
getting the texture correct is the most difficult part of this repair.
Monday, April 11, 2005
I profiled the last crack on the dashboard, and did the texturing
trick on it. I hung the dashboard from a wire in the garage and put a
large cardboard panel behind it to catch the overspray. I rounded up
my Badger airbrush gear so that I can paint tomorrow. I also used
Leatherique's Surface Prep to clean the dash. The instructions say to
let it dry 6-12 hours before painting. Well, it'll be 24, I hope
that's OK.
Tuesday, April 12, 2005
I put the first coat of paint on the dash today. As usual, I overdid
it and got some runs, so I had to wipe off a bunch. It's so easy to
go too heavy, I sure hope someday I get the hang of this. The glove
box lid and the speaker grilles went well, but I did them last.
Wednesday, April 13, 2005
Three more coats of paint on the dash today. Put on properly thin,
it's dry enough to paint again in 20-40 minutes. I think one more
coat will probably do it. I also removed the passenger-side door
skin, to repair a small tear in it (near the bottom). Unfortunately
my Tear Mender latex fabric glue has all dried up, I'll need to get
more. I cut a small piece of foam to put behind the tear, to replace
the decomposed foam that used to be back there, and I cut a small
canvas patch to back up the tear. It's all in place, awaiting the
glue. Then I can use color-matched Leatherique crack filler to fill
in the crack, and then maybe paint the panel to match.
Thursday, April 14, 2005
I put the final (?) coat on the dash today. I also glued the canvas
backing patch in the torn door skin. The Tear Mender glue (latex)
doesn't stick well to the vinyl, but it seems to be doing the job
nonetheless. I patched the remaining crack using color-matched
Leatherique crack filler. (You mix the filler with the paint.) I
also glued (using Shoe Goo and metal reinforcing strips) the door
pocket mounting ears back on. Finally, I cleaned and surface-prepped
the seat bottom cover prior to a Leatherique color change for it.
All these other items will get painted next. I'm hoping I have enough
paint left to hit all the vinyl surfaces. This will refresh the
(rather sun-baked) interior color, and should improve the overall
appearance quite a bit.
Friday, April 15, 2005
With a day off, I did a lot more painting. Both seats, side panels,
pockets, and door handles. Starting to look good!
Saturday, April 16, 2005
More painting. Finished the seats and the other removed interior
pieces. The day was warm, so I went to the cold side of the garage
where the car is and painted the 'horse collar' too. That was very
sun-baked as well, the cleaning and painting of it made quite a
difference. All that's left to do paint-wise is the two side panels
in the rear. Those will wait a bit until the car is largely put back
together. No sense exposing freshly-painted surfaces to harm
needlessly. I believe I have enough paint left to do them, with some
left over for future touch-up. I'll send the bottle with the car when
I sell it.
Monday, April 18, 2005
The passenger seatback was 'twisted', which I've seen before. When a
seat is disassembled a careless mechanic can get the two hinge gears
out of sync, resulting in a twist (a lean to one side) in the back. I
took the back off, and loosened a hinge, allowing the two gears to be
operated independently. This let me experiment with various trial
settings until I was satisfied the back both looked right, and felt
right to sit in.
I got all the paint (and painted) crap out of the warm side of the
garage so my wife may resume parking in there. Things are stacked on
and around the car now, so I really need to get to reassembling. I
did start fiddling with the AC switch, and routing its temperature
probe.
I need to get some black cotton webbing to glue on the leading edge of
the dashboard. What was sewn there has all rotted and fallen off.
This is an important anti-creak component! That is, I believe, the
last thing required before reassembly may begin. Once I can begin
reassembling, I'm hoping the job will go quickly.
Tuesday, April 19, 2005
I hot-glued a strip of canvas webbing around the leading edge of the
dashboard. This is a cushion and anti-squeak mechanism. I decided
that while hot glue probably won't hold up in the heat (the original
was sewn), it doesn't have to. Mostly it's just to hold the strip in
place during reassembly. The advantage is that it's ready for use
almost immediately.
With that done, I began reassembling the dash. Unfortunately while
putting the ducting back into it the dash cracked again, in a new
place! And two of the existing cracks at the very front opened up a
bit too, due to (avoidable!) stress I put on it while crimping the
duct retaining ears down. This is going to get old. Fast. I think
it can be repaired just like before, so I'll try that, and I think if
I can get it installed intact it'll hold up to normal stress, but...
Pretty depressing. But onwards!
The two posts that hold in the switch bezel had speed nuts on them,
which broke during removal. So I threaded the posts 4-40, and used
real nuts on them instead.
Wednesday, April 20, 2005
I finished reassembly of the dashboard, all parts are in. I did scar
the new paint while reinstalling the speaker grilles (these are
difficult to install), so I have at least some touch-up to do. I put
more color-matched crack filler into the new cracking, we'll see how
it goes. It's tricky to force filler down into the crack all the way.
But right now it looks pretty good.
Thursday, April 21, 2005
I put a dab more crack filler in the new crack, to bring the level up
flush with the surface. Looks pretty good, and minor flexing of the
dash in the area doesn't open up the crack any more. If it can
survive re-installation, it should be good!
I reassembled the shifter as well, now that the legend has been
cleaned up. And, I recovered the wheel that was serving as the spare
for the new 560 SL, it got a steel wheel spare (from a 116?) that I
had. I had to scrape up a set of steel wheel lug nuts for it.
Friday, April 22, 2005
I selectively masked and did touch-up painting this morning. The
crack repairs again look as good as they ever did. The 'new' crack,
as it hadn't opened up with time, is practically invisible. If it
holds together, it will be fine.
Saturday, April 23, 2005
I trial-fit the dash, and managed to scratch it up a bit. (Nothing
serious, and I touched it up again so it's OK.) It wouldn't go into
place, so I pulled it out and am now following the official directions
regarding the vent hoses and cables. (I had these attached to the
ducting end, but the manual calls for them to be attached to the dash
first.) The steering column is the big interference item, I'm going
to try loosening it more when I get the chance.
Monday, April 25, 2005
The dash is in the car! I was able to loosen the steering column a
bit more, which fractionally eased putting the dash into place. It is
not an easy job, I managed to severely deform one of the two defroster
duct horns, but I think it has pushed back into place. Nothing's
attached yet, I felt like I'd reached a good stopping point just
getting the dash back into place.
Tuesday, April 26, 2005
Sigh. The dash is out of the car. I was unable to get the dash to
seat fully, and the defroster plenums and their rubber boots were
getting deformed and pulling off/apart. So I had to take the dash
back out to put those right again. (Some staples pulled out on one.)
I used more weatherstrip glue to hold the rubber boots on, maybe this
time they'll stick.
The dash is getting a bit scarred at the edges, and smudged all over.
At this point I think it'll still clean up fine, with a bit of
airbrushing too. With luck it'll go back in without further damage,
and seat properly.
Wednesday, April 27, 2005
The dash is back in the car, but seats no better than it did before.
I guess it's as good as it's going to get. The center mounting bolt
is not fully engaged in its slot, and the adjuster for the center flap
doesn't go in far enough to fully open the flap. (It used to.)
Unfortunately I broke the adjustment linkage, so it's being glued up
now. (Maybe that'll fix it.) Adding to the fun is that the edges of
the dash got pretty chewed up, and the cracks are opening up. Not a
fun day. I've got a lot of repair work ahead of me.
Thursday, April 28, 2005
The gluing of the center flap linkage piece seems to have taken. (I
bathed the pieces in acetone to clean them, then used a file to put a
tiny notch in the angle on one side so that a length of wire could be
twisted around the two pieces to hold them in together in the correct
position. Then the whole broken joint was potted in JB Weld epoxy.)
A bit of filing of the epoxy let the fork in the next link fit over
the joint so it went back together.
The dash is now hooked up, as are all the ducts and HVAC controls. It
still doesn't seem to fit in all the way, but you'd never know it from
the outside. Maybe this is right after all? Regardless, I got
tired of fooling with it, so now it's in. An adjustment of the center
flap link rod made the center flap work correctly.
I still have cracks in the dash to re-repair, and the whole thing is
very dirty. This will all be done in-place, no more dash removal!
Friday, April 29, 2005
I installed and hooked up the all switches in the dash, and secured
the steering column and its stalks. I also reassembled the driver's
door skin, etc., and installed the windshield side trim piece on the
driver's side. The chewed-up passenger edge of the dashboard is
getting its first treatment of crack filler.
I was going to install the instrument cluster, but found when I turned
it over for the first time in a year that the cracking of the clear
window was much worse: all three windows exhibited problems,
some severe. It appears that sitting alone was not good for it. This
would have been very depressing except for the fact that I had
recently gotten a spare instrument cluster from a 116, which happens
to be exactly the same part. (In fact this cluster has already
sourced a tachometer movement into Jill's new
SL.) I cleaned this replacement window and got the old one out
of the cluster. Unfortunately one of the plastic posts that holds the
cluster together broke off, so it is gluing up now. This is not the
first such damage, old plastic can be very brittle.
Saturday, April 30, 2005
With the glue dry, I assembled the instrument cluster and installed it
into place. Next I applied another bit of crack filler to the edge of
the dash and installed the windshield side trim piece on the
passenger's side. Then I installed the passenger door skin, etc. The
sunvisors were next, no problem.
At this point in time I tried to install the dome-light bearing
windshield top moldings (from a 560 SL), only to find they don't fit
well. Apparently a 560 SL has the top rail relieved to make room for
the light bodies. Without this relief, the moldings don't seat fully
in place, and the light bodies tend to protrude a bit from their
sockets. This is very depressing, considering that adding these
lights is what prompted the disassembly of the car in the first place.
Not that the situation looks that bad, really, but the current effect
is more GM-like than I care for! It remains to be seen what, if
anything, I'm going to do about this.
I reassembled the shifter and placed a box in the car for me to sit
on. Then I slipped the steering wheel into place (unsecured), and
remembered to put the drained coolant back into the car. (One of the
steps to removing the heater core.) With this, the car was ready to
fire up, which it did with only about twice as much cranking as a
normal cold start. It started and ran normally, so I put it into
reverse and backed it out of the garage. For the first time in a year
and a half or more. With the car out of the garage, it was much
easier to swap off the two snow tires that were still on the front
from way back when. Also, the doors swing all the way open outside,
making for easier access. And in the sunlight the interior color can
be examined properly. It's looking pretty good.
With the car outside, I then began fitting the console into place.
Finding one of the screw mounting holes broken out (now I
remember!) I took time out to use Shoe Goo to glue the little pieces
back in place. Then I potted the area in Shoe Goo, and laid strips of
aluminum reinforcement (pop can material) over the area to strengthen
it a bit.
All of this work occurred in the warm sun. In fact, it was getting a
bit on the hot side. Sitting back on the rear deck for a bit of a
rest, I noticed that the filled cracks in the dash were very
prominent! Oh no! The thermal expansion of the dash was forcing the
filler material to protrude noticeably. There is no way that this
crack filling experiment can be considered a success. It still looks
decent, but isn't really acceptable. At least the dash cap repair is
there as a backup plan.
Thursday, May 5, 2005
Trying to finish installing the console today, I managed to kink the
temperature sensing line from the AC thermostat. Which cracked when
I tried to straighten it out, letting out all the magic gas. Crap!
These are filled with Freon, I have heard, and are expensive/unavailable
anyway. I have a spare from a different car, but it won't fit.
Well, with lots of time on my hands (and no income) I can at least try
a repair. I was able to make a small piece of copper leaf using
hammer, anvil, and a bit of romex wire. This I rolled into a small
tube, which I then soldered the (now-separated) pieces of the tube
into. With some filing it will still slide into the evaporator housing.
Next is the difficult proposition of filling it with something. While
I do have two cans of R12 left, I really hesitate to crack one open for
a job as dubious as this one. I unsoldered the tip of the tube, and got
it open a bit. Next, I researched pressure curves of various refrigerants
looking for something similar to R12 around the freezing point. Didn't
have a whole lot of luck using my CRC handbook, or an old refrigeration
'bible', so I thought I'd just see what pressure was in one of my cans
of camping fuel (a propane/butane mix). It was some 55 psi at around
60 degrees, which seemed to be close enough to R12 to give it a try.
I finally got around to making an official camp fuel tap, prior to now
I just clamped an R12 tap to the side of a can and pierced a hole in it.
However, some time ago I'd procured a thrift-shop camping stove from which
I intended to steal its fitting. With the stove tap, a piece of 5/16"
fuel line from the liquidator's, a spare R12 fitting from the junkyard
and a couple of clamps, I was able to make a tap. With the cans of fuel
now somewhat reusable, I can afford to experiment with this thing a bit.
Taking another R12 fitting, I drilled a 1/8" hole through one of the
side flats. The intent here is to fit a plunger through this hole to
hammer the tube end flat once the thing is charged. With any luck I
can then solder the end shut without the gas escaping. I think I'll
be trying this outside! Next I'm going to fill the non-flare end of
the fitting with Shoe Goo, through which I will drill a tight hole for
the tubing once it's dry.
Friday, May 6, 2005
Setback! I probed the tubing with a wire, and found that the solder
had plugged the tube at the joint. I disassembled it and blew/shook
out the solder, and tried to leave a stainless steel wire in the
center while I resoldered it. The wire kept getting trapped and
wouldn't pull out when cool. I then tried a (somewhat larger)
aluminum wire, and that seems to have done the trick. The joint is
soldered, yet a wire probe can still get beyond the joint.
This ain't easy.
I also Shoe-Goo'd the non-flare end of my to-be-charging fitting, and
set it aside to dry.
Saturday, May 7, 2005
Another stab at charging the thermostat, I drilled a small hole
through the plug in my charging fitting, which allows the open end of
the thermostat tubing to fit in there. The original intent was that I
crimp down the very end of the tubing once it is charged, using a
punch or a screw through the hole I drilled in the side of the
fitting. This is over-elaborate, and I shouldn't have done this.
Closer examination of another thermostat shows that the tubing is
crimped some 1/2" from the end, and the open end is filled with
solder. I'm getting too much leaking through my side hole, so I end
up clamping it off using a piece of rubber and a vise-grip.
I vacuumed and then charged the tubing using my R12 AC gauge set and
tools, using butane/propane camp fuel as a charge. This weighed in
at about 35 psi at ambient temperature, which was enough (barely) to
let the switch actuate. I used fence pliers to crimp the tubing flat,
and then soldered the open end. The charge was still trapped in there,
and then I adjusted the sensitivity screw on the bottom of the thermostat
to try to get the switch actuation range to match that of my intact (but
unsuitable) spare thermostat.
Sunday, May 8, 2005
When I went to install the thermostat, I found it dead again.
Apparently the charge had leaked out. This is extremely frustrating.
Tuesday, May 17, 2005
Another stab at charging the thermostat, I disassembled the solder
joint again and cut off the sealed end, and again cleaned
everything with acetone. (I'm running out of excess length of the
tubing, this is probably my last try.) Again using the 0.035"
aluminum welding wire as a spine I resoldered the tube back together,
taking particular care to get a solid looking joint. I then removed
the aluminum wire and stuck the tube end into my charging fitting.
This time, after vacuuming, I decided to try to duplicate R12's
pressure charge the same way I do when charging the AC system proper:
I use butane for a partial charge and then add propane until the
'temperature' on the R12 pressure gauge matches the actual ambient
temperature. In this case about 55 psi, more than before and I
hope enough to stay away from the ragged edge of operation.
I had a few leaks, and the charging fitting popped off a time or two,
but I was finally able to get a charge in. It may be a little 'hot'
in that there may be too much propane (pressure). I'm not sure I'll
get proper thermostatic action as a result, but at least the switch
cycles on when you turn it on, so the AC compresser should run.
With the tubing charged this way, I then used fence pliers to pinch
the tube flat where it goes into the charging fitting. Then I rushed
outside and soldered the end of the tube shut. After this, the switch
still turned on, and even several hours later it was holding a charge.
Soapy water on the end and the soldered splint showed no leaks.
So I installed it. We'll see! The spare thermostat turns on with
about a 180° turn of the knob, the recharged one is less than
90° to turn on, and there was insufficient range of the adjusting
screw to bring it into line.
Also installed is the HVAC panel and the ashtray. What remains in the
area is just the stereo. Then the underdash panels, glovebox,
carpets, and seats.
Wednesday, May 18, 2005
I installed the stereo. The AC thermostat knob is still functioning,
so far so good.
Monday, May 23, 2005
I put in the driver's-side underdash stuff, including carpets. I had
to glue back into place the one that goes underneath the front of the
seat, using carpet contact cement. Then I put the seat in, after
vacuuming the area thoroughly. Then the steering wheel. I found the
remaining piece of the broken fourth end-of-seat-track cover, and it's
gluing up.
 The dome light addition has turned out to be flakey, and a bit of
diagnosis shows that the TO-92 NPN transistor used to invert the dome
light signal to the timer relay is too puny. It appears that the dome
light relay needs a burst of ground current to activate, though it
needs very little once activated, and sometimes it got 'stuck',
drawing 120 mA while not being able to pull the voltage low enough,
causing overheating of the transistor. Experimenting with more base
drive didn't cure it, so instead I added a second NPN power transistor
from the junkbox (smaller than TO-220, but a TO-220 [common] would be
fine) in a Darlington configuration. (Common collectors, original E
[was grounded] to the new B, and the new E to ground.) This seems to
have cured the problem.
The dome light addition has turned out to be flakey, and a bit of
diagnosis shows that the TO-92 NPN transistor used to invert the dome
light signal to the timer relay is too puny. It appears that the dome
light relay needs a burst of ground current to activate, though it
needs very little once activated, and sometimes it got 'stuck',
drawing 120 mA while not being able to pull the voltage low enough,
causing overheating of the transistor. Experimenting with more base
drive didn't cure it, so instead I added a second NPN power transistor
from the junkbox (smaller than TO-220, but a TO-220 [common] would be
fine) in a Darlington configuration. (Common collectors, original E
[was grounded] to the new B, and the new E to ground.) This seems to
have cured the problem.
I made a schematic of the circuit, for future reference, in Illustrator, PostScript, PDF, and GIF
formats.
Next I put in the passenger's-side underdash stuff, including carpets.
I also had to glue back into place the one that goes underneath the
front of the seat, using carpet contact cement. Then I put the seat
in, after vacuuming the area thoroughly. At this point, the car
looks more-or-less complete, though there are some more things
to do.
Thursday, May 26, 2005
I reinstalled the air intake grilles, after refreshing (rattle-can
black) the paint on the screens. New plastic rivets were installed.
Getting the aluminum trim piece at the bottom of the windshield back
on was a bit of a challenge. Since I had the paint out I repainted
the black ashtray frame, as it had gotten chipped.
Then I put the glovebox back in, which necessitated a side-trip to
restore the crimp-on connector for the glovebox light switch that had
come off somehow. For now the retaining rivets are not in place, until
I can be sure I don't need to get back in there.
Oh no, nothing much left! I rolled it outside the garage and parked
in the lawn. Then I washed it! Amazing how good this car looks once
its clean. The refreshed interior looks pretty good.
After that, there just wasn't anything to do but drive it in to town
to procure license tabs, which were badly expired. This car has been
'down' for a long time, it still had snow tires on it from the last
time it was driven, which means something like a year and a half has
gone by since it was a useful car. Too long, if you ask me.
The car behaved well. As always when I drive it, I just can't help
but think what a nice car it really is. It'll be missed once it is
gone, but the 560's are better cars, though more complicated.
I think I have the steering wheel off one notch, but I left the emblem
uninstalled for just this reason, it's easy to unhook the wheel and
shift it a bit. The AC also doesn't cool, no doubt it's leaked down.
Another minor chore to take care of.
Later in the day I needed more window screening (thank you son, for
ruining one), so I rigged the baby seat in the back and took him to town
to get some more. Another very nice trip: sunny with temperatures in the
high 70's. I made him carry the screen. (Making him install it in the
frame is probably a bit beyond him!)
The car is almost ready to put the for-sale sign on. I need to
do cosmetic refreshing of the bucket area (paint and carpet glue), and
that should be it. My dad wants to drive the car a bit before we sell
it, but he's due here again in a week or so, the timing should work
out right.
Sunday, May 29, 2005
Went to a party in the car, taking my son with me in the bucket in the
back seat. It is sure a nice car, I think that every time I
drive it. The 'lasers' at night were nice too, I'd forgotten how
well they light up the road.
Monday, May 30, 2005
Today I removed the rear bucket panels, and glued the rear panel
carpet back down using contact cement. It had mostly come loose. I
also cleaned these two panels, and put on two coats of Leatherique dye
to refresh the color, eliminating the uneven sun-fading on these two
final pieces of the interior. Before painting I used color-matched
crack filler to mend the few small flaws.
Tuesday, May 31, 2005
Swapped rear seat belts with the new SL. (The 'new' latching belt I
put in it was less easy to use for the child seat, so we're keeping
the old Kangol magnet belt in the new car.) I put the painted bucket
panels back in, and it looks pretty good. I also shifted the steering
wheel one notch, we'll see if it's centered better next time I take it
out. For all intents and purposes the restoration of this car is
done. Finally! I just need to charge the AC system, put back the
emblem in the steering wheel (once that's centered for sure), and put
the rivets in that hold in the glove box. (No sense doing this until
you're sure you're done with getting in there. It'll only take a
couple of minutes.)
Saturday, June 4, 2005
As it was warm, I got out the AC gauges and had a look. Pressure was
low, and turning on the compressor resulted in a vacuum on the
low-side. Leaked! Too bad, this car had had R12 in up 'til now. I
recharged it with a test refrigerant to find out if it has a bad leak.
Took it for a test drive, vent temps were 42 °F.
Also put the center emblem back in the steering wheel, as the wheel
seemed properly centered on the test drive.
Wednesday, July 13, 2005
Took the boy out in the car on errands. Perfect convertible weather,
many stops. I sure do like this car!
Wednesday, July 20, 2005
It's been forever, so I washed the car (hardtop and all) with soap. I
got out the touch-up paint to hit the few little nicks I found, only
to find it nearly dried up. I filled the jar with acrylic thinner,
and stirred and shook it up a lot. I was able to get enough
paint-like behavior out of it to cover up the nicks, but it was a
close thing. Next step, wax!
Friday, July 22, 2005
I waxed (Carnauba) and polished the car, preparatory for taking
pictures. Looking sharp! Took it outside after the rain stopped for
a photo session under cloudy skies (soft light).
Monday, August 1, 2005
We finally had a moderately cool day, and didn't need the AC. Which
allowed me to notice that the heat was stuck on. (Low.) Y'know, it
had seemed lately that the air from the side vent was warmer
than that from the centers. Great, something new to look at.
Tomorrow?
Tuesday, August 2, 2005
I popped the hood, and hooked up the shop vacuum pump to the car in lieu
of manifold vacuum. I noticed a hissing. One of the vacuum hoses had
pulled out! I put it back in, and the heater valve responded to the
heater controls as normal. But I still heard some hissing. Further
investigation showed the offending rubber vacuum connector to be
split, and leaking. That explains it! I replaced the split connector
with good used.
Wednesday, August 10, 2005
The car had started to make a rattling noise coming up the washboard
road, so I put it up on ramps and had a look-see. The heat shield
over the exhaust pipe behind the transmission was a bit loose, so I
tightened the front 8mm sheet-metal screw, which seems to have helped.
(At least when pounding on it with my fist.)
I also tightened the steering idler nut a bit, it seemed fractionally
loose. The next trip or two will prove whether or not I found the
rattle. (I noticed no grotesque looseness of anything.)
While I was there I injected grease into the torn boots on the left
tie-rod. Probably should get a new one of those, but so long as grease
is kept in there it'll be OK. Just more of a high-maintenance item
than it ought to be. It's not worn/loose (yet).
Saturday, August 20, 2005
Extremely PO'd at the local fish wrapper. Put an ad in the paper, and
opened it this morning to find the car classified in Mercury! Along
with another SL. Stinking web interface that they suggest we use was
infuriatingly slow, confusing, and unhelpful. Also costs more, and
obviously is unable to do the job right, facts which they do not
disclose up front. The interface doesn't show you the classification
after you enter it, and they suggested (when I called) that I
misclassified it myself. Yeah, right. I'm sure that a Mercury-Benz
is one of the selections!
I'm thoroughly pissed off, but I still had them run the ad again next
weekend, even though we're going to be out of town. Convertible
weather won't last forever, and the machine will take messages. We
also added the cell phone number to the ad. We do want to sell the
car, after all.
Monday, August 22, 2005
Stinking fish wrapper ad did as well as expected. Zero calls.
Wednesday, August 24, 2005
While out on errands, not one but two gentlemen saw the sign
and stopped me to take our phone number.
As it was Jill's birthday, we took the car on a nice backroad trip to
one of her favorite restaurants. It was a nice trip, and of course
the car behaved well. She liked the individual control of heat on her
side, and I was pretty fond of the deerspotter headlights. The new
dome lights were also very welcome in the dark parking lot for the
trip home. We'll miss the car when it sells!
Tuesday, August 30, 2005
Returned from a weekend camping trip to find that the ad we'd run in
the local fish wrapper again netted zero calls. (We know it ran,
because we called a friend who checked.) What a waste of money! Even
if interested parties didn't like the asking price, where were the
calls offering trades of clapped-out Darts with $50 thrown in?
Wednesday, August 31, 2005
While out on errands, again two people saw the sign and stopped
me to take our phone number. Freaky. Memo to self: forget fish wrapper
and go out on errands more!
Or maybe we should try an ad in the Wheel Deals?
Thursday, April 20, 2006
Spring's coming! Listed car on Craig's list.
Mercedes 450 SL Convertible, 1976 $7500 Greenacres
Clean classic convertible, everything works, needs nothing.
Refinished interior. Take your honey to Dick's for malts!
162 kmi, See http://cathey.dogear.com/JSLsale.html
for more pictures, details. (509) 926-7801
Friday, April 21, 2006
...And got a call on the car already. Guy might be coming over to
look at it tomorrow, so I figured I'd better dig it out of the garage.
It dusted off nicely, and I drove it to town on an errand. Will
perhaps wash it tomorrow and take off the top.
Saturday, April 22, 2006
No guy. But I did have a nice little top-down trip down the road to
look at some potential firewood. (No firewood, but we did rescue [and
I guess adopt] a stray dog.)
Tuesday, April 25, 2006
Disassembled a junkyard rear-view mirror (Japanese) to see if it's
possible to open them without ruining them. Based on this experiment
I don't think it is, and the plastic in the MB mirror is much harder
than the Japanese one so glass removal would be even more difficult.
I did notice, however, that the MB mirror's lever (which has come
loose) seems to have torn loose from the mirror body, so I'm trying a
bit of Shoe Goo to hold it back in place. The other option is a new
mirror. Believe it or not, the Japanese mirror seems to have been
better designed.
Saturday, April 29, 2006
Put re-glued mirror back in car, it's no longer loose, but I doubt the
little flip lever will work very many times before it pops loose
again. Luckily you rarely need to!
Saturday, May 6, 2006
Wife's on my back to get an ad into the autotrader magazine. $49 for
176 characters, runs until it sells. (Presumably with some effort on
my part for renewal.) I think the print ad is only 2 weeks.
'76 450SL Clean classic conv., everything works.
Refinished int. 162 kmi
http://cathey.dogear.com/JSLsale.html for pix, etc. Spokane $7500
(509) 926-7801
...Stinking web site won't let a car this old be entered.
I hate most of these online things.
Wednesday, May 10, 2006
Listed the car in the local Wheel Deals and Driveline free magazines,
for two weeks. The ad. should come out on the 12'th. $58. On the
drive home it was fairly warm so I tried out the AC again. Didn't
seem to be cooling too well, will have to look at it soon.
Saturday, May 13, 2006
Picked up the local Wheel Deals and Driveline magazines, the ad's were
indeed there, so we'll see how well this works.
Wednesday, May 17, 2006
Finally got a call on the car from the Wheel Deals ad. The guy was
not particularly local however, but he may call back this weekend.
As the day was hot (90+ °F) I got out the AC gauges. The pressure
(and charge) was indeed low, so I topped it off. I found that the
low-side Schrader valve was leaking a bit, so I tightened it. On a
test drive the vent temperatures got to 43 °F, not too bad.
For some reason the passenger armrest's rear retaining screw came
loose. Odd. Unfortunately the door panel has to come off to put it
back, but it's not like I haven't done a few of those! Took about an
hour to button it back up.
Saturday, May 20, 2006
Got another call on the car from the Wheel Deals ad. The guy may call
back tomorrow.
Sunday, May 21, 2006
Got a different caller on the car from the Wheel Deals ad.
They came and looked at it, but I doubt they're interested. They
seemed generally unable to recognize the difference between road dirt
and rust on an undercarriage, and that there is an inherent difference
between a three-year-old and a thirty-year-old car. And good luck
to you, guys! You may eventually find what you want, but not at
anything near this price.
Thursday, June 22, 2006
Re-listed car on Craig's list.
Thursday, September 7, 2006
Removed trunk light, disassembled it, and cleaned out all the
corrosion and dead grease. Burnished the contacts, regreased the
plunger, and reassembled it. Works correctly again. (It was getting
sticky and wouldn't always come on when the trunk was opened, not
without some jiggling and convincing.) One of the things I love about
Mercedes (the older ones at least) is that you can do things
like this.
Monday, September 11, 2006
Ran the front of the car up on ramps, and started whacking things with
a rubber mallet looking for the weird intermittent yet persistent
rattles and knocks that the car has had for a long time. Though I was
focusing on the steering idler arm, and had even gone so far as to
remove the nut from it to check it out internally, I was in the wrong
place. I managed to accidentally whack the exhaust system, something
I'd done on purpose numerous times before to no effect, but this time
I got a nasty squeaking buzz! I tracked it back to a heavy sheet
metal brace that goes between a boss on the exhaust manifold at #8 and
the rear elbow of the catastrophic converter housing on that side.
Looking at it closely it appears that there is a bolt missing at the
manifold end, but things are so tight back there that there's no way
one could be reinstalled without serious work, possibly including
lifting the engine partway out of the bay. (I suspect that the bolt
head has broken off, or at the very least the threads need tapping out
before a new bolt could be installed.) Also, the welded-on end at the
converter housing looks like it's cracked. I used a long screwdriver
to bend the upper part away from the manifold so that it no longer
buzzed when I whacked on things. I'm very hopeful that this will cure
the weird intermittent rattle at certain just-off-idle throttle
settings it's had since we got it. It's been without support there
all this time and it seems to be OK with it, so not replacing the
bolt at this time doesn't concern me too much.
While I was under there I noticed that the bolts for the rear
transmission mount were loose. Doh! That could easily explain the
heavier thumping noise that had started up in the last year on some
bumps. I'd looked before, but never found anything, and trying to
locate it by ear always led me more forward than that on the car.
(Hence today's foray around the steering.) So I tightened them
back down.
One test drive ought to prove whether or not these irritants have been
cured, I should find out on my drive to work.
...Yes! Take that, entropy!
I'd been looking for that pesky little rattle since I got the car.
Tightening things, looking at things, whacking everything in sight,
but I could never get it to act up when I was in a position to see
what it was. It feels so good to finally kill that noise. It's
amazing, but to me, at least, noises like this really negatively
affect my enjoyment of a car. This makes being 'stuck' with this car
a whole lot more palatable. You can heed my warning that noises
really can telegraph to odd places in the car, leading you far astray
from the actual source.
Tuesday, September 12, 2006
Today has been predicted to be the last day of summer weather. So I
took the car to lunch at Dick's for a burger and a chocolate malt.
While sitting there at the drive-in I had the radio on, and on came
Janis Joplin's tune "Lord, won't you buy me a Marsay-dees Benz?"
Sweet! I had to laugh. Supposedly this car is exactly the model she
had in mind when writing it.
Wednesday, September 13, 2006
The speedometer needle has been bouncing a lot more at low speeds
recently, so I pulled the top connector off the cruise control speed
sensor and pumped in some M1 5W20 (downhill into the sensor, of
course). I'm hoping that it'll get worked up towards the speedometer
head as the cable turns, getting that top section out requires pulling
the cluster, which requires pulling the steering wheel first. Not
fun. The upper section, when spun by hand, seemed a bit stiff. Also,
the cruise works well now, so it's probably not the lower cable as the
CC amplifiers seem to be sensitive to binding cables, resulting in
surging.
On the drive to work the bouncing was noticably reduced, but still not
gone. More work is probably required. Yeah, a bunch colder and
windier today, nearly 30 °F less as a high! Good chance of rain
tomorrow.
Thursday, September 14, 2006
Rained today, I had to put the lid on the car for the first time in I
don't know how long. Probably just about time to put this car away
for the season. I need to switch over to the 190D
anyway, my new commute downtown is much longer than before and the
fuel mileage difference is going to be significant. If I'm not going
to have the lid off, there's no point in paying nearly 3× just
to be taking an SL!
The speedometer needle bouncing is definitely a whole lot better,
possibly good enough to stop worrying about doing anything more.
Thursday, September 28, 2006
Removing the roof again (as the weather is so fine and my cold is
getting better) the stupid plastic buckles on the hardtop lift straps
started breaking and shooting pieces across the garage!
I knew I preferred the original lift's nonadjustable straps.
The hardtop nearly fell back onto the car. I was able to get it to
hold long enough to move the car out of the way, then I lowered it to
the ground and tied knots in the fore and aft straps (the broken
ones). I suppose the side straps will go next...
I hate plastic.
Saturday, March 31, 2007
Dug the car out of storage in its deep hole in the back of the garage.
(Four cars shoehorned into a three-car garage.) Uneventful, though I
can never seem to back it out as easily as it went into the far
corner, and it started right up. Washed it. We used it as a
datemobile, though with the top on.
The door lock vacuum system is leaking down in only a few hours, I
think I'll have to dive into that again.
Sunday, April 1, 2007
Made new stick-ons for the for-sale signs. The URL had changed, as
had the asking price! Family had a nice drive to church, the booster
seat also works well in the rear bucket with the auxiliary seat belt.
Divide and conquer. I teed off the rear two vacuum elements in the
trunk, we'll see if the doors hold vacuum. The MityVac indicated that
the rear might have a tear somewhere (a variable leakdown rate, it
actually seemed worse at low vacuum levels), but it's not entirely
reliable. (Its release valve leaks sometimes.) The golf tee will
give me some good information, in time.
Monday, April 2, 2007
No, even with the trunk capped off it still leaks down quickly. Will
need to do a more involved diagnosis. Car is running well otherwise,
though.
Wednesday, April 4, 2007
When I went out into the garage this morning I smelled raw gasoline.
My wife had filled up the car last night, so I checked and found that
she had again put the gas cap on backwards. (For whatever reason, it
only seals properly one of the two ways you can install it. The
gasket is good, and a different cap also leaked. I suspect that the
filler neck is slightly deformed.) Gas will leak out on corners if
it's on the wrong way. The black orientation arrow I'd drawn on it
with a Sharpie had again worn off. So this morning I cut out an arrow
shape in a piece of masking tape and painted the arrow on the cap.
Two coats of primer, two of black paint. I put the cap in the shop
oven to dry between coats. We'll see if that arrow lasts longer, and
we'll see if she remembers/notices how it's supposed to point.
I dug out the foam 'football' vacuum
pump I use for cruise control testing. (This is a lot quicker to
deploy than the main shop vacuum pump.) I rigged a tee, vacuum gauge,
and check valve to the line that goes to the car's vacuum reservoir
and pumped it down to 13" Hg. It held rock-solid at that level while
I puttered around for awhile, so I buttoned up the car. We'll see how
it reads tomorrow, I suspect that (of course) the leaking is not in
the tank but it'll be good to formally eliminate it as a suspect.
I'd feel pretty stupid tearing into the car only to find that it was
the tank all along!
...After work I checked and the vacuum was still solidly at 13" Hg. I
think I can safely say that there are no leaks there. Will check
again in the morning to be sure.
Aargh! I found a shiny bit of plastic in the rear footwell, some
examination shows it to be the remains of the bezel from around the
seatback latch handle. How the heck did that get broken? I suspect
my wife, who drove the car yesterday evening. She can be a bit
ham-handed when she gets frustrated, even more so than myself, and
that does machinery no favors. Can't repair it since it's not all
there. It's a dealer item, assuming I can still get one. Crap. She
claims to know nothing about it, I guess it's going to be one of the
great mysteries of life.
Thursday, April 5, 2007
No, no perceptible loss of vacuum in 24 hours. The check valve also
seemed good and passed the hang-from-my-tongue test. Got to dive into
the doors next, I guess.
I bought another for-sale sign for the side window today. Cheap at
twice the price if it has any positive effect! I tuck it between the
inner wipe strip and the glass, this will even work with the top off
and the window down.
Friday, April 6, 2007
I removed the glovebox liner to expose the vacuum hoses. The
splitters behind the dash are too deeply buried in the corner to
access except by fingertip, so I cut the lines where they cross the
glovebox opening. The vacuum test rig, when applied to the downstream
(door, filler, and trunk) lines showed them to be clear of leaking.
The upstream lines, when capped off, still showed leakage from the
main feed. This points clearly towards the vacuum switch in the
driver's door. (Which was brand new a few years ago.) I now have
many junkyard valves to play with, so that will be the next step.
There's also an adjustment that may be out of whack. Out of time, I
put everything back together with two 'new' rubber joints where I cut
the lines.
I also readjusted the trunk latch to make it operate better with the
locking system. A washer under the latch plate at the bottom screw
did wonders for relieving some rubbing that made the button stick
sometimes.
Saturday, April 7, 2007
Yesterday I dropped my fuel/vacuum gauge while putting things away,
and the needle jumped to read about 10" Hg vacuum at rest. Crap!
Today I took apart the gauge and found that if you squeeze the Bourdon
tube gently you can run the needle's gear completely off the end of
its mating sector gear, allowing it to be realigned. A few tries got
them mated right again. I'm sure the drop just bounced the needle off
of the sector gear in exactly the same way. Good as new!
I opened up the driver's door. (While doing this I found the missing
piece of seatback latch bezel trapped in the seat belt mount, so I
ought to be able to glue this back together.) With the door open I
removed the vacuum valve. Putting the vacuum test rig on the locking
line I found that it indeed does not leak. Next was the unlocking
line, same thing. (I put on about 12" Hg which is what the football
can make, then walk away for some time.) Next was the vacuum supply
line, with it capped off in the engine compartment. (It's best to
check for cracked lines before blaming the valve itself. The valve
was new a few short years ago, and was a VDO from the dealer, not a
no-name.) It didn't leak either. That meant it was the valve.
Now, I'm not adverse to buying a new valve, but this was a
new valve and it really hadn't lasted that long. I was not impressed.
So, I checked my parts pile and found I had about five of these
valves, procured from various junkers. I took one of the clapped-out
ones that was loose and leaked very badly and opened it up. (They're
not meant to be opened. I set the jaws of a vise at just the right
opening so that the valve body wouldn't go through but the plunger and
retaining washer could, then I used a nail as a punch through the vent
hole on the other end to drive it apart with a small hammer. The
retaining washer broke through the plastic lip at the end but that's
no great loss. I think this washer just keeps the plunger from coming
out during shipping and installation, once it's in place it's of no
use.) With the valve apart I could see that it's just a smooth
cylinder with three taps in it, and a plunger inside that has two
rubber cup seals, one at each end. These cup seals were apparently a
bit shrunken and no longer made a good seal against the cylinder. The
rubber wasn't dead yet, though, as I proved when I removed them from
the plunger. They have to stretch significantly but they didn't tear
and there were no signs of cracking or other damage. So I grabbed my
Harbor Freight O-ring assortment (SAE) and pawed through it looking
for something useful. The second smallest ring, R02, seemed about
right. With one of those rolled onto the plunger at each end outside
the cup seals so that they wanted to nestle into the cups, forcing
them outwards a bit, the valve then sealed very well. It
slides fairly stiffly, but not so stiffly as to not operate. With the
valve connected (but not fully installed) the system pumped down again
with no perceptible signs of leakage, either locked or unlocked.
Since I had the door panel off I decided to glue back the bottom edge
where the vinyl had come unstapled from the fiberboard in spots. It
was catching on the sill and making a noise whenever you opened the
door. I used weatherstrip cement and a bunch of small spring clamps.
I also glued the seatback release handle bezel back together with
gap-filling cyanoacrylate glue and pushed it back in place. I let the
glues dry while I had breakfast.
The repaired vacuum valve worked well, but was stiffer than the
original. Enough stiffer that the door keylock couldn't actuate it in
both directions. (It could be adjusted to work either way, but not
both ways at once.) There was flex in the linkage to the lock, and a
bit of slop where that flat link is itself loose in the round mounting
holes. The retaining clamp also didn't grip quite tightly enough. So
what I did was to fabricate a mild steel bar as a link, and screwed it
into the holes top and bottom with self-tapping screws. This
eliminated the slop in the linkage. I also used some bicycle inner
tube rubber to shim the clamp so it wouldn't let the (now stiffer)
valve body shift. Unfortunately all this didn't help the problem, so
I removed the door handle and latch assemblies to have a look. (That
was actually quite difficult because the roll pin hinge of the door
handle had worked half out and was trapping the whole assembly in the
door. Once I finally got it out I tapped the pin back into place with
a hammer.) The 'finger' on the key lock had worn some over the years
and didn't shift the lock bar quite far enough anymore. I bent the
ears of the lock bar inwards a bit to compensate for this and
reassembled the door. (This whole procedure was much easier said than
done. Figuring and fiddling took several hours.) That gave the lock
bar just enough more travel that it could actuate the lock in both
directions with the key. It's still kind of stiff, but it works
correctly now. I then buttoned up the car.
The weather was magnificent, the car's thermometer read 72 °F and
we had a nice scenic family drive around the newly paved road around
the old lakebed, and stopped for lunch and ice cream. The lock system
held vacuum for the hour or so we were stopped, so it's definitely
better than it was. I'll consider it fixed unless I find out
differently. Tomorrow morning if it's still holding enough vacuum to
cycle the locks before I start the car I will know for sure.
Sunday, April 8, 2007
This morning there was plenty of vacuum to both lock and unlock the
car again. Didn't have time to play with it more to see how many
shots it had left in it as my boy and I had a date. Grey day, so we
put up the windscreen and the windows. (Can't use the windscreen when
there's three of us.)
Monday, April 9, 2007
Raining. Put the lid back on the car again. There was enough vacuum
left to lock and unlock the doors again, eight cycles, even though
yesterday I'd already demonstrated the repaired system to a neighbor
by cycling the system twice. Looks good!
Tuesday, April 10, 2007
Noticed that the dome lights aren't working on the door switch, I
probably knocked loose the relay inverter that's behind the glove box
while fiddling with the vacuum lines. Will look into that.
Wednesday, April 11, 2007
Had a look at the dingus behind the glove box. Looks fine. And this
morning it works fine too. Weird. In celebration of the end of the
rains (though it's below freezing out) I took off the lid again.
No, the dome lights flaked out again when I got to work. I popped out
the glove box liner and poked at the can containing the transistor
circuit, and the lights came on. Obviously there's a loose connection
in there somewhere to track down.
Thursday, April 12, 2007
Had another look at the transistor dingus in the film can behind the
glove box. What was inside the can was fine, it was the trigger line
that had broken loose from where it tapped into the wiring harness
from the door switch. (Cold solder joint.) It was difficult, but I
was able to reach in there and resolder it without melting anything.
The most difficult part was getting new solder in there once the iron
was in place. I ended up taking a metal stiffener strip from a
windshield wiper blade refill and tying a bit of solder to the end.
That allowed me to poke it in past my hand and get the solder to the
tip of the iron, a feat that I obviously didn't perform correctly last
time. Also somewhat difficult was re-insulating the joint. Anyway,
after the operation it worked correctly again.
Wednesday, May 2, 2007
Last time I used the softtop I noticed that one of its seals was
coming out of its track so I used a putty knife to work it back into
place. (The sharp-tipped spring clips inside the channel have to be
held back.) No big deal. While I was in the area I cut and shaped
some pieces of inner tube rubber and glued them into the gaps in the
A-pillar seals where age-related shrinkage has allowed the joint
between the two sections to open up a bit.
Rain today, so back on the hardtop goes.
Saturday, May 5, 2007
Re-listed car on Craig's list.
Friday. May 11, 2007
Temporarily installed Glenn's returned CC amplifier for testing.
(It's for the same year and model of car.)
...It does seem to work. Once or twice the speed sagged mysteriously
on hills, but then it came back. Other times it behaved more like I'd
expect. More testing is called for, there was no opportunity to try
it on the freeway.
Got a call on the car. We'll see. He wants me to call him tomorrow,
he might come look at it. Jill also has a friend that's examining it
with interest, they had a little test drive today.
Saturday, May 12, 2007
I washed the car. I then shimmed the glove box light with a bit of
cyanoacrylate glue to make it hold in place better. It's been bugging
me by popping out of its hole occasionally. No more! (No, it's not
glued in place, I just made it fit in the hole tighter.)
There is a small crack in one of the seat back covers, so I dug out
the Leatherique crack filler. Unfortunately it had dried up, even
though I'd put it inside a glass peach jar. I tried resurrecting a
lump with ammonia (which I believe was one of its native solvents),
but didn't have a lot of luck. I was unable to get it to mush up
enough to take the paint. I puttied the crack anyway, and painted
over it.
Jill drove the car today, and reports that Glenn's cruise control
amplifier hunts too much, especially at higher speeds. OK, will look
into that.
I called the prospective buyer at the appointed time. The guy offered
some free web hosting for 2 years, and $6000 cash. Sold! He said he
didn't need to see the car as he'd already looked it over when he took
down the phone number. He's fulfilling a youthful promise to his
mother, and plans to paint the car, Maaco. Perhaps red, perhaps
silver. We'll make the transfer Monday, at the bank. Let's hope all
goes well. I've got some work to do to scrape up all that goes with
the car, and clean out all that does not. I also need to finish with
Glenn's cruise control amplifier, and take another look at the door
lock valve. I don't think Jill's going to have one last drive in it.
Oh well. She got to drive it today, it was very nice out and I heard
her blasting the tunes as she drove in the driveway.
Sunday, May 13, 2007
Spent the morning detailing the car. Cleaned out the trunk and the
glove box "Oh, so that's where that went!..." and generally
got it ready to go. Found the extra keys, the title and records, etc.
Boxed up the touch-up paint and service manual CD. Put the smog pump
and original window moldings into the trunk, in cardboard boxes.
Removed the embedded garage door opener.
I decided to adjust the door vacuum switch some more, I think I made
it better. Certainly it operates easier now, it really had gotten
too stiff.
I resoldered Glenn's cruise control amplifier in the area of the
servoamplifier circuit, then took it in the car for a drive. It
operated nearly perfectly this time. It even remembers the set speed
while the car is turned off. I'll box it back up and send it back.
I'm glad it responded to the repair attempt, tomorrow I'm going to
lose my test bench!
After this I put the door and under-dash panels back together. She's
ready to deliver.
Monday, May 14, 2007
Sold! We made the exchange this morning. He liked it, and we drove
it to the bank to deposit the cash and make over the paperwork. He
threw in the extra $100 for the dash cap, though unfortunately I'd
misunderstood his wanting that too, so he'll have to pick that up
tomorrow. He drove me back to work, and I waved goodbye to the car.
Whew! That's a heap of worry off my plate. (Will it sell soon? Will
something bad like accident or vandalization happen to it before we
can sell it? Will something break because we're driving it so that
it'll be seen as for sale? Will something happen to the car(s)
I should be driving while they rot in storage? Etc.)
Curious about the effectiveness of my "advertising campaign", I'd
asked him how/where he saw it; he said that his girlfriend had spotted
it in the parking lot of the drugstore across the intersection.
That's interesting, because this car was never over there!
(I have seen other SL's parked over there for sale from time to time.)
She'd also told him it was 'tan'. He drove by and saw it in our lot
and told her, no, it's brown, not tan! Well, I guess I'm glad she saw
some other for-sale SL that day, and that it wasn't around cluttering
the field the day he came by to check it out.
Tuesday, May 15, 2007
I dug out the dash cap and washed it off. Decided the best way to
transport it was on the dash of Jill's replacement
SL! The guy stopped by work to pick it up. We chatted a bit,
they're busy talking over what color to repaint it. I talked to him
about staying in the same color spectrum (red-orange-brown) so that
the color change won't be too obvious. He's decided against Maaco,
and will hire a guy to paint it for something like $2500–3000.
(That price sounds about right for a proper job.)
Done-diddley-done.
Return to Site Home
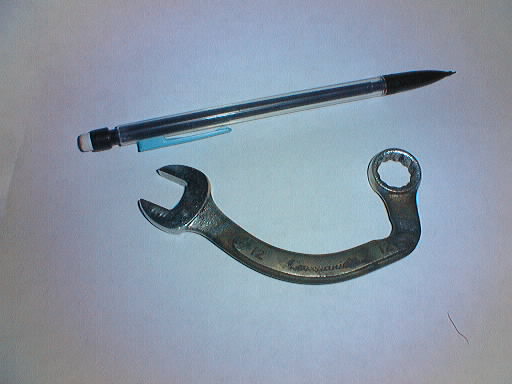