Log of Jill's 560 SL's life with us.
December 2004–January 2005
Whenever driving by, saw car floating around a used car lot. Giant
windshield-posted price didn't look all that bad, assuming I read it
correctly. Kept seeing car.
Monday, January 17, 2005
Truly filthy weather, snow and slush piled all over. Rotten for
convertible selling. Stopped and looked at car up close. Hmm,
interesting. Posted price is in a reasonable range.
Tuesday, January 18, 2005
Jill looked at car. Jill bought car! Technically. (Her name is on
it, since it's replacing her 450, which is in her name. She even
wrote the check.) Honey, it's not my fault! $11,300, plus the
state's cut. I hope to recoup a substantial fraction of this out of
the sale of her 450 in the Spring. (That, of course, is up to her,
both cars are hers. But I don't expect her to want to keep two
SL's of her very own.)
Wednesday, January 19, 2005
The car sat at work overnight. Today at lunch I drove it home. In
some of the more open areas of road I stomped on it, and it behaved
well. Good power, no additional problems noted other than the engine
temperature reads a bit low. Does sound like maybe it needs motor
mounts, there's more motor noise than in my (same-year) SL. We then
all went out for lunch, and Jill dropped me off back at work.
Thursday, January 20, 2005
The battery is/was low, they'd had to jump-start it at the lot once.
(I wasn't there.) So I put it on the charger. It's been drinking
5+ A for a couple of hours, and is still thirsty. They didn't
know how to jump-start an SL from the hood area, so they'd opened up
the battery box and left it that way. I buttoned it back up properly.
One thing: the car does have the correct Group 49
battery in it, it looks like a dealer item as the protective flap is
attached. While in the area, I found another trunk-mount cell phone
antenna. More crap to remove eventually.
I pulled the nasty dash mat off, and peeled loose most of the velcro.
The dash is cracked, but not as badly as her 450's had been.
I'll clean off the glue later. I want to try filling the crack with
Leatherique crack filler, and painting the dash black. It'll have to
come out to do this right. Someday.
I had a look at the fuse panel, and found two nasty clip-on
connections in there. Either for the stereo or the cell phone,
probably the latter. I'll be removing them at some time. No sign of
bad fuses, though, will have to look elsewhere for causes of
non-functionitis. The driver's door light problem turned out to be the
switch. I pulled it out and gave it some good shots of contact
cleaner. That restored its function.
The trunk light fixture had no bulb in it. I put one in, but still
nothing. The switch plunger was very sticky. I removed the fixture
and tried the contact cleaner, but no dice. The plunger might have
been a bit deformed, so I disassembled the switch and reamed the
plunger's bore out with a drill bit. That fixed it, and now the trunk
light works properly.
I got out the Arctic White touch-up paint (for the SDL), and fixed a
few rock chips I found. Same year, same color! While I was at it I
glued back down a piece of door weatherstrip that was starting to come
loose.
Friday, January 21, 2005
The auxiliary fan runs all the time, so I disconnected the temperature
sensor for it. I've seen this before, it had happened on my SL once
so I'd ordered another sensor. But the problem went away before the
part came, so I've still got the extra sensor laying around somewhere.
I'll install it later.
To keep the battery charged, and as the car sits outside for the time
being, I bought an inexpensive (on sale!) solar panel for the car. I
hope this'll keep the battery charged.
Sunday, March 20, 2005
With the completion of the Frankenheap's
annual (?) tour of duty, it was time to move on to the next car in the
roster: this one. When I went to start it, in spite of the small
solar panel I'd installed some time ago the battery was too low.
Either something's sucking a lot of juice, or that solar panel wasn't
working. I suspect the former, so I'll dive into that. I don't like
the stereo that's installed, and there's a big cell phone to yank out
too. I put the charger on for 20 minutes so that I could get it
started to move it inside.
The car does leak ATF (I think.) There's quite a puddle under it. I
shoveled some dirt over it to soak it up. Nice.
Once the car was parked in the garage, I popped the hood and used
Super Trim Adhesive spray to re-glue the parts of the hood pad that
were coming loose.
I put the battery charger back on, and it took a heavy charge for
hours. I left the charger on overnight, it'll shut off automatically
when it's done charging.
Monday, March 21, 2005
The heater fan squeaked, so I removed it from the car and lubricated
its bearings with ATF. This is pretty easy to do on a 107. One of
the two bearings is obviously shot, as there's some play on that side.
We'll see how long I can keep this running, as a new blower motor is
very expensive. I wonder if it can be disassembled enough to replace
just the bearing, or if I can even get a bearing for it at the local
bearing supply house?
On the way to work the fan was quiet. Success! (At least for now.)
Tuesday, March 22, 2005
Deciding which of the short list of items needing attention is the
most irritating can be difficult, but I thought that the wind leak
behind my ear was the worst so I tackled that first. To do this
required lifting off the hardtop, which exposed another problem: The
release lever for the retention pin didn't work. With enough yanking
on the top I got the hook to release and the top lifted off, so I
changed plans and tackled that problem first. The cable for the hook
was intact and operating, but it didn't have enough range of operation
to completely pull the hook back out of the way. Fixing this only
required shifting the cable inside the retaining clip that holds it in
place. This moved its range of operation to be more usable.
With that fixed, I took a look at the soft top, advertised as being
in good shape. It appears to be, but there is a tear in one of the
corner windows. It's blue. Next up was to use weatherstrip cement to
fix the small tears in the sealing strip for the top stowage
compartment. That was easy. Then I was able to actually tackle the
wind leak at the three-way joint of the window, top, and body. The
weatherstrip had started to tear there, and it had shrunk enough to
open up a gap. I glued the tear back shut, and cut some pieces of old
EPDM rubber weatherstripping to shim the gap. These attach to the
bottom of the hardtop.
With this addressed, the next-most irritating problem was the
occasionally-spastic ACC system. It seems to work, but has the
symptoms of a rotted foam hose. (I didn't get that far today.) It
also sometimes made a screeching relay noise behind the PB array,
which can signify that the PB array is in need of a resoldering.
So I pulled the PB array out, and opened it up. No severe solder
cracking was visible, but the joints for the relays themselves didn't
look good. Using a very hot iron I was able to re-make these
connections so that they looked better. I also used a regular iron to
touch up all other joints, and I sprayed contact cleaner into the
switch array and cycled it a bunch. While reassembling the panel, I
checked the lamps and found the one that sources the fiber optics to
be out. I replaced that while I was there.
Putting the top back on, I noticed that the sunvisors moved too
stiffly, so I loosened their hinge screws slightly to make it possible
to (using both hands) get the visors all the way against the ceiling.
(Too loose and they'll fall down on bumps, too stiff and you can't
push them up all the way due to their double-jointedness. So it's a
fiddly little adjustment.)
On the way to work the wind noise was much reduced, and there was no
sign of the screeching relay noise. (More time is required to be sure
that's been fixed.) But I still think the foam hose is rotted. I'll
look at that tomorrow. The center vents also blow heat, as do the
defroster vents even when set on EC. A vacuum problem, probably torn
actuator diaphragms.
Wednesday, March 23, 2005
Jill drove the car last night to orchestra practice, and received
several compliments on it, some of them quite emphatic! That's nice.
While she's no car nut I think she enjoys that sort of attention, and
it helps her to tolerate, if not necessarily appreciate, my efforts on
the car front.
Anyway, she noticed a few of the items I'd already noticed. Nothing
serious except she also thinks it handles a bit squirrelly. (She's the
first to drive it on the freeway.) I'll have to look into that, it's
probably out of alignment or something.
What I noticed after she got back is that the antenna was stuck
partially up. So this morning I removed the mast and found it
somewhat bent and binding. And gummy. So I did an elaborate
cleaning, involving sluicing it out with a succession of acetone,
Simple Green, Tide liquid laundry soap, and waterless hand cleaner. A
lot of dirt and grease came out in all these steps, but it finally
cleaned out. I used a final acetone wash to get out all the water,
did some (I hope) corrective bending to get it straighter, lubed it
with spray silicone, and re-installed it. That took a lot of time,
but now it seems to work right. I think it was the usual tired old
story: PO finds the antenna getting sticky (actually due to dirt),
starts lubing it inappropriately, finds the problem getting worse, and
eventually gives up with the antenna sticking out a lot, whereupon it
gets bent in a parking lot—Game Over.
Next up was to examine the foam ACC hose. It's easy to pull the glove
box liner to see. And it was rotted! (It's nice when a
diagnosis pans out.) I already had the necessary pipe insulation from
previous car repairs, so it was an easy matter to cut another length
and install it. Then I put the glove box liner back. That should
cure its cabin temperature regulation anomalies.
Still with some time left, I unscrewed the cell phone mount from the
console tray. It's a big old analog cell phone, and took up the whole
tray. My wife requires only two things of a car beyond the basics:
that it have a working radio, and that it have a useful cupholder. We
have a very useful (though homely) sit-in-the-SL-console weighted
cupholder from her 450 SL, but it had no place to sit with the
cell phone there. I disconnected the handset from the mount, then I
unscrewed the mount from the floor of the tray and found the tray
carpet pretty well mashed and gummed up underneath. So I pried out
the carpet and gave it a good wash. That nearly eliminated any signs
of there ever having been a phone screwed to it. The cupholder sits
nicely on a cloth in the tray now, and the cell phone mount is draped
behind the seat for now. Actually removing the mount completely will
require removing the console itself. This will wait until the
dashboard comes out (as it's a necessary precursor) for crack repair
and vent pod replacement. That might be awhile!
To finish off the morning, I reinstalled the chrome seat hinge cover
piece that I found in the glove box, and pushed back into place one of
the plastic hinge trim pieces of the armrest. Tomorrow I think I'll
pull the steering wheel and the instrument cluster, to tackle the
clock and intermittent wiper problems.
Thursday, March 24, 2005
This morning I emptied the trunk of all of yesterday's shopping booty,
and decided to do something about the (non-)spare tire while I was
there. What was in the well was a loose tire, and a chromed alloy
wheel was in the trunk itself. (Also there was the official toolkit,
which I've never seen in any of our other used MB's!) This wheel had
chalk circles on its inner surface, corresponding to some very bad
pits on the inside. My guess is that the tire developed some slow
leaks due to these pits and was retired (!) at that point. (I'm
wondering if I can repair these pits using the aluminum welder.)
These pits are unusual, I wonder if they're due to flat sealant or
something? Anyway, I removed this stuff and put in one of the summer
wheel/tires from the 450 SL as a temporary expedient. It's a
14" wheel rather than the 15" that belongs there, but at least
it's round and alloy and ought to bolt up OK.
Next up was to address the front lighting situation a bit. I found
that one headlight fuse (that also runs the nonexistent fog lights)
was blown, so I replaced that. I also found that one turn signal bulb
was in backwards, and that the other wasn't fully seated. (These lamp
housings are badly damaged, I think due to a curb incident that also
took out the fog lights.) With this put right, all the lamps on the
car now worked properly, and the lamp-out indicator stayed
extinguished. I also adjusted the high beams upwards a bit, as they
were lighting the road surface too much last night.
Finally I got to pulling the steering wheel and instrument cluster.
This went just fine. I accidentally flashed the clock power lead
against ground, and it sparked and blew the fuse so I know the defunct
clock was getting power. When I removed the tach/clock pod from the
cluster, I could see some burn on the circuit board of the clock. The
clock is fairly easy to remove, you just have to remove its hands, all
the relevant screws, and the faceplate of the instrument. The
faceplate then pivots around the tach needle shaft enough to give you
room to remove the clock. Then you apply heat to the ground pin with
the soldering iron and the clock pulls out of the pod. Unfortunately,
while setting the clockless pod aside I heard a clatter, and looked to
see that the tach needle and faceplate had fallen off. No problem,
except that some of the tach's shaft was still in the needle!
Oh crap, the tachometer shaft broke in half!
Sigh.
Ignoring that for the moment I looked at the clock. There is a
resistor in series with the clock's power line that had overheated and
burned itself and the circuit board underneath it. I pulled the two
100 µF/16 V electrolytic capacitors, and found them
both shorted. This is an unusual failure mode for these, usually they
open up, drop in capacitance, and/or develop a lot of series
resistance. Because both parts were shorted, clock power
through the resistor was shunted directly to ground. This was too
much heat to sustain, and it cooked. (Good design would dictate that
a larger-wattage resistor be used in case there was such a short. Not
enough current to blow the fuse, but too much to dissipate safely.
Bad!) Some scrabbling around in the junk box yielded a couple of
replacement capacitors that tested out OK on the bridge and the
leakage testers. I soldered them back in place. I couldn't read the
burned resistor's color code anymore, but I measured it and found that
it was still 200 Ω, a reasonable value. So
I grabbed a junkbox 220 Ω resistor and put
it in place. (Some extra work was required to bypass all the burned
traces.)
Applying +12 V power (current-limited to 100 mA for safety)
resulted in a small current draw, and the sight of the gears moving in
pulses. It worked!
Clock reassembly was uneventful. And now for that $#@*! tachometer.
My spare parts pile included a spare instrument cluster from a 116
gasser of some sort. (Bought because it's the same thing as a 107
cluster, and even has a 107 part number.) Looking at it showed that
its tachometer was constructed similarly, but was 10 years older and
had a slightly different part number and frequency rating. (I think
it was from a 280 6-cylinder car.) Figuring that I really had very
little to lose (except my spare $20 cluster), I popped the needle off
of this tach (using two spoons as pry bars) and unsoldered the circuit
boards from both meter movements. Then I swapped the meter movements
and resoldered the boards back in place. Then it was just a matter of
reassembling the pods and clusters. While I was there I
cherry-picked the best looking meter needles for the car.
While looking at the other cluster, I also checked the resistor in its
clock. Turns out it should be a 120 Ω
resistor, but the 220 Ω I used seemed to be
working and I was running short on time.
Reassembly went fairly well, though it's tedious. With the car back
together I replaced the fuse and found that the clock was now working.
I started the car and the tachometer seemed to be behaving itself. On
the way to work in the car I noticed no tachometer anomalies, so maybe
I was able to recover from my mistake. Whew, that could have been
expensive!
I checked the SRS lamp bulb, and it was OK. But there's still no
power-on indication, perhaps the SRS brain has been unplugged? They
may have had an always-on SRS lamp, and disabled it that way. Will
bear checking out, it may be that the same thing that was wrong with
my SL is wrong here: dead accumulator capacitors in the little box in
the wall cavity behind the driver's seat. An easy fix, if it is.
Except for the vent control problem, the ACC system is working
fine. It's now set-and-forget, as it should be.
Friday, March 25, 2005
This morning I pulled the driver's underdash panels, to access the
intermittent wiper relay and the airbag connectors. (Silly me read
the manual first, which said that the airbag connector was under the
passenger floorboard. So I pulled that out, only to find nothing like
that there. At least I got to vacuum under the carpet.) The wiper
relay was broken off in its socket! Looks like somebody must have
kicked it, though it's pretty hard to get a toe on it. Anyway, I
pulled the piece of PCB with the pins on it out of the socket, and
fishing around behind the carpet yielded the body of the relay. I
removed the relay cover and super-glued the pin-holding PCB back
together, then I unsoldered this board from the main board, which is
at 90° from the broken board. With the broken board separated, I
was then able to scrape the solder mask from over the trace breaks and
bridge the breaks with solder. Finally I soldered the board back to
the other one and snapped the pair back into the cover.
Upon installation back into the socket, the wipers then functioned
perfectly. Success!
With the under-dash panels all removed, I was able to liberate the
little fiberboard side kick panel, which has a vinyl skin glued to it.
The glue had failed, and the vinyl was all wadded up and torn. Using
spray glue, I was able to glue it back more or less in place, which
from a distance makes it look good again.
A similar repair was conducted on the fiber panel that is closest to
the firewall. This had been installed improperly at one time, and one
end was folded over and half torn loose. Some super glue and a
crimped-on metal splint restored it to normal form.
I checked the two red airbag connectors, and with either one unplugged
(or restored) the SRS lamp still refused to light. The SRS system may
or may not be working, all I know is that the lamp bulb is good but
doesn't light. I'm going to have to check out the two boxes in the
side wall behind the driver's seat, and probably the main SRS box
inside the console. That'll wait until the console comes out
sometime.
With nothing left to do in there, I then reinstalled all the
under-dash covers.
Monday, March 28, 2005
Jacked up the front of the car via the crossbeam to liberate the front
wheels from the ground. No sign of particular wear on tie rods,
etc. to cause squirrelly steering, so I'll take it in for an alignment.
I know this guy, he's mostly retired and works out of his garage now,
but only on cars he likes. Such as SL's!
While I was there I noticed that the brake bleed screws were missing
their rubber caps, so I put some on. (The front, I haven't looked in
back yet.)
During the day I managed to find (on-line) a manual for the wretched
Sony CDX CA-400 CD player that's in there, only to find there's no way
to turn off the stinking beeping! The CD player beeps after key-off,
to alert you to the necessity (not!) of removing the detachable
faceplate. This has sealed its fate, it's coming out! (Someday.)
In the evening I noticed that the headlights still are out of
adjustment, so I tweaked on them some. This will be a gradual
process, I think.
Tuesday, March 29, 2005
Took the car in for an alignment to address the squirrelly handling.
The bad news is that both lower ball joints are completely unsealed,
and rusty. Shot, that is. He was able to get it handling a bit
better, but strongly advised against driving it much before getting it
fixed. He'd be willing to fix it, but he doesn't have the special
ball joint press for these cars. Oh joy, more fun for me!
Tuesday, April 12, 2005
Took the car in for new lower ball joints. (I'd researched the ball
joint press idea, and found it to cost more than I was willing to
spend. The tool price has gone up, from expensive to really
expensive!) The car had begun to squeak a lot. (We kept it off the
freeway during this time, I just commuted back and forth to work in it
since it was licensed and insured, unlike many of our other cars. [To
keep costs down, we run them in shifts.])
Wednesday, April 13, 2005
Mechanic called, said it needed an idler arm bushing kit too. While
I've done this on an SL already (so I know how), I'm a bit short of
time right now. So he's doing that too.
Thursday, April 14, 2005
Picked up the car, the bill was about $475. Handling is much
improved, now I need to get it aligned again.
Friday, April 22, 2005
Weather is very good, so the top came off for today. While in the
area, I used touch-up paint on the hardtop pecks on the horse collar.
Also, there has been a persistent squeak on the passenger side, so I
lubed the pivot points of the soft top, and greased the latches of the
seatback. We'll see if that helps.
Sunday, April 24, 2005
Yesterday I bought ($4) a center rear seatbelt at the U-Pull, it came
out of a '85 500 SEL. It's a bit odd for a 107, but it fit well
enough into the back deck area so that our son's car seat can be
tethered in place for family outings in the convertible. When not in
use, it'll tuck back underneath the deck out of sight.
Monday, April 25, 2005
Yesterday I bought ($6) a new M117 air cleaner housing at the U-Pull.
The one in the car appears to have been attacked with an aggressive
cleaner (lye?), and has a mottled appearance. While the new air horn
is on the wrong side of the housing body, the cover appears to be the
same (though it bears a different part number). I just cleaned the
new cover and swapped it, for a nicer looking underhood appearance.
The body (sides) are still mottled, but that's not as noticeable.
Tuesday, April 26, 2005
The free-standing cupholder from the 450 SL worked great (it's
weighted down with an old timing chain), but was a beige color that
seriously clashed with the blue interior. Yesterday I bought a
99-cent rattle can of dark blue vinyl paint at the liquidator's, and
now the beige is no more. It looks pretty good, though the "Slate
Blue" isn't quite dark enough.
Wednesday, April 27, 2005
Got the car aligned (again), for $40. With the new lower ball joints,
this time it 'took'. The alignment guy said that the intermittent
click I heard on some turns could have been bad subframe mounts, as
they were pretty bad. He didn't see anything else wrong. As a
kindness he swapped in a better used subframe mount (or bushing?) for
the worst offender, and said that would probably cure it. We'll see,
so far I've noticed no unusual noises.
The "560 SL" badge on the trunk lid started to peel off the car,
so I carefully pulled it off the rest of the way, and when I got home
I washed the trunk lid area and the back of the emblem with acetone.
Then I used weatherstrip cement to put the badge back on, and a bunch
of spring clamps to hold it in place until it dried.
Saturday, June 4, 2005
With the more-or-less completion of the 450 SL's
restoration, this car can now get some attention. As it was warm, I
got out the AC gauges and had a look. Dead, dead, dead. No pressure
at all. A little bit of diagnosis shows a profound leak somewhere at
the compressor. I wonder if this is due to its having been converted
to R134a? I've heard nothing good about the durability of such
conversions. Regardless, this promises to be a fun-fest!
Thursday, June 9, 2005
I installed the keyless entry system I
bought for the car. Easy, and works great.
Wednesday, June 15, 2005
I installed the used right-hand fog light I had bought a couple of
months ago. Before installation I (re-)painted the shell black, and
straightened out the bent mounting ears. While there I solved the
mystery of the exploding fuse: the DPO (or whomever) had taped the
wires together when they removed the old fog lights (presumably
destroyed in a curb-kissing incident). That, at least, was easily
rectified! I still need a left-hand fog light, and at least one
turn-signal shell, and both turn-signal lenses.
Next I removed the AC compressor. Easy to say, not so easy to do. I
had to jack up the front of the car and remove the fan, clutch, and
shroud to make room. You also have to (temporarily in this case)
remove the hose manifold from the rear of the compressor in order to
get the compressor out. The compressor is held in with four long
bolts. There is one bolt holding the manifold to the compressor, and
a bolt and a stud holding the manifold to the engine. I then
disconnected the two hoses at the car side, leaving 1–2 foot
pigtails on the compressor end, put the now-free hose manifold back on
the compressor, and corked off all four open pipe holes (using rubber
stoppers) to prevent moisture entering the system. (It's handy to
keep an assortment of stoppers in various sizes around.) The low-side
fitting is on this pigtail, so I then submerged the entire compressor
in a tub of water and pressurized the assembly with propane through
the fitting. The leaks weren't small, they boiled the water! Some
examination showed them to be coming from the joints where the
manifold adapter bolts to the compressor body, and not the shaft seal
as I had feared. Removing this adapter revealed four more O-rings
(besides the two on the hose manifold), two of which looked badly
chewed. This didn't look like chemical degradation, more like
mechanical damage, but I'm told that this is a classic sign of R134a
eating R12 rings. I will purchase six new O-rings, perhaps tomorrow.
The existing O-rings are all black, and not the newer green or blue
ones. Obviously the R134a conversion was a cheap and nasty one.
Next I used gasoline to flush out the R134a conversion's nasty Ester
(so saith the tag) oil from the compressor. This is only the
first-stage flush, more steps will be required. Also present was
green dye, presumably from a leak-hunting session. I don't know how
I'll get all the Ester oil out of the system but I intend to: this
system is going back to R12 (or compatible), if only for the benign
(and highly functional) lubricating oil associated with it. Ester oil
doesn't lubricate too well, and breaks down easily.
The first step in removing the compressor was to remove the idler
pulley, and I found it to be a bit 'dry'. Not bad yet, but definitely
in need of lubrication. I took this opportunity to try an experiment
I'd been meaning to conduct. I took my vacuum oil sucker and wrapped
a wad of tape around the end of the hose that would wedge in the spout
of a plastic funnel. Then I put a rubber stopper in the center hole
of the pulley. Next I fired up the vacuum pump and dropped the pulley
into the funnel, and pressed down on it to get a good seal. The
pulley seated firmly and the vacuum pump started to draw down. Then I
just squirted ATF around the bearing, and watched it get sucked into
the bearing. A few sessions of this, alternated with removing the
pulley and spinning it, resulted in a quiet, smooth bearing. That
should extend its life!
Thursday, June 16, 2005
I went to a local AC servicing shop to get new O-rings, and they said
I needed an odd size, and to get them at NAPA where they got theirs.
Oh. NAPA next door said they didn't stock any such things, and sent
me downtown to their main store (big pain). There they measured them,
and found that they only had two in the R134a variety, at about $0.80
each, and it could be weeks to get more. They had a bunch in a
slightly larger size, which could (just) be made to fit in place, but
they were $4.40 each! No, thanks. I settled for four more of the
right size, in black (R12), at $0.77 each. That'll do, as I'm
intending to use R12 (or compatible) in it anyway. Annoying that I
can't make it R134a compatible in any kind of timely fashion, but
c'est la vie.
Friday, June 17, 2005
I put a splash of R12-compatible oil in the compressor and worked it
into the mechanism, and re-installed it using the new O-rings. Then I
put back the fan, clutch, and shroud. I left the AC piping
disconnected, and corked off. I'll vacuum it later, and add a
measured amount of oil. I have decided against a full flush, largely
because it's so incredibly time-consuming.
Saturday, June 18, 2005
I added about 100 cc of R12-compatible mineral oil to make up the
balance of what a 'dry' Nippondenso 10P17 is supposed to take
(120 cc), and vacuumed the system for about an hour and a half.
While vacuuming, I put a heat gun on the drier to try to drive
moisture out of the desiccant. I then charged the system with test
refrigerant and it seems to be holding pressure. Vent temperatures
were 41 °F, though ambient was only about 70 °F.
Further use on hotter days will be the real test.
Wednesday, July 13, 2005
We're preparing for a cross-state road trip in the car, and I decided
to put one of our Peltier-effect coolers in the back bucket to hold
snacks, etc. Unlike the SDL or the truck (our usual road-trippers),
the SL only has one lighter socket; we often use two: one for a cooler
and one for a cell phone. While we could use one of those splitter
devices, access to the SL's socket is awkward, and cable clutter would
end up very annoying in the limited space that's there.
On the other hand, there's a completely unused (in the summertime at
least) high-current connector in the back of an SL: the window
defroster socket. So what I did was to take a two-conductor connector
pair from a boneyard 123's sunroof motor (it's the same connector) and
connect the two sets of wires together. This made an extension cord
of sorts for this socket, which then in turn plugs straight into the
back of a boneyard 115's lighter socket (which also uses the same
connector). After cleaning (Dremel wire brush) the inside of the
lighter socket and dressing the wires, the result is a nice little
foot-long extension cord that hangs out of the side wall of the SL,
looks decent, and supplies +12 V power to a standard lighter
socket on demand. Into which we plug in the cooler.
It works fine. Of course, we'll have to keep an eye on the defroster
switch lamp: since the thing is on a 20-minute timer we'll have to
periodically turn it back on during our trip. A small price to pay
for less clutter in the car, methinks. If it doesn't work out, we're
not out any money, all these parts were free, or next to it. And we
can always plug the cooler in up front in a pinch.
I also removed the intermittent passenger door light switch, and
drilled out the rivets holding it together. I found that one of the
two contacts inside was deformed, probably during manufacture, so I
cleaned and reshaped the contacts and put it back together with
screws. The interior lamps now work correctly every time.
Semi-significant because this also drives the factory car alarm.
Thursday, July 14, 2005
Took a nice leisurely trip to Lake Chelan, top-down and going about
55 MPH on scenic back roads. Just like my
SL, such conditions favor good mileage and this one also turned in
21 MPG, with the AC on the whole time! (Which worked well.)
Tuesday, July 19, 2005
Removed the intermittent window switches, and cleaned them out. (The
contacts were very dirty, and usually required much cycling to get the
windows to come up.) Replaced the rockers (with the worn-off legends)
with good used rockers from boneyard 123 rear window switches. The
switches now look and work like new, for $4 (the price of the two
boneyard window switches).
The pin holding the rear of the shifter surround into the console had
been broken off and glued before. The glue failed, so I re-glued the
pin back on with Shoe Goo.
Thursday, July 21, 2005
The horn has always sounded weak, so I jacked the car up to have
a look. Both horns looked OK, so I removed them and tested them
on a battery. The low-tone horn did not work, though sometimes I
could get it to go with pounding. Shooting it full of contact
cleaner (through the adjustment screw hole) made it worse, and it
was totally defunct after that. Nasty-looking (rusty?) fluid
came out of it with shaking, I imagine it got filled with water
or something at one point and was in pretty bad shape internally.
Interestingly enough the bad horn was a Hella, while the other one was
a Bosch. Looks like one of these was a replacement already.
Anyway, what's the point of having parts cars if not to rob? I
removed the low-tone horn (Bosch) from the 124 300TD in the woods, and
tested it. It worked. So I installed it in place of the bad horn,
using the old mounting bracket (which is not straight on a 107, unlike
the 124's). Success! The missing low-tone horn is the louder of the
two, so its loss was pretty significant.
Saturday, July 23, 2005
Since the old SL got itself washed and waxed, it
was looking a lot sharper than this one, so today I washed it. That
helped a lot. I also used touch-up paint to take care of the small
nicks I found. (Maybe I can wax it tomorrow.)
While drying it I noticed that there was a quarter lodged in the
defroster grille, so I tried to lift it out with a forked stick (you
can't reach in there with your fingers), and promptly knocked it down
into the duct!
Crap. At least I could still see the thing lying on the floor of the
duct, it hadn't gone down into the guts (yet).
I then got a section of tecalan vacuum piping (stiff, flexible, and
non-scratching), and found that I could just fish it in and touch the
quarter with it. I then put a small blob of weatherstrip cement on
the end, and guided it back down to touch the quarter near its edge.
I then waited for a minute, and then lifted slowly. The quarter came
out! I was really sweating that one, but it worked out fine.
Still having a little trouble with the passenger-side window switch,
so I removed it and cleaned the contacts again. That seems to have
cured it.
Sunday, July 24, 2005
Waxed (Carnauba) the car.
Friday, August 5, 2005
Jill noted last night that the glove box light was sometimes coming on
by itself. I checked today, and found that one of the hinge screws
was loose, preventing the door from closing fully, so I tightened it.
Much better.
Since I was there in the garage, I got out the NOS fog lights I got on
eBay recently ($58 for two, a screaming deal!) and had a close look.
The lights are new, but the lenses looked somewhat used. No big deal,
just dirty/fogged. (One looks like a lamp burned up in it.) Not
pitted or anything, and the reflectors and lamp bodies looked good. I
took the lenses off and put them in the dishwasher!
...The dishwasher didn't touch the fogging, so I put them in the laundry
sink and put in a strong lye solution (drain cleaner) to sit overnight.
Saturday, August 6, 2005
The lye didn't even touch the fogging, so I'll try again with a
strong acid instead. Sheesh!
Monday, August 8, 2005
No, acid doesn't touch it. If it is tungsten (or tungsten
oxide) from a lamp explosion incident, it isn't supposed to be touched
by any acids I want to mess with! (Thank you, Internet. A mix
of strong nitric and hydrofluoric [!] acid will eat tungsten. Mmmm,
tasty!)
So, I was left with mechanical means. I used some fine wet-and-dry
sandpaper, and a small screwdriver to sand/scrape off the worst of it.
You can still see it, but only if you look closely. Standing in front
of the car it's now invisible. I did scratch the inside of the glass
a bit, but it's much less noticeable than the original spiderweb
appearance of the fogging.
Then I put the two new lights on the car. They look nice!
While I was under the bumper, I had a look at the cracked air dam.
(Probably from the same curb incident I theorize took out all the
lights.) The original glue on the back side had cracked and was
falling off. Probably epoxy, or something equally brittle, not good
for fixing fiberglass anyway. I took some acetone and cleaned out the
crack as best I could, then used some good gap-filling cyanoacrylate
glue to stick it back together. Then I used Shoe Goo to pot the whole
backside of the crack, as this is where any strength of the repair
will come from. The cyanoacrylate glue is just to hold it together in
place while the other glue sets up, and to fill the crack. With that
in hand I used touch-up paint to cover the crack. It doesn't show
anymore, unless you're looking for it.
If this doesn't hold up the next try will involve actual fiberglass.
I hope I don't need to go there, it's messy, and I'd need to get more
as I'm out of that.
Sunday, August 21, 2005
Jill has been complaining about the sun visors falling down a lot, and
the little strips of paper I wedged in there don't help much. So I
took out one of the retaining clips and found it cracked (no
surprise). I cleaned the plastic with brake cleaner and fired up the
plastic welder (hot air blowpipe) to have a whack at it. I was able
to get the cracks joined up a bit using the hot air, and then I potted
(lightly) the area in Shoe Goo. I glued the tapered washer from the
retaining screw into the clip, as the spreading force from this when
it's tightened down is one of the things that induces cracking. This
went well enough that I then did the other clip. The glue is now
drying, but if it worked the body of each clip is not so splayed out,
and should grip the visor stub better. Time will tell! The sunvisors
are one of the worst design features of the car IMHO. They're
fragile, and expensive.
Thursday, September 8, 2005
My wife has been complaining that the turn signals are too dim/quiet,
and as a result end up left on more than she's happy with. (This is
one area where the older 450 SL is superior: the clacker is louder,
and the instrument panel indicator lamps are larger. I also find that
the stalk is in a better relative position on the older-style steering
wheel, but there's likely little that can be done about that.) The
stock clacker is just fine when the top is on the car, but with the
enhanced noise floor of top-down driving a louder signal is called
for.
While making the lamps brighter is likely not possible, at least
without the risk of melting plastic, the clacker is susceptible
to modification. I took a look at the ETM's schematic, and decided
that it would be very easy to tap the required signal at the hazard
flasher switch, which is quite easy to get to on the 107. So, I
removed the shifter surround and raided the junkbox for a small 12 V
relay. This I glued (Shoe Goo!) to the bottom of the wooden surround
panel, right between the hazard switch and one of the window switches.
The panel should serve as a sounding
board. Then I ran the two relay coil wires to small loops of stripped
wire that were lassoed around the 31 and 49a pins of the hazard
switch. Voila! A louder turn signal clacker. We'll have to see if
it's now loud enough to satisfy my wife. If not, I'm sure I can do
better, such as with a larger relay (a standard Bosch automotive
relay, probably).
...According to my wife, the enhanced clacker works just right. At
first the extra noise disconcerted her, due to its slight time delay
and spatial separation, but she says it is adequate to notice when
they've been left on, even on the freeway—which was the purpose
of the exercise.
Saturday, October 1, 2005
According to me, the enhanced clacker does not work 'just
right'. Sigh. I put the lid on the car today, because the weather was
bad and I was going on errands alone. (As a family we usually use the
SDL.) The clacker causes a small whine to come
from the turn signal relay, unless the turn signals are on!
This was unnoticeable with the lid off the car, but far too noticeable
with the lid on. Obviously the circuit is too simple in its current
form, but I have hopes that a cure won't be too difficult. (The
clacker's coil resistance is too low, and the turn signal relay is
sensing its presence, and reacting to it.)
Looking at the car's schematic again, Plan B is to place the clacker
relay between the R and L terminals of the hazard switch, using
the unlit side as the relay's virtual ground. (The operating current
of the relay shouldn't be enough to cause any wrong-side lamps to
light.) This operation is simple, and only requires moving the wire
lassos on the hazard switch.
If that doesn't work, Plan C is to use diodes to combine the R and L
terminals (in conjunction with the real ground at pin 31). Plan D
reverts to Plan A's wiring, but uses a transistor or two to amplify
the signal so that the load on the turn signal relay is reduced.
(Switched power is also available at the hazard switch.)
If that doesn't work, Plan E involves modifying the turn signal
'relay' itself, probably by putting the clacker in parallel with the
real internal relay. (Plan F is just to rip all the crap out and call
it a bad idea.)
Plenty of plans, one of them ought to work!
Sunday, October 2, 2005
Plan B worked, according to, ahem, plan. I moved the lasso
wires to the L and R terminals of the hazard switch, and the clacker
still clacks, the signals all work right, and the whine is gone.
Using a virtual ground this way, the extra clacker doesn't clack when
the hazard lights are on, but that is of no consequence. It's possibly
even preferable.
Monday, December 12, 2005
The used turn signal I won on eBay came in today, but an edge was
chipped off the lens. So I glued it back.
Tuesday, December 13, 2005
This morning I installed the turn signal. The other side still needs
a lens, and I suppose I'll need to get that new.
Monday, January 16, 2006
Put the car on the battery charger for awhile, then hooked up a
battery tender. We're not driving it, so it really needs this bit
of TLC.
Tuesday, August 22, 2006
Won an eBay auction for two used turn signal lenses, $16.01. Much
better than the pairs of lenses that have been showing up for $46/pair
(plus shipping) for the last six months.
Wednesday, September 6, 2006
The two eBay RF turn signal lenses showed up today, they look good.
(Better, in fact, than the LF replacement lens that's now on there,
but tucked under the bumper as they are it's not that easy to tell.
In fact, the major objection to the POS substitutes that were there
when we got the car is that they're not weathertight, not that they're
particularly ugly.)
I put one on the car in place of the ugly aftermarket plastic sheet.
The POS was held on with the original screws, so I transferred them to
the eBay lens that didn't come with screws, and put the other one on
the shelf as a spare. Looking good!
Tuesday, May 15, 2007
With the sale of Jill's 450 SL it was time
to dig this car out of storage. It was filthy, but it had been on a
battery tender so it started right up. I drove it into the lawn and
washed it. What a transformation! I dried it off then put it back in
the garage to lift off the top. (Had to do some cleaning under its
rim.) Drove it to work, and at lunch got it emissions tested and
licensed. Nice car. Stupid sunvisor keeps dropping down on bumps,
though, and the keyless fob seems to have forgotten its purpose in
life.
Wednesday, May 16, 2007
I put on the new license plates (stupid State, there's absolutely
nothing wrong with the old ones, I think they just do it to get more
money periodically), then cleaned up the trunk, sorting out what had
come from the 450 SL (which I had thrown indiscriminately into
it). I vacuumed it out and put in a set of (miscolored) floor mats,
I'll get a better-matched set later. The car has a ratty steel spare,
with associated lug nuts, so I tried (again) to get its alloy wheel
fixed up. We got the tire dismounted (PITA!), but the inner tube I
procured for it needs a buffer pad as the inside of the alloy is a bit
rough where last year I tried, unsuccessfully, to weld up the
pinholes. Later, I guess.
I installed the new hardtop front mount washers. (That's always
surprisingly difficult.) I also put a piece of plastic sheet into the
loose sunvisor socket, that should tighten it up a bit. When I got
out the spare fobs and the instructions for reprogramming the keyless
system it started working again. Weird. The car's all ready for Jill
to drive.
...
Out at lunch I was buying a battery for the 190D
at Les Schwab and picked up a used (dead) inner tube. That should supply
some rubber for a protective band around the alloy wheel's inner surface.
Thursday, May 17, 2007
Got the spare tire the rest of the way dismounted. (PITA!) Cleaned
out the inside of the tire, and inflated the dead inner tube in order
to plan the cuts. Cut out the inside ring of the inner tube. It was
too large (of course) to stretch over the hub of the wheel. It was
also too wide so I first cut a strip off the side. Then I took out
about a 4" section containing the valve stem. This resulted in
about a 2" overlap of the remaining strip when wrapped snugly
around the hub. I then washed off the overlapping ends with acetone
and smeared on weatherstrip cement. (The good stuff.) When that
tack-dried I carefully pressed the glued flaps together. After only a
short period for that to set up I rolled the resultant band onto the
wheel around the hub.
Next I found I had to cut out a hole in the band for the valve stem.
I also found that my new inner tube had a shank much too large to fit
through the wheel's hole, so, as the wheel was essentially ruined
anyway, I drilled out the hole with a 9/16" bit so that the shank
would protrude a usable distance once inserted. The hole's still not
really large enough, but that's about as big a hole as I can drill
there easily.
Then I remounted the tire. (PITA!) I used Simple Green as a spray-on
mounting lubricant, and put on the one side. Then I tucked the inner
tube into the carcass, pushing it well out of the way of the rim and
making sure the valve stem was in the wheel's hole. Then I put on the
other side. (PITA! Have I said that lately?) I found that my air
chuck wouldn't reach the poorly-fit valve stem, but that another one I
had for doing truck tires would. I inflated the tire until the beads
popped into place, then removed the valve core and deflated the tire
fully. Interestingly, once the inner tube had deflated the
tire started making air noises. I think there was air
trapped between the inner tube and the tire that was then able to get
out. Finally, I inflated the tire to spec. I put it aside where I
plan to monitor its pressure for a few days. If it holds air I'll
swap it into the car.
Monday, May 21, 2007
I removed the loose driver's seat, and was again reminded that you do
not unhook the spring-loaded elevator mechanism. The seat
slides forwards (or is it backwards?) off of its studs. Getting that
big spring put back into place was a giant pain. One of the two
mounts for the elevator's cross shaft is buggered up, and has some
doesn't-fit-right US thread bolt wedged into it. Unfortunately a more
proper bolt from the junk box wouldn't 'bite' anymore, so I had to
leave the mess in place. To take the sting out of this extra chore I
found 39 cents under the seat. Woo-hoo!
Anyway, with the seat out I found that there was one (only) of its
eight glides missing. I got out one of the new ones (I'd bought a
dozen!) and put it in place, cleaned out the tracks and re-greased
everything with my old can of Lubriplate. At that point the track was
still a bit loose, unlike the other one. I pulled the other one back
off and found that half of its glides, the upper ones, had rubber
spacer strips inside them, whereas the loose track had none. I cut
some strips of inner tube rubber to tuck into the glides, and after
that they fit snugly in the track.
With the seat out I also noticed that the metal spine through the
leather that the hog rings holding the back of the bottom in place tie
to had slipped sideways far enough to release one set of hog rings to
pull directly on the leather. Fortunately the leather had not yet
torn and I was able to get the spine slipped back into place. I then
reinstalled the seat. This, apparently typical for 560 SL's, is
not all that easy. But I persevered and got it back into place
without noticable incident. It feels a lot nicer than it did, and
slides easily. No more rocking.
Then, because it's a rainy day, I put on the hardtop for my wife.
...We met for lunch and I noticed that one of the front tires had
tread separation all around the outside! We knew it was time for
tires, but not that it needed them that badly. Later she stopped off
at Les Schwab and put on a set of unidirectional Toyo Turezas,
80 kmi warrantee. About $570. Three of the four tires were
crap, but one didn't look too bad. I had her keep that one, we may
find a use for it on some car or another. Probably for a spare.
Tuesday, May 22, 2007
Made the extension plug for the embedded garage door opener. This
turned out to be surprisingly difficult, mostly because I don't have
enough hands. I took a cut-off pigtail connector for a defroster
switch and some random bit of a MB relay block (126?) that I found at
the junkyard that had male connector pins, and soldered four male and
female pins together end to end. (Coming up with male pins is
relatively hard, most of these cars' connectors are female, and most
of the male pins are embedded in assemblies that don't come apart.)
The male pins just fit through the socket's snap-on retainer, and
protrude nicely. I then soldered two wires to the 31 (ground) and A
(Off) pins. I then built another 9 V regulated battery
replacement using a 9 V Zener, a 47 Ω
resistor, and the top piece of a dead 9 V battery. (I had left
the original in the 450 SL for the next owner, he seemed
interested in using it.) I wired this up and put it in the battery
compartment of the garage door opener. I also moved the shorting wire
to the correct switch on the opener for this car's location. (It's a
triple opener.)
So, what I ended up with is a plug for the defroster switch that has
pins sticking out the back onto which I can plug the car's connector,
no surgery to the car's wiring harness required. (Unlike on the
450 SL's prototype.) The opener is then tucked into some tidy
under-dash place. Unfortunately I ran out of time to install it, but
I did test it out. Worked fine.
...At lunch today we went to the park, and as it was warm when we were
leaving I tried the AC. It works! Apparently it doesn't have a bad
leak anymore.
Wednesday, May 23, 2007
I installed the embedded garage door opener. This turned out to be
harder than I thought (big surprise!) because I had forgotten how
tight the connectors fit through the holes in the dash. There wasn't
room for the extension plug to fit through with its wires coming out
the side. I had to bore a hole in the car's connector shell so that
the two wires from the extension plug could go through it
rather than around it. And, of course, with all the messing around
one of my two wires broke off... So I ended up having to drag the
soldering iron into the car anyway, though avoiding this had been the
whole point of making the extension plug in the first place! To avoid
having my mated pins fall apart during the repair I clamped it in a
vise grip, but with a layer of thin cardboard for thermal insulation
so that it could be heated to soldering temperature. It worked. I
should have done it that way when making them in the first place.
There is an access hatch in the rear of the glove box, I put the
opener behind that so that it might be possible one day to fish it
back out without removing the glove box liner. Perhaps we'll see.
Or not.
Anyway, once installed it worked perfectly and I took the roof off the
car in celebration. (It's looking like a nice day today.) I even
found 25 more cents under the floor mat! I removed the loose garage
door opener so that my wife will have to test it. I mean, 'retrain'.
Saturday, May 26, 2007
I've been musing on the idea of an appropriate Road Trip Relay for
this car. Two years ago we took it on a nice road trip and I used the
rear window defogger plug to power the cooler. However, the automatic
power-off cycle of the timer relay was a minor problem. (In the
sunlight you couldn't really see the lights turn off because the relay
had timed out, and in an open car you couldn't hear the cooler's fan
stop.) I'm hoping we will take other such trips in the future, and I
would like to improve this situation for next time. Since I have a schematic for the
107 820 00 10 defogger timer relay, and some experience modifying it, I've been
musing on potential modifications for this car. While the delayed
shutoff of the 190D's additional modified
relay is attractive it would require some rewiring of the car. Nearly
as attractive would be a modification of the existing relay to disable
the timer. I have worked up a circuit that would allow you to hold
the OFF side of the switch down for a few seconds, which would trip
the relay ON yet prevent it from timing out in this mode. You would
turn it off, normally, by actuating OFF again or by turning off the
car. Turned ON and OFF in the customary manner it would behave as an
unmodified timer. Given my apparent inability to design transistor
circuits that don't have nasty
side-effects I think I need to prototype this before committing to
it further. The proposed modifications should fit entirely within the
case of the relay. Three transistors (one PNP), four diodes (one a
Zener), two capacitors, and five resistors: nearly as much circuitry
as the timer relay itself! If I were set up to burn PIC
microcontrollers I'd be tempted to bypass all the logic and put it all
into an 8-pinner. Wouldn't be much of a program. But that's a lot of
infrastructure to deploy just for this application. [See September 18, 2009 for the next installment.]
Tuesday, May 29, 2007
The tubed spare tire is holding air well, so I put it in the car in
place of the nasty steel spare (with lug bolts) that was there. Much
better!
...At lunch I bought some gray floormats at Costco, to replace the
tan (taupe?) ones that were from the 450 SL.
Wednesday, May 30, 2007
I installed the gray floormats from Costco. They're a better color
match to blue than the taupe alternative, though I wish they carried a
few more colors. I put the little ones in the rear too, as my boy
walks through there when we're all in the car.
Sunday, June 3, 2007
While driving us all to a party my wife slapped at the sunvisor and
managed to stab herself on some sharp nasty little spring clip
somebody had installed to hold the hands-free microphone for the
(defunct) car phone in place. That's got to go!
Tuesday, June 5, 2007
I pulled the sunvisor and associated trim off so that I could pull the
microphone out of there. I peeled it down the A pillar and just
stuffed it under the dash, I'll do more someday when I remove the rest
of the car phone. Since it was raining I also put the top on for her.
I gave her that sharp spring clip, she didn't seem to appreciate
getting it too much! (She did appreciate its removal from the car.)
Wednesday, June 6, 2007
At lunch with the family I noticed a bit of a gas smell around the
car. No drips, but I will have to look into that.
Friday, June 8, 2007
I prepped the car for Jill's cross-state road trip to see our niece's
Christening. I put the cooler in the bucket and hooked it to the
defroster plug. I washed the car, then took off the air cleaner to
look for gas leaks. Found some! Two of the fittings on the fuel
distributor looked damp, and the body of the electrical dingus on the
side was weeping. I removed all these items and cleaned up the seats.
That cured the distributor leaks, but the dingus was still leaking
gasoline from its weep holes. I went to my convertible in storage and
stole its electrical part, and put it on instead. (It must be love!)
Other than a fuel fountain or two during installation it looks good.
(I put the bad part on my car, to plug the holes at any rate. Also I
had to clean the mouse nests off of the engine, sigh. I've got lots
to do down there now.)
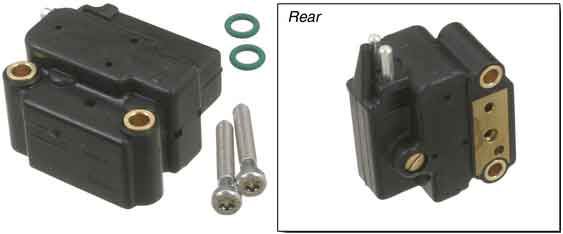
Unfortunately I believe this leaker is the E.H.A. valve, and is a $300
item on Rusty's site. Yikes!
She also reported that her window switch had stopped working, so
I tore that open and cleaned it. It works again.
...Later at lunch with me, on her way out of town, my wife reported
that it was running rough. I took a quick test drive, and it indeed
wasn't running too smoothly at idle. (Though the gas leaks were
cured.) It smoothed out as it warmed up, so I'm guessing that there
may have been a bit of dirt that got into the system when it was
opened up, or that the replacement EHA requires a different adjustment
setting on the fuel distributor. We'll see how it's doing when she
gets back on Monday. A couple of nice long cross-state freeway drives
ought to blow out the cobwebs, if anything will.
|
I did some more surfing, and it seems that Bosch used this particular
EHA on most gasoline Mercedes in the 80's-early 90's, though
apparently on nothing else. Used supplies will be relatively limited
if I can't also shop Audi/VW/BMW wrecks of the era. Some parts sites
seem to imply that the 190E uses a different EHA, so they could be
out. (This is not particularly clear in my on-line research.) At
home I hit my copy of the US EPC for this SL, and came up with a part
number and a where-used (application index):
This shows the 190E uses the same part, so I have contradictory
stories, unless there are other 190E's. The service manual I have
indicates that some 190E 2.3's before '87 use 102.961 engines, and
some use 102.985, great! The 2.3-16 is also off my list, if I can
believe this chart.
|
A 000 070 39 62 Governor
| 102 | .985 | 190E 2.3 | | 116 | .965 | 420SEL
| | 103 | .940 | 300E 2.6 | | 117 | .964 | 500SL
| | | .942 | 190E 2.6 | | | .965 | 500SE(L)(C)
| | | .981 | 300SE(L) | | | .967 | 560SL
| | | .983 | 300(T)E | | | .968 | 560SE(L)(C)
| | | .985 | 300(T)E | | 119 | .960 | 500SL
| | 104 | .980 | 300CE
| | | .981 | 300SL
|
|
That's not too short a list of wrecked cars to shop from, though some
of them are a bit new to stumble across in the low places I frequent.
The 190E's are likely to be the most fruitful source.
It's just that I balk at spending $300 for a new one. It's
so small!
Friday, June 15, 2007
I called a craigslist ad. where a guy is parting out a 190E. When we
finally got done playing phone tag it turns out he wanted too much for
it, the engine was a runner. He knew what an E.H.A. valve was,
anyway, and what they cost new. We'll keep looking.
Saturday, July 21, 2007
My wife reported that there has recently begun a horrid scraping from
the RR wheel, and today I got a chance to look at it. Yep, one of the
brake pads (rock-hard semi-metallic by the looks of it) was worn to
the metal. (The other was decent enough still.) I replaced it with a
used pad I had kept from the Chicken Wagon for
just such an eventuality. That should stave off its
eventually-required brake job for awhile. (It's a really quick job to
switch pads on an MB, if that's all that needs doing.)
The car desperately needs a new muffler, the bad one on the car is
peeling apart and is extremely rattly. If it rattles while removing a
wheel you know it's bad!
Jill called from the road and said the sound was gone, and was quite
happy about it. The sunvisors are still falling down, however, and
she is happy about that, not. She says that she has again
received a number of compliments from her orchestra buddies on her
nice car, I think she is pleased about that. (As am I.)
Tuesday, September 4, 2007
Daniel's first day of school. (Kindergarten.) My wife came by work
to take me out to lunch. Just like a date! Anyway, the antenna was
partially up and I thought I'd grab it and work it up and down a bit,
cleaning off the dirt with my hands. (I do this from time to time.)
The antenna came apart! One of the segments popped out, there's a
coppery split bushing that worked its way past the crimped over top of
a segment. I couldn't get it back in by hand, I told her not to
extend the antenna all the way until I could deal with it. Crap.
Oddly enough, my wife didn't seem all that pleased with how it worked
out.
Wednesday, September 5, 2007
I pulled the antenna mast out and played with it for awhile. I got it
cleaned out some, but I was unable to get it back together with all
four sections working. (I think they're crimped together during final
assembly, so they're not really repairable.) It's hammered together
now such that the one sick section is more-or-less permanently stuck
down. It's only three sections now, it could really use a new mast!
Monday, September 10, 2007
Last night the lamp-out warning light was again on, but this time the
bumpy road to the house didn't turn it off. (Jill says it's on most
of the time.) So I walked around the car and found that the left
front side marker lamp was out, and came back on when I thumped it
with my hand. Just have to love an intermittent electrical problem!
So this morning I pulled the headlamp assembly. The USDOT lamp
assembly is definitely a second-class citizen, you need a screwdriver
to remove 6 screws in order to get the lamp assembly out, and a wrench
to remove three 8mm nuts in order to get the side marker cover off to
expose the bulb. How GM! (The bulb was bad, so I replaced it. The
difficulty of getting to this bulb meant I used a brand new bulb, not
a used one.) What a contrast to the ease, for example of bulb
replacement in a 123, 126, or 201 body. Or for that matter, the trunk
lights in the 107.
Since I was in the area I tackled the surface rust that was beginning
on the crossbrace in front of the fan, and on the vertical wall behind
the auxiliary fan dropping resistor. I brushed off the rust, chipped
off any loose paint adjacent to it, and spray-painted it. First with
primer, then color coat. (Rattle cans, of course.) This has been the
only sign of rust on this car, I definitely don't want to let it gain
a foothold.
Also, last night I noticed that the LR brake was scraping, so I jacked
it up and checked the pads, one was down to the metal on the edge. I
replaced it with a good used pad I had, the other one is good for some
few thousand miles more. Next time I need to just replace the full
set. It's sure easy if pads are all you are doing, jacking up the
car and pulling the wheel is the most time-consuming part.
Oil. I finally checked and I've never changed the oil on
this car, and we've driven it in excess of 10,000 miles! Oops. I
sucked the oil out and put in new. I didn't have time to do the
filter too, I'll get that next time. (I usually do the filter every
other time anyway.)
Tuesday, September 11, 2007
At our first PTA meeting (?) I noticed that Jill's tire was very low.
I had her drive by Les Schwab and they found a nail in it. That was
certainly easier to deal with than me having to do anything.
Friday, September 14, 2007
Jill handed me a package of new sunvisor clips. Those remanufactured
ones, $50 for the set of four pieces. When we were driving this car
this evening her visor fell down several times. She'll allow me until
tomorrow to install them!
We'd gone to see Seussical, and Jill commented that she
thought the headlights were cutting out at times. I didn't notice
anything, but we've seen this before with the
SDL. (It was the combination switch going bad and cutting out the
low beams on right turns.)
Saturday, September 15, 2007
I installed the new sunvisor clips. Though in sorry condition the old
ones went to the 380 SL, which needs one
set. (I should be able to paint them black to match.) I couldn't get
the old male pieces off and there was nothing wrong with them anyway,
so I only installed the new sockets. The other parts can stay in
reserve.
Monday, September 17, 2007
Weather's turning colder, I put the lid back on her car.
Wednesday, September 26, 2007
Last night Jill informed me that the car's ACC seems to be heating too
much, and that she turns on the AC to tame it. This time of year?
Something's wrong. I pulled the monovalve insert and found dried
coolant residue in the spring washer, and its solenoid plunger was
waterlogged. The seal diaphragm, however, isn't torn that I can see.
I wonder what's up with that? I cleaned it out and put it back. (For
reference, the assembly order of items into the body is plunger, small
washer, spring washer, large washer, collar, and coil.)
Y'know, I'd always thought that a waterlogged monovalve plunger was a
sign of failure, but having taken it apart (and another one from the
spares pile) it seems more to me like it's supposed to be
full of water. There's a weep hole from behind the screen into the
plunger area, through the plane of the diaphragm. If the
intent is that the plunger fill with (screened) water resulting in
water on both sides of the diaphragm, the passage of water through
this hole as the plunger moves back and forth could serve to damp the
physical motion of the plunger. It may be that the slow-scale PWM
signal from the ACC system actually results in a fairly steady
physical position of the valve rather than an on-off modulation of
water flow. This would actually make some sense in that it would
dramatically cut down on diaphragm wear, but then I have no
explanation for why a torn diaphragm results in loss of control of the
valve. It ought only result in a leak. I guess we'll see if the
cleanout has done anything helpful.
Thursday, September 27, 2007
Jill reports that she has noticed no heater anomalies since the laying
on of hands.
Wednesday, October 10, 2007
Replenished the brake fluid. Where's it going? No obvious sign of
leaks. Could it be sucking it into the intake manifold?
Friday, October 26, 2007
The car's new muffler was delivered today. $265, when bought with
another one for my 560 SL. Eberspacher, the
good one. Heavy.
Sunday, October 28, 2007
I installed the new muffler. Just bolts on? Right! First, of
course, the leprous old muffler had to be removed. (It also looked
like somebody had backed it into something like a high curb: besides
the big chunks flaking off the outside it was accordioned a bit in the
middle—it was long past time to replace it. It was the
original muffler according to the 1286 date code embossed into it, and
made by Gillett.) The existing bolts were frozen, and even after I
got them off (twisting one in half, though I did get the nut off to be
reused) the retaining collars were frozen. Eventually I got those
loose, and that's when I found out I hadn't ordered the seal bits that
go into the pipe joints. One (for the flared mating ends) was ratty
but reusable, but the other (for the slip joint) was ruined. I had to
fabricate something out of two rings of metal cut off the old
muffler's pipe. I slit them and spread them out so that they would
fit concentrically and snugly over the new pipe, inside the formed
collar that's on the muffler end, then I welded on the edges to fill
the gaps. (They were left split.) I then put it all back together,
using anti-seize on the bolts. The junk box supplied another bolt to
replace the ruined one. It took 2.5 hours or so to do the job. The
center resonator's rubber support rings were missing, so I used some
of the chain-filled ones from the junk box. (Whenever I see them at
the junkyard I grab them.) The resonator, etc., still looked intact.
A big PITA, but it works nicely now. Quiet. Had I bought new seals
and bolts it would have gone a lot smoother. Incidentally, my wife
still has reported no further heating anomalies, so cleaning out the
monovalve last month seems to have done the trick.
Tuesday, October 30, 2007
At the U-Pull for some other stuff, I found another set of heated
front seats in a 126. I got them, the mating plugs, and the switch
sockets for about $20. (And the cables between them, only the one cut
[each] at the three-wire point for power, ground, and illumination.)
These are the relay-less early version. The switches were long gone,
as was the back seat. One of the butt pads is open-circuit, the other
three pads all measured about 5 Ω.
Saturday, November 3, 2007
The squealing from the car has been getting intolerable. The rear
brakes are making noise, too! Time to do something about it. I
replaced the motley collection of used rear pads with good new ones
from Rusty. It gets easier each time. I ground the small lips off of
the brake discs, the easy way there is to let the car spin them while
you 'kiss' them with the running grinder. I greased the backs and
edges of the new pads for squeal-proofing.
I also topped off the brake fluid and engine oil. It seems to be
using a bit of both of these.
I had a setback on my heated seats plan. I removed the seat cover
from one of my heated 126 seats, only to find that the heating
elements are sewn into the covers, they're not separate pads under the
covers. Oops! Now I've got two sets of front 126 seats, and one rear
seat, that aren't going to be of much use.
...I shouldn't work tired. After lunch and a nap I had another look,
and the pads are merely long fingers (like a coarse comb) tucked
snugly into the sewn channels. Getting them out will be hard, and
into another seat harder yet, but shouldn't be impossible. I'm going
to do my experimentation on the dead pad. Who knows, I may even be
able to repair it.
Thursday, December 6, 2007
We were going to take this car to the company Christmas party (at the
fanciest hotel in town, the
Davenport), but Jill couldn't get it started. The dash lights
were acting weird, the alarm went off on her, and it wouldn't even
crank. Battery? I had no time to look at it.
Friday, December 7, 2007
I put the battery on the charger, and it was seriously low.
I wonder what the excessive draw could be, the nasty Sony stereo?
We're not driving this car anymore this season, apparently I need to
rig it with a battery tender.
Saturday, January 5, 2008
The roads have cleared, so I sent my wife off in this car for a
change. She can get it washed, and maybe fill it up. The car is
filthy, and appears to have possibly-salty road slime on it from
before, I want it off! The battery tender is doing its job, the car
started instantly.
The brake fluid was again low, and I had to refill the reservoir.
Where is it all going? There were no spots on the floor.
Monday, January 7, 2008
The replacement antenna mast came today. Jill managed to get to the
box on the porch before the dog did.
Tuesday, January 8, 2008
I installed the antenna. It took a few tries to get the leader
started, naturally. Around the shaft it's a little bit looser than
the original, I hope that's meaningless. (It's not Hirschmann.)
Saturday, April 12, 2008
Magnificent weather today, finally, it hit 65 °F, blue skies
and all. Got out the car and took the lid off so Jill could take it
to a concert in style. I did need to add quite a bit of brake fluid.
Saturday, April 26, 2008
Finally another beautiful day, unlike all the intervening days since
last time. I prepped the car to go downtown for dinner, topless.
...Wretched POS! The battery was stone cold dead again. There's
something wrong with the car, if not being driven for two
weeks can (but doesn't always) kill the battery. I had to
take the other convertible, which had not been prepped for
the trip, so we were late. I put the battery tender on the car to
bring it back up, the charger was busy doing de-rusting duty on the boat trailer's leaf springs.
Sunday, April 27, 2008
The boat trailer springs had finished de-rusting, freeing up the
battery charger. I put it on and the car resumed drinking heavily.
Obviously the little tender wasn't up to the job; I didn't really
expect it to be.
Monday, April 28, 2008
I put the charger on again this morning (I should have done it last
night) and it resumed pulling a pretty heavy charge. Poor thing!
...After I got home I put the charger back on, Jill had taken the
car out. Still drawing heavily!
Tuesday, April 29, 2008
I checked, and the charger is down to about 1 A or so. Seems to
finally be about done. I'll leave it on a while yet to top off. I
also need to get out the ammeter and see if I can find a parasitic
draw, there is definitely something wrong, though perhaps
it's intermittent.
Thursday, May 15, 2008
The car hasn't been driven in a few days, so I put the battery charger
on. It drew heavily, and only settled down to about 5 A after an
hour. There's something definitely wrong, I wonder if the alternator
is charging? I need to check into this.
Monday, July 14, 2008
Jill called me at work from the parking log of Wal Mart.
(Not the close one, however.) Said there was a big green
puddle under the car. So I headed over there. There was a
big green puddle under the car, but I couldn't really see why.
Nothing obvious, but the reservoir was pretty much empty. I sent her
in for a gallon of water and I poured it in. No leaks, I sent her in
to refill the jug just in case. We caravanned home, there were no
problems. Just a minor overheating episode on a hot day with her
crawling around a parking lot looking for a good spot with the AC on?
Let's hope so!
Wednesday, August 13, 2008
I finally got a chance to tackle the battery discharge problem. (I've
been putting the car on charge most nights for months now.) I suspect
one of the two alarms, or the stereo is at fault. (Though it could be
almost anything, including the clock, radio antenna, or dome light
system.) I pulled apart the main power supply terminal under the hood
and determined that there was no parasitic load except through the
main feed wires to the fuse box. (Thus clearing the alternator itself
[of bad internal diodes], and the starter.) When I disconnected the
keyless entry/alarm system and powered up the car it draws some
200 mA once things settle down. That's fairly hefty, over time.
When I dug up the fob so I could reconnect the keyless entry/alarm and
shut it up I found that it only seems to draw 10–20 mA
itself: not so bad. I removed the trunk light bulb, no change.
Removing the faceplate of the stereo did nothing to change the draw.
I removed the floor panel, but the factory alarm isn't under there so
I couldn't disconnect it. I mis-remembered, it's behind the glove box
according to the ETM. (The lamp-out warning module is what's under
the floor panel.) I ran out of time to continue chasing this morning,
however.
Jill also reports that the headlights spontaneously go out sometimes.
That's not good, and it keeps her from wanting to drive the car.
Combination switch? I've seen that before, though usually only
when applying a turn signal.
Thursday, August 14, 2008
It's not the stereo (removed), or the antenna (unplugged). But it's
on Fuse 12. If the schematic can be believed that indicates the
antenna, trunk light, alarm system, warning module, courtesy lamps,
diagnostic socket, hazard signals, or clock. I disconnected the
alarm, that's not it. I pulled the dome light timer relay, that's not
it either. I checked the visor lights, it doesn't seem to be them.
(Current draw when either was opened was the same, 950 mA, and
together it was about 1600 mA. That indicates that neither
switch was leaking.) I pulled the door switches, no change. It's not
the warning module. (Getting to that was fun.) It's not the hazard
switch. All that's left is the clock, which is difficult to get to.
So I pulled the airbag, steering wheel, and instrument cluster. It's
not the clock! WTF? Supposedly I've gone through everything on
Fuse 12, yet I've found no culprits. The car still draws
200–350 mA through the fuse. Damn, either somebody added
something (cell phone?) or the schematic's wrong, or there's a
pinched wire. The next step is to pull the fuse box itself and check
the individual wires feeding off of it. That's a drag.
So I pulled the fuse block. There are two ring terminals screwed to
#12: one a clump of small reds with a red/yellow in it, and another
clump of small reds with a red/white in it. The culprit is in the
red/white clump, though I ran out of time to chase it further than
that. The red/white wire itself goes to the diagnostic socket, and
nothing's plugged into it. The car now looks a right mess, and it's
probably going to get worse before I'm done.
Friday, August 15, 2008
More leak chasing. The schematic shows eight wires on Fuse 12,
and there are two ring terminals of four wires each, which bodes well
for the schematic being correct. I put a test light in series with
the fuse power supply so that slips wouldn't cause big problems, and
the offensive current was still about 150 mA. I then used the
low-current (60 A) AC/DC amp clamp (a one-time Christmas gift
from my brother the mechanic, perfect for digging around in a car's
wiring harness as it has much smaller jaws than my 400 A Fluke or
the 2000 A OTC that I just bought) and clamped it in turn around
each wire in the offending clump at Fuse 12. One of the solid
red wires leads to the culprit, which means it's not the clock or
diagnostic socket wire. I then grounded the offending ring terminal
to reverse the test. I went around the car with a small 12 V
battery in series with the test light. I'd ground the battery and
then probe for power wires with the test light. When the light lit up
I'd look at the meter (perched on the dash) to see if the current was
going through the offending wire. No joy at the back of the car, nor
at the courtesy lights, hazard switch, radio, or dome light timer.
(All customers of Fuse 12.) But when I popped out one of the two
dome lights I found my circuit! At least it's a short (!) one, though
I was out of time to chase it further.
Saturday, August 16, 2008
Victory! I tackled the other dome light, only to find that it was
glued in place because one of the plastic ears was broken off. It
wasn't fun getting it loose without tearing up the molding, the whippy
thin almost-sharp antique carbon-steel butter knife (one of my
favorite tools) worked well. The nylon insulation wrapper on the hot
lead was brittle and half missing, and I think it was pinching through
the foam insulation on the molding and partially contacting ground, as
there was a pit chewed into the foam down to the metal backing. That
could make an intermittent, and variable, short circuit. It explains
a lot, and the electrical leak was gone once I took this apart. (A
good solid short would just have blown the fuse, of course.) I put
some Shoe Goo on the thin place on the molding's foam and scraped up a
replacement light fixture from the junk box. I used heat shrink
tubing and electrical tape to bolster the insulation at the terminals
that hook to the light fixtures. That should take care of the
problem, and once the glue's dry I'll start putting it back together.
It seems like I had this exact trouble spot flare up before on one of
the other SL's, but I just can't remember which one nor can I find any
record of it. (That bugs me.)
Sunday, August 17, 2008
I put back the molding and the dome lights. That went easily enough,
except that the 'good' used light fixture had bent with heat enough
that it would no longer snap back into the hole. I used a propane
torch to heat it gently until the styrene got soft then I bent it back
into shape. It got a little bubbled looking on the inside, but it's
really hard to notice and it does fit back into place. When
I checked the wiring for current leaks there were none. Cured!
Then I started putting the fuse box back together. Since I was there
I took the opportunity to restore the separate (from low beams)
function of the fog lights. (I do this on every car I can as you can
actually see better without the main headlights under extreme fog
conditions.) That involved moving the gray/yellow/green wire from
Fuse 19 back to Fuse 15. I also had to scrape up another
fuse box screw from the junk box, relabel the fuse panel's card, and
swap an 8 A fuse for the original 16 A that was in
Fuse 19. That took a bit of time, especially the scavenger hunt.
Unfortunately I was again out of time to do more.
...After church I pulled the combination switch out, and for the first
time tried to open one up. (I've replaced a few now, and they're
expensive enough that I've wanted to dive into them to see if they can
be cleaned up but hitherto I haven't really had the time. Also, it's
a critical enough component that I didn't want to mess around if there
was any risk of malfunction, but as I learn more about these things I
realize that there's actually little risk of that if one is careful
and if one is always prepared to get another one if things do
go wrong.) If you're careful you can release the plastic snap clips
and it swings open, exposing the contacts. Which in my case were
quite dirty. I think this can be cleaned up to good effect, but it's
too hot out to enjoy working on the car right now, so I won't.
Monday, August 18, 2008
Per request, I photographed the combination
switch so as to highlight the way it opens. On the upper (as
shown) sides of the plastic body are two plastic bails that have to be
bent away from the contact-carrying plastic 'plug' more or less
simultaneously. If you do this right and the bails don't break, the
plug swings up and out on its wires, exposing the guts for cleaning.
Note the spring-loaded plastic turn signal release flipper at the
bottom of the body, and the sliding turn signal contact at the top.
The obvious dirtiness of the contacts is not apparent in the
photograph. There is a little spring hooked between two pegs buried
in amongst the terminal lugs, don't lose that and make sure you hook
it back up. (It's what puts spring tension on the headlight switch
contacts, and the switch won't work right without it.) You don't
necessarily have to open up the switch to clean the headlight
contacts, if you look around it you can see where they are exposed at
one side. (Problems with the turn signal contacts would probably
require it to be opened.) The switch is actually much simpler than it
appears, half of the terminal lugs on it are just dummies that are
there to join the cable to the wires that go up the switch stalk for
the wiper switches.
I then cleaned the switch contacts and snapped the switch back
together. The date code on the switch indicates that it is probably
the original unit. Reinstalling the switch was surprisingly
difficult, and it wasn't the usual problem of getting the connectors
threaded back through the steering column. The knot of the main
wiring harness was sufficiently in the way of the big connector that I
couldn't get them mated again, I had to remove the female connector
from its chassis mount in order to mate them, then I could snap them
back into the slot in the bracket. At that point it was easy to put
the rest back together. From appearances the turn signal release tab
on the steering column is physically centered, so I don't think I need
to do anything there. I did plug the warning module back in and I
should start putting everything back together, but I was (again) out
of time this morning. Tomorrow I won't be able to do anything.
Wednesday, August 20, 2008
I didn't have a lot of time today, but I did get the driver's side
kick panel and sill (wiring) cover removed, as well as the driver's
carpets and seat, and the center console loosened. With the rear deck
removed this exposed the bulk of the old cell phone installation.
This all needs to come out! (Jill has requested repeatedly
that the dangly wires be removed. Can't say as I disagree with her,
it's just been a large bit of Pending Pain. Now that the car was
already torn half apart it's Time.)
Thursday, August 21, 2008
I finished removing the cell phone. This required removing the rear
bucket side panels in order to un-trap the wires that went back there
to where the main unit was. I took apart the handset cradle and
removed the connector so I could then push it back through the hole in
the center tray. (I didn't want to cut the cable, call it a personal
quirk of mine.) The carpet covers up the hole, it looks undamaged. I
also removed the antenna, the wire just pulled through into the trunk
as it had already been yanked out of its connector.
While I was there I re-routed the speaker wires to go through an open
channel rather than be pinched against the chassis by the side panel.
I then had a peek at what it might take to add the rear fog light.
The rear taillight assembly is just like the 450 SL's, there's room for an auxiliary brake
lamp to be secured behind the parking light bulb. I didn't have any
suitable sockets in the junk box, I'll look for one at the store. I
still haven't decided whether or not I'll actually do this, but at
this point in the car's disassembly it couldn't get any easier.
...Today after work I picked up a single-filament lamp socket that can
be adapted to be surface-mount. About $3. (I got one for the 380 SL too, just in case I get ambitious.)
Friday, August 22, 2008
Digging up the information on how I'd done this before out of the
predecessor 450 SL's log,
I added the necessary two wires to the rear of the headlight switch:
NS to go back to a new socket in the left-hand taillight and the 31
(ground) for the indicator lamp in the center of the knob. Reaching
the two screw terminals is a real pain, things are just too tight. I
used a Sharpie to label all the outer ring of terminals and then
removed them. That allowed me to pull back the plastic collar
exposing the rear set of terminals. I stole two headlight switch
screws from a junkbox donor and crimped some ring terminals on the new
wires. It was very tight quarters and difficult to do this job, but I
did get the new wires installed. I picked up ground by wrapping a
length of stripped wire around the mounting bolt for the steering
column. Tacky, but sufficient. When reassembled, the lights worked
correctly.
The 'new' wire (actually recycled yellow wire from the cell phone
installation I just removed) is threaded down the side of the kick
panel and through the wiring channel on the sill, thence up and over
the wheel well. It's too short, so I'll splice another length on and
run it through the wiring grommet with the radio antenna wire and into
the trunk. (I was out of time again.)
Saturday, August 23, 2008
I spliced a length of the cell phone's blue wire to the too-short
yellow and threaded it on through to the trunk. I used a wiper blade
insert spine (a thin stiff whippy metal strip) to poke around from the
antenna grommet in the rear of the well until it came out by the
anti-towing sensor, then I taped the wire to it and pulled it through.
Just like threading a needle. I fed the wire around the side of the
trunk behind the carpeting, it doesn't show at all. Next up was
mounting the new socket to the light assembly. Its mounting ears got
cut, bent, and drilled such that it mounted flush to the side plate
that holds the rear parking lamp, screwed between the existing lamp
and its reflector. There's plenty of room. The new lamp globe is
directly behind the old one. I put a new pin in the connector in the
unused site #8 in the shell, resulting in the neatest possible
installation; near-factory in fact except that this particular
taillight assembly has heat-staked rivets holding it together so I
just broke them off so I could get behind the connector shell. I
drilled and replaced these plastic rivets with screws. All the spare
male connector pins I could find were a little too fat at the wire end
to fit easily into the connector shell, apparently the design style
had changed for that connector, but a little gentle persuasion with a
hammer made it go anyway. I greased the new bulb's base before I put
it in the new socket. The wiring was all soldered, with heat-shrink
tubing for insulation. When tested, it all worked properly.
I then started putting the car back together. As I had all morning,
and some help, I was able to finish by 2:00 PM.
Reassembly went smoothly, except for getting the kick panels in
properly; those are tough. Getting the front seat back in and on
track was also a bit difficult.
On the road the car behaved well, but the SRS light is on and the
engine temperature read low. (It always has.) I'll look into those
things next. My plan is to drive the car myself for a few days while
I finish the sorting out, then swap with Jill and take the 190D she's been driving down for maintenance. I
managed to get the steering wheel back on one notch off.
...While driving at night I noticed that the battery light was on
faintly, it may be time for new brushes. But the SRS light was off.
The transmission probably needs oil, too, as it shifted oddly at
times. And the thermostat definitely needs checking out, the engine
temperature was reading low, around 60 °C at times. Things
to do!
Monday, August 25, 2008
I went into the garage and found my remaining gallon of Zerex G-05,
which I had bought for this car. (No small feat, given the state of
the garage.) I also found the new thermostat in the trunk, and the
bag of flushing thermostats and the pierced radiator hose (used for
flushing). For once I didn't have to do a lot of looking! The rated
capacity of the system is 12.5 l, so I don't really have enough
G-05 to get a 50% mix. (This March I used up the other gallon I'd
bought in the 190D, which has an 8 l
capacity and thus did get a proper mix.)
Anyway, I jacked up the car, drained the radiator into a bucket,
removed the upper radiator hose, and finally removed the existing
thermostat. I could see that it was partially open, hence the low
operating temperatures. When I checked my bag of (2) forced-open
flushing thermostats I found that this car didn't take either one! So
I cut another piece of .38 shell casing and used it to hold the
thermostat fully open. I installed this, hooked up the flush hose and
a water source, turned on the water and started the car. I put the
heater on MAX. I let it run for about a half an hour, until there
were no signs of green coming out. (This amount of time was excessive
because I'd noticed a green pocket in the reservoir and spent some
time removing the low-coolant-level sender to drain that pocket.) I
then removed the flushing thermostat and installed the new one, jiggle
valve up. (The jiggle valve had been at the 3 o'clock position
on the old one, which is wrong.) I used the new O-ring gasket from
the thermostat kit. (There was another choice that was clearly
wrong.) Before I put back the housing bolts I chased the threads with
a die and painted anti-seize on them. The inside of the thermostat
housing was free of corrosion, I don't think things had been let go
too far. The new flushing thermostat went into the bag with the
others.
While I was working on the car I noticed that apparently I neglected
to hook the alternator back up to the car. That might explain the
dimly-glowing battery light! I put it back and put the battery on
charge. (It was thirsty because of the night babysitter run on
Saturday.)
As I don't have quite enough G-05 for a complete change and I don't
want to risk it anyway until I'm sure there are no leaks, I just
refilled the car with water. (Back-filled through the head hose to
eliminate head air bubbles.) The drain bucket holds about 6 l,
so just draining the radiator and refilling with coolant (once I have
some more) ought to get the mixture pretty close. I'll try to pick up
some more today.
Since the car was up on jacks I started on the steering wheel
centering. I wanted the turn signal cancellation to be centered as
Jill had reported that this acted odd, so that's what I used to decide
where the wheel went on the shaft. If the wheel isn't centered in use
I'll have to adjust the tie rods (equally on both sides) to get the
wheel perfectly centered. That might take a few attempts.
While the flush was progressing I checked the transmission fluid
level. I'm never any good at this, but I decided that it was low
(also corroborated by its shifting behavior) so I added half a quart
or so. It's easiest to just pour it down along the partially-removed
dipstick as that keeps it from splashing around. I threw the IR
thermometer into the trunk just in case I still have engine
temperature problems. (I don't expect any, the visibly-bad thermostat
is enough to have caused them.) I put in the G-05 too, though I don't
expect to do the coolant fill on the road. (It'd be OK, all I'm
draining at this point is pure water.)
...I bought two more gallons of G-05 at NAPA, nearly $30
even with the AAA discount! Sheesh. That should give me
enough to do both this car and Ethelred the 380
SL. I also bought a Harbor Freight bench brush for removing
rain-borne dirt and dust from the soft top. $2, on sale.
The steering wheel is indeed off center, I'll need to adjust the tie
rods to bring it back to where it should be.
The temperature gauge now reads normally, something right around
85 °C. The transmission's shifting was also much improved.
Tuesday, August 26, 2008
I jacked up the car, drained the radiator, and refilled with G-05
coolant. I did use a gallon and a half, but I spilled a fair bit.
It's 'overfull' right now, but I expect that to burp down. I did
back-fill through the head hose to prevent air bubbles. The water
that came out still had a faint green tint, this must have been
dissolved out of internal deposits as yesterday's flush was pretty
thorough.
I then loosened both tie rods and rotated them one full turn each in
the direction that would make them steer towards the right. (To match
the direction the steering wheel is offset. This meant the car's left
side rod needed to get longer, and the right side's shorter. To do
this the vise-grip, when clamped to the rod body with the handle
facing rearwards and the slack out of the ball joints, has its handle
go up and forward over the top, the same action on both sides.) We'll
see today if that was the right amount. (I expect it to take a few
sessions to get the steering wheel perfectly centered.)
...After work I checked the coolant level, and though it did come down
some it's still a bit high. Oh well. If it persists I may let out a
little some time, I could put it in another car! (Perhaps Ethelred, it's next up for cooling system service.)
The transmission, though much happier now, still seems a bit anomalous
sometimes so I checked the transmission fluid. Near as I could tell
it was still off the bottom of the dipstick, so I put in the rest of
the quart. Will check it again tomorrow. The tie rod adjustment
worked well, I think perhaps another 1/2 turn will do it. After
tomorrow's session (and test drive) I expect to be able to turn this
back over to Jill, then I can begin to tackle the 190D's most pressing problems.
Driving it, I can again say that this is an awfully nice car. Going
back to Ethelred in a day or two is going to be something of a
letdown.
Wednesday, August 27, 2008
I adjusted the tie rods another 1/2 turn. (Up and over the top from
the rear, making the left rod longer and the right rod shorter,
turning the car towards the steering wheel's bias.) We'll see if that
does it. It was raining, though, so I didn't drive it to work to see
if I'm done.
Got a nice compliment from one of the guys at work on its appearance
in the parking lot yesterday. Yes, it is a nice-looking car.
(At least, much purtier than Ethelred! The guy
did a bit of a double-take as it was the same model in the same spot,
but suddenly white and shiny.)
Thursday, August 28, 2008
The weather's improved, so when I got to work today I checked the
running battery voltage: 13.8 volts. A little low for modern battery
chemistries if you ask me, but within acceptable limits; it may well
be the regulator's chosen value. I'll keep an eye on it. I also
checked the transmission fluid and it was still low, just covering the
curl at the bottom of the dipstick. I put in 1/2 quart.
I overshot on the tie rod adjustment, I think I need to come back
about 3/16 of a turn. (It's not as far off to the left as it was to
the right, so 1/2 of the last 1/2-turn correction isn't right, so
we'll go halfway in between that.)
...After work I got another compliment on the car. Nice.
When I got back home I checked the transmission fluid again and it
was still low, about halfway to the optimum level from where it was
this morning, so I put the rest of the quart in. I threw a quart into
the trunk for emergency on-the-road topping off. That's a good thing
on a car with such an apparent appetite for oil.
Friday, August 29, 2008
I rolled back the tie rods 3/16 of a turn and relieved the binding on
the driver's seat height adjustment, and told Jill to go ahead and
start driving it. I'll miss it!
Sunday, September 14, 2008
Yikes! Jill called me this evening around
5:00 PM, she said she'd run off the road. Turns
out it was into the median of the freeway! Somebody had roared up an
onramp just where she was changing lanes to the right, and when she
caught sight of him "out of nowhere" she overcorrected (so we deduce)
and broke the front end loose. She fishtailed for awhile until the
front wheel caught the gravel at the median, then it was all over.
Witnesses said that she had spun around three times. (That might be
3×180°, not 3×360°, we're not sure. Jill
certainly isn't.) She ended up in a cloud of dust at least partially
in the oncoming traffic lane on the other side of the median. (There
is some question as to which side of the yellow line she was on.)
Fortunately nobody hit her and she rolled back down into the median.
Shaken, but OK. Several people stopped, one offered her some baby
wipes to wash off with. Jill wondered why, then she figured out that
she was completely coated in dirt. That witness said she thought Jill
had rolled because of the huge amount of dust and how dirty the car
was when she stopped to help.
For extra fun some looky-loos got clipped, so there was an additional
accident right there with people standing around. It was all gone by
the time I got there, I don't know much more about that. (So far as
the original incident goes I suspect mutual culpability. Jill was
probably inattentive as to where is or is not a good place to change
lanes, and our Masked Driver was probably speeding and not paying proper
attention to the lane-merging procedure.)
When the Idaho State trooper got there she noticed a fluid running out
of the car back by the exhaust pipe, the deduction (not sure whose)
was gasoline and that the car shouldn't be driven. That's when Jill
called me, and I told her to call AAA. I then went out and hooked up
the car trailer to the truck and headed out with Daniel. AAA only
covers 5 miles free, I figured maybe we could transfer the car to our
trailer in a safe quiet place. I called from the road and Jill was a
lot calmer by then. We determined that since the trooper said it was
OK for us to just load the car on the trailer ourselves right there in
the median that we would try to do so. So Jill called AAA again and
cancelled the tow (which was still some 40 minutes away coming from
the North side [idiots, who sends a Northside tow for an Eastside
incident anyway?]) shortly before I drove by the two cars in the
median, turned around at that next exit, and joined them. (That was
hard, crossing the freeway from that same semi-blind onramp without
getting hit. I think I got flipped off a few times.)
I've never seen a dirtier car, it was just filled with dust
and dirt, like sombody'd tossed a bucketful over it. The wheels all
had dry grass stems sticking out from around the rims, wedged in
during the spin. I went around the car, there were no signs of
damage. I couldn't see or smell any gas. I popped the filler cap and
heard a 'whoosh'. I started the car, it ran fine. I went around and
crawled under, and couldn't see any gas leak with the car running.
There was a drip from the bumper, that's what the trooper had been
seeing, but I tested it and it was water. After some head-scratching
I couldn't see any reason not to, so we thanked the trooper and Jill
drove off in a big cloud of dirt, most of that coming off and out of
Jill's car. I followed her to keep an eye on how the car drove. (It
was fine.)
There was no ticket, nor a police report since there was no apparent
damage. We went to our favorite fuel stop, it was close by and I
needed fuel anyway. I figured I'd give it a more careful look there.
I went around again. I couldn't see any damage except a rock hole in
one headlight, and that could well have been there from before. I
noticed that the drain plug from the spare tire well was wet so I
opened the trunk. Wet. The gallon of water that had been riding
around back there since the July 14 overheating
incident had burst. It was a heavy polyethylene, much thicker than
the milk jug that it resembled. Mystery explained! There must have
been some significant forces involved in order to pop the jug, though
obviously nothing really traumatic. The car is low, wide and heavy,
so it just went into a flat spin instead of digging in and flipping as
an SUV or mommyvan probably would have done. (Or for that matter our
truck, but we only drive that when we need it
so our exposure [so to speak] is limited.)
We went on for ice cream which gave Jill some time to clean up and
calm down. When we got home she parked in the lawn and we gave the
car a thorough cleaning, or as thorough as one can be in the dark.
Sucked out the dirt, wiped down the interior with a damp rag, and
washed the car. I left the trunk open to dry out, parked outside in
the breeze.
By tomorrow it "won't have happened", except that she lost her hat.
Too bad, it was a cute cowgirl number she got recently at Goodwill.
It was fun to see her roaring along in the convertible in her fancy
hat. I'm not sure she'll be able to replace it anytime soon,
considering the source.
Monday, September 15, 2008
I looked over the car in the daylight. Much more vacuuming required,
and some dust to wipe off inside. (Daniel manned the vacuum last
night, he had fun he but isn't the most thorough of workers.) Since
the oil was low and it was time I changed the oil and filter, and I
did it from below so I could look everything over. (You have to go
below anyway if you're going to change the filter.) Everything looked
OK, but I think there's a loose ball joint on the center drag link, so
I put that on the list. I did dig a bunch of fresh dirt out of where
it was jammed into the air dam. I topped off the washer fluid, it was
low. I'll be driving the car today to check it out on the road.
...It was fine. We traded cars at lunch. I do believe she prefers
hers to Ethelred!
Tuesday, September 16, 2008
The driver's side windshield washer nozzle heater assembly had its
neck broken off, hence the no squirting on that side. I pulled off
the two broken pieces, dried them, and Shoe-Goo'd them back together.
I set it aside to dry. I then put the trunk back together as it's now
all dry.
Wednesday, September 17, 2008
I reinstalled the squirter's heater. It should be fine now, it
squirts at least. I replaced the now-dry trunk's contents, and
replaced the batteries in the flashlight (which somehow got left on).
Sunday, September 21, 2008
Sadly, the rains have finally come putting an end to our magnificent
run of early fall weather, so it's time to put the lid back on the car
again. C'est la vie.
I got out the touch-up paint and fixed a couple of small chips in the
paint that I found while dusting off the car.
Monday, October 6, 2008
The brake fluid was again low so I refilled it. Odd, there's no overt
signs of leakage.
Wednesday, October 8, 2008
Jill's been reporting a disturbing rattle up front, so I jacked up the
car and had a good look around. I didn't find anything other than the
barely-loose drag link. (I used a rubber mallet to bang on this and
that.) I did wonder if the heat shield around the crossover exhaust
pipe was loose enough to rattle, so I wedged a few pieces of sheet
metal into the gap on the end and put a hose clamp around it to secure
it all. We'll see. I also topped off the low power steering fluid,
it had been groaning a bit lately.
...No, driving it today I could still hear the rattle. Sounds more
like loose bits inside the dash. Heavy bits.
Sunday, October 12, 2008
Jill was reporting that the low-oil lamp had been flashing so I
checked. The oil was low, I put in a quart or so. It has
only been about 1200 miles since the oil was changed, I guess it's
either leaking or burning it.
Thursday, October 16, 2008
I ordered a new steering drag link from Rusty. $75.
Monday, October 20, 2008
We recently bought a new washing machine, replacing the 1974 Kenmore.
My wife's been complaining about the box in the driveway, which I'd
been saving for new drip pads for under the cars. Today she got one!
Tuesday, October 21, 2008
I opened the box that came yesterday, and found the drag link. OK, I
need to find some time to do this now. Saturday?
Saturday, November 1, 2008
Flash-to-pass isn't working. Fuse?
Tuesday, November 4, 2008
Oil and brake fluids were low, topped them up again. It's got an
appetite! Nothing visibly wrong with Fuse #2, the one that
runs the flash-to-pass switch. The same one runs the wipers and
washer, so it's probably OK. Switch problem? This is
the switch I operated on, after all...
Monday, November 10, 2008
So, today I decided to do something about the rock pip I'd found in
the left high-beam headlight after Jill's off-road
adventure. New headlight? Well, you'd think so, but that's just
not my way. There was water inside the glass so I pointed a heater at
it and taped a straw to the air compressor to heat the lens and run
air into it to evaporate the water. I then removed the lamp and shook
it to get all the tiny glass chips out the little hole in the front,
except for the two big chips that couldn't come through such a small
hole. I then rattled them around until I got the big chip back into
its crater, then I squirted Shoe Goo in to seal the hole and glue the
chip more-or-less back into place. I placed the headlamp face-down to
let the glue set up. The other chip can just rattle around loose in
there. We'll see how it goes.
I hate waste, even to the point of repairing a stupid cheap USDOT
headlamp!
Tuesday, November 11, 2008
The hole wasn't completely sealed, so I put a little more Goo on it
and pressed it in. After it set up a bit I put the lamp back on the
car.
Monday, June 1, 2009
Jill's been bugging me to get this car out of storage, so today I
finally managed it. (I moved crap out of the way yesterday and put
the battery on charge.) It started immediately, with no fuss. It was
very dirty, so I ran it into what's left of our front yard and washed
it there. There were a few dings on the door edges, so I got out the
touch-up paint and covered them.
Friday, June 12, 2009
Took the top off for her. (I've been lax.) Maybe now she'll drive it.
Wednesday, July 29, 2009
I went out to get the battery charger (for the boat), and found the passenger car door open and
the courtesy lights (naturally) burning. How long's it been that way
killing the battery? At least since yesterday morning. I put the
charger on the car instead, it definitely needed it more than the
boat.
Friday, September 18, 2009
It's been nearly forever, but after moving into the computer room I
found the sketch for the user-selectible always-on modifications to
the rear window defogger relay that I worked up May
26, 2007 that would be useful in powering a travel cooler on road
trips. (See also the 190D's Road Trip Relay for another take on
this problem.) I used a 28-280 Radio Shack breadboard system that I
bought at the thrift shop ($9) for this purpose (and perhaps for
eventual gift to my son), and components salvaged from the junk box.
Unfortunately, it didn't work right. Par for the course when it comes
to my designing old-fashioned transistor circuitry. Needs more work,
obviously...
Saturday, September 19, 2009
With fresh eyes I can see that I left a bias resistor out of the
circuit. With that in place it started working correctly. I tinkered
with the component values a bit and got it working reliably. When the
STOP signal is asserted for a little more than one
second it turns on, it turns off immediately when
the STOP signal is asserted momentarily. The circuit
powers up in the off state reliably. The schematic of the final (!)
relay, for future reference, is in Illustrator, PostScript, PDF, and GIF formats. Now I just need to make one!
The Theory of Operation for the new circuit is that while
the STOP signal is asserted the new capacitor C3
charges up slowly to a threshold set by Q3 and the 6 V Zener
diode D7. When Q3 fires it trips (through R10) the latch formed by Q4
and Q5, which supplies power to the original timer relay circuit,
engaging it (via D8) and feeding voltage into its timing capacitor
(via D9) to prevent its normal timeout. C3 then discharges through
Q3's base-collector junction and Q5, ensuring that Q3 won't be
hovering near activation and perhaps interfering with attempts to
disengage the latch. While STOP is unasserted C4
develops a considerable differential voltage across it through the
agencies of Q4, R1, and R2. Whenever STOP is first
asserted this voltage pumps the base of Q4 sufficiently positive to
ensure the Q4/Q5 latch disengages, and so long as STOP
is released before Q3 fires the disengagement will hold. The circuit
exhibits the desired behavior, a toggle ON-OFF action,
with a delay before ON. However, there are a couple of
lingering concerns:
- Can Q4 supply enough current through D9 to actually trip the
original defogger timer? There is the relay coil itself to power, and
also the lamp in the dashboard switch.
This can be addressed by beefing up Q4, perhaps in a Darlington
configuration with a bigger PNP transistor (as Q6).
- While STOP is asserted can the original timer
circuit engage at all?
This might require another diode (D10) from the collector of Q5 to the
base of Q1, which will hold it ON while the latch is
engaged, thus allowing the relay to be powered. When the latch is
released (via C4), Q1 should be able to process the
normal STOP signal that it will then be seeing.
- Will C4's initial discharged state cause the latch to trip upon
power-on as it attempts to charge itself through R1 and R2, and pulls
current through Q4?
I sure hope not! This can be tested with the prototype circuit merely
by putting a 4700 ohm resistor between the STOP
signal and ground.
These questions will be answered once I actually build a modified
relay.
Tuesday, September 22, 2009
I got out the prototype board again, which had been off for several
days, and when I flipped on the power the circuit came up engaged,
which is definitely undesireable behavior! After that it behaved
normally. I put the 4700 ohm R1/R2 test resistor into the
circuit, and with it in place things did not look good! The
circuit would often power-up with the latch engaged, and it wouldn't
stay disengaged once the STOP signal was released. A
setback! This is probably all due to unintended action of C4, as the
circuit resumes normal ON behavior if it is removed.
I added a diode (D10) to prevent C4 from drawing charging current
through Q4, and gave it its own weak charging resistor (R13) instead.
That restored normal toggling behavior, even with the R1/R2 analog in
place.
Wednesday, September 23, 2009
When I flipped on the power the first time today the circuit came up
engaged again. This can't stand! Speculating that parasitic or
leakage effects are somehow 'encouraging' the Q4/Q5 circuit to latch
as power rises I added C5, a small capacitor across the base-emitter
junction of Q4, which should tend to hold it off. (C3 is definitely
holding Q3 off as power comes up.) It's small enough, however, that
it's easily overridden by strong deliberate action taken by Q3 or C4.
The circuit behaved properly after this addition, time will prove
whether or not this makes power-on more reliable.
Thursday, September 24, 2009
When I flipped on the power today the circuit came up disengaged, as
intended. So far, so good!
Wednesday, September 30, 2009
I've been testing the circuit daily, and it's worked every time. I
think I'll call it good for now.
It's cold now, I put the hardtop back on the car.
Tuesday, January 5, 2010
More brake fluid. Also needed a quart of engine oil and a bunch of
windshield washer fluid.
Friday, April 2, 2010
I was fetching the cupholder for the road trip in Ethelred, and noticed that the courtesy lights were
dim orange. Oops, I haven't been keeping an eye on the battery, and
the tender is not hooked up. I put it on charge, it was drawing
10 A, the maximum for the charger.
Wednesday, April 21, 2010
Jill said that she wanted to switch to this car for the season, so I
took the battery charger off, pumped up the tires, and checked the
fluids. I blew the dust off with air, no sense washing it since it
looks a bit like rain today. Will leave the hardtop on for the same
reason.
Wednesday, April 28, 2010
Beep-beep-beep-beep...
Jill says that the car's factory-supplied alarm has been going off at
times. (It's probably not being properly disabled by the door's key
switch, said door switch is likely dirty.) Today I had a chance to
look into it. These things are widely considered useless, and
annoying, the usual (and least expensive/troublesome) solution is to
disable the alarm entirely by unplugging the alarm's brain. According
to the ETM (second half, page 128)
it (N26) has two connectors, an 8-pin and a 14-pin. The schematic
shows nothing that looks like it's in series with anything important,
so unplugging it (both connectors) looks like the right thing to do.
The component location guide's
page 202 shows it located behind the glove box. The photograph (page 218-1) shows it
to the upper left of the junk back there, somewhat towards the front
and with its plugs facing forward.
Glovebox? I can do that. A few minutes later I had the plastic
buttons popped out (with my trusty antique carbon-steel butter knife)
and the liner out. Detailed examination showed the black plastic
Becker Autoradio unit to be screwed to the top of the plastic air
duct, connectors forward. I unplugged it.
For extra credit I removed it to have a more detailed look. Two
stickers, one bearing:
| (M) | MERCEDES-BENZ
|
| 126 820 08 26
|
| 72 | BAW 845 Z 0000
|
| GEPRÜFT: 2086
|
and the other bearing:
| BECKER
|
| AUTORADIO
|
| Brand | EDW-Steuergerät
|
Typ
Model-No. | 0845 509.485
|
Geräte-Nr.
Serial-No. | T 20132306
|
After releasing the two plastic snap-hooks I could slide the board out
of the shell, and I found about what I expected. Many 4000-series CMOS IC's: Two 4013's, two
40106's, two 4001's, and one each 4060, 4069, 4002, and 4012. Also
about 35 signal diodes, 6 zener diodes, three rectifier diodes, two
transistors, four relays, one large (troublesome) Frako electrolytic
capacitor, two smaller electrolytics, and the usual handful of
resistors and capacitors. All jellybean logic, in other words.
Should be very easy to repair, if one were ever inclined to do so.
(And I suspect that this car's problem is in the key switch,
not the alarm brain.)
| Qty | Type | Description
|
| (2) | 4001 | Quad 2-input NOR gate
|
| (1) | 4002 | Dual 4-input NOR gate
|
| (1) | 4012 | Dual 4-input NAND gate
|
| (2) | 4013 | Dual D-type flip-flop
|
| (1) | 4060 | 14-bit ripple counter, with RC oscillator
|
| (1) | 4069 | Hex inverter
|
| (2) | 40106 | Hex Schmitt trigger inverter
|
4000-series CMOS logic is ideal for this purpose because it
has very low quiescent current draw, and can run directly off
of the car's battery voltage so there's also no power-wasting voltage
regulator. As a rough guess, the various Sense and Arm/Disarm inputs
from the car go through the Schmitt inverting buffers and are massaged
by the gates down to three signals Arm, Disarm, and Trigger. The
flip-flops probably keep the Armed/Disarmed and Triggered states. The
ripple counter generates the honking/flashing pattern when Triggered,
and drives the relays through inverting buffers and the transistors.
(The relays drive the horn and lights.) The ripple counter is also
probably responsible for the Triggered timeout, so that it won't run
forever once Triggered. My guess is that the RC oscillator is
disabled except when the circuit is Triggered, and so there is no
power consumed but for the circuit's DC static requirements while
Disarmed, or Armed and un-Triggered.
I snapped it back together and put it back in the car. (Unplugged, of
course.) I buttoned the car back up and called it good. (I bolstered
the positive terminal insulation of the glove box light with
heat-shrink tubing. It was, as is so often the case, coming loose.)
Wednesday, May 5, 2010
Jill complained that the driver's seat felt loose. I looked, and
found that the right front pivot bolt had worked loose. I tightened
it, that should be better.
Thursday, May 13, 2010
Finally it's time to take the lid off this car. The nylon
straps of the lift are shrinking a bit, and it gets harder and harder
to get them onto the top. The secret is to put the two side hooks on
first, well back of their normal position, then slide them forwards
until you can engage the forward hook.
Sunday, May 16, 2010
It was past due, and I finally changed the oil, but didn't change the
filter. I used the vacuum sucker, it took quite awhile because I was
only able to warm the engine for a few minutes before I began.
Jill also had noted that the AC didn't work so I checked, and the
charge had leaked away. I replenished it, and using a watering can
against the condenser and having Daniel keep the RPM's at 2000 I was
able to get it down to 37 °F, which is plenty good enough.
Ambient temperature was about 80 °F
I topped off the windshield washer fluid with water and checked the
brake fluid level, which was OK.
Friday, June 25, 2010
Jill and Daniel took the car to Wyoming for a mini-vacation, and on
her way back she called me from Missoula, three hours away from home.
The car wouldn't start, and the aftermarket alarm (an inseparable part
of the keyless system I'd installed) was honking away at her. I ran
her through the basic diagnosis procedure with the lights, neutral
switch, etc., but didn't get good results. (A lack of calmness
doesn't help.) Then I had her get out the cheap Harbor Freight
multimeter I keep in the trunk, and the battery measured around
10 V. Oops! She called AAA to get a jump, and the guy knew what
to do. He checked the battery voltage once it was running and it was
13 V or so, enough to prove that the alternator wasn't totally
dead. She got home (carefully husbanding the battery charge) without
further incident, and I put the car on charge. It was thirsty, but
not inordinately so. It probably needs a new brush pack, they usually
get intermittent at their end-of-life.
While I have already disconnected the factory
car alarm, the aftermarket keyless entry system
also has a built-in alarm function, and that was going apeshit when
the battery was low. I only have the alarm horn connected because
it's required in order to be able to train the key fob, and it
normally doesn't beep the way I have it programmed, nor are the alarm
sensing wires even connected. But when it went nuts it sure made
noise! Repeatedly.
I got out the soldering iron, and a slide switch I'd gotten at a yard
sale. (In a baggie with several other switches, all for $1.) I
cleaned the switch with brake cleaner and put it in the alarm's horn
wire, that should cure that little problem. I labeled it with a
Sharpie, and made sure it was in the OFF position.
The battery box lid was all broken up, and filthy, so I pulled it out
and washed it, and started gluing it back together with Shoe Goo. I
note that the battery is sitting on a piece of plywood inside the box,
that makes it protrude a bit more than normal, and which might be
responsible for why the battery cover got so badly broken. I'll have
a look at that, when it's time to put the cover back on. I think only
a couple of small coin-sized pieces of the cover are missing, the rest
seems to be there.
Saturday, June 26, 2010
I dedicated the day to gluing up the battery box lid. There were
a lot of cracks! I got the bulk of it glued in a number of
sessions and then clamped it to a flat board to let the glue set hard
overnight in position. That'll get it flat again, it was considerably
warped. Still a lot of gluing to do, though. I'll probably end up
exhausting my tube of Shoe Goo on it.
Sunday, June 27, 2010
The overnight set-up seems to have worked, the lid is fairly straight
now. More glue and clamps today...
I pulled the battery and battery box out, which required removing the
ground cable from the chassis. The NAPA 75 Group 49 battery
has a June "2" date code, probably 2002. The box itself is cracked in
a few places, which I'll want to repair. The battery was sitting on a
perfectly-fitting board of some kind of dense red plastic, not
plywood, perhaps this is factory original? More research is required.
I found one of the two missing chunks of the battery box cover, and a
tiny piece of the other one, the rest of it seems to be gone. The
area is very dirty, and a good vacuuming is in order.
I washed and dried the battery box, and began gluing it too. It won't
need much repair, unlike its lid.
Monday, June 28, 2010
More battery box and lid gluing. Takes a lot of sessions to do it
'right' when it is as tattered and deformed as this one was. I have
to clamp the lid to the board, sometimes with spacers, to get it to
dry back in shape, and I have to leave it for quite a while in order
for the glue to have top strength before removing the clamps. All
that's left to do now is one strip on the side lip of the box lid, and
maybe some spot bolstering, but I'm pretty much out of glue. I'll get
more today. I also bias-cut and glued (with cyanoacrylate glue) the
box's broken EPDM sealing ring.
I then moved out to the car, and removed the alternator. To do so
it's easiest to first shift the windshield washer tank out of the way,
then it's just one 13mm and two 17mm bolts and unplug it. With it
out of the car I could then get at the two screws that hold in the
combination regulator/brush pack, and with that out it was
obvious that it was worn out: one brush was much shorter than the
other, and its corresponding slip ring was a bit chewed from arcing.
I'll need a new brush pack, and to dress that ring. It's a 70 A
unit. (Marked 14V 28/70A, I wonder what the "28" is?)
...I checked at Schuck's, and they now want $61, plus a week and $6
shipping, for a brush pack. A front bearing is now $30, same deal.
No thanks! Rusty's price for the brush pack is more like half that.
I checked at Ace hardware for individual brushes, and it appears that
they've stopped carrying those. Jerks. I need to assess the state of
the bearings before I can decide my best course of action.
I bought more Shoe Goo at Ace, while I was there. ($5) When I got
home I glued on the last piece of the lid. Later, after it had set
up, I started bolstering the weak points. I also pulled off some glue
that had started to come loose due to overexuberant clamping, and
perhaps a bit of poor surface preparation. I'll finish by putting
that back.
Tuesday, June 29, 2010
I re-glued the bad spots on the lid. I then just had to deal with the
missing chunk. I found a piece of scrap black plastic (the tray face
from a dead DVD player!) and cut some chunks that filled the hole,
then glued them in place. That pretty much finished up that job.
When spinning the alternator by hand it sounds 'dry', I'd say that it
really could use a new bearing or two. Checking my records I find
I've done this before, three
years ago on the 190D, and the place to take
the alternator is Spokane Auto Electric & Repair
(1407 E. Sprague). They carry everything, and can turn slip rings
too. I just need to take it apart and re-assemble it.
Not an issue. Step one: use a Sharpie to mark the phasing of the two
housings. As before, I then put two screwdrivers into the fan and set
them against bolts through the alternator mounting holes. A 22mm
box-end wrench went over the nut, and then a hammer striking the
wrench removed the nut easily. (Rotor inertia, rather than the
screwdrivers against the fan, was the main counterforce.) The pulley,
fan, and all the spacers just drop off the front then. I strung them
on a piece of wire to keep them in order. A hammer and a screwdriver
removed the shaft key. Removal of the fan exposed the four screws
that held the body together, those came out easily enough. (Don't
slip and bugger the screw slots, or you'll really have a problem!) A
brass hammer tapped around the rear housing caused it to drop away
from the front housing and rotor, the rear bearing stayed with the
rotor. The rear bearing was very dry, it's close to failure.
Most of the grease appears to have worked out of both bearings. I
removed the four little screws that released the front bearing
clamping plate, and with the nut on the shaft the brass hammer drove
the front bearing out of the front housing.
Checking the tool box I found a recently-acquired New Britain puller
(50¢ at a garage sale) that is a perfect fit to the rear
bearing. It clipped over it and with a twist and a little pop it came
right off the shaft, the flat end of the puller's bolt slipped
perfectly through the bearing. (It was sweet, I love using
good tools!) The front bearing is the hard one, but I have found that
I can use a clamp-together flat plate bearing puller in conjunction
with a 2-jaw puller to pull them off their shafts. I kept the front
nut half-on the shaft in order to constrain the point of the 2-jaw
puller. It took quite a bit of force, but the bearing pulled off
pretty easily, and the procedure didn't seem to deform the bearing
clamping plate too much. Disassembly complete; it didn't even take
very long.
I put the rotor, bearings, and brush pack into a box in the trunk of
the car.
...Today out at lunch I stopped by Brown Bearing, and
unlike last time they had both alternator bearings. $15 for the pair.
I stopped by Spokane Auto Electric & Repair, and they
did not have any solder-in brushes, but they did have the brush pack
for $30, which is an OK (but not great) price as these things go.
(They did say that it was made in the USA. Marked 71-40007 and
USI 00838.) I bought it so that I can finish (?) tomorrow.
They didn't think the slip rings needed turning, but they did
recommend that I chuck it in a lathe and use emery paper to take off
the black. I think I may be able to rig something, we'll see.
Wednesday, June 30, 2010
I slipped the old front bearing back on part way, wrapped a strip of
pop can metal around the back shaft, and chucked the rotor into the
drill press as a vertical lathe, with the front bearing resting on the
table and the shaft protruding through its central hole. I then got
out a flat stick and some emery paper and had at it. That worked, but
it exposed the fact that the one worn slip ring had a noticeable crease
in it, presumably from arcing. I got more aggressive with a file and
flattened it, mostly, then re-applied the paper and stick. (Taking
the hairline groove completely out would have removed more material
than I was comfortable with doing.) I now have a nice shiny smooth,
and mostly flat, pair of slip rings. We'll see later if I made a
mistake or not! I didn't have time to do much more.
The original front bearing was marked FAG 6303.R.10.18, and also A.Q
and ITALY; one dust cover is marked 6303 S 457, the
other 6303 S 478. The replacement is also FAG, labeled on the box
6303.2RSR.C3 but marked on itself 6303.C3 and E275-0331 HB; one dust
cover has 6303RSR and W263 on it, the other has 6303RSR and W243 on
it.
The original rear bearing was marked SKF 6201-2RS1/C3HT228VU035 (a bit
sketchily, as it's on the outside of the race and has some scuffing
that somewhat obscures the legend), and also B (or 8) and
ITALY, the dust covers appear to be unmarked. The
replacement is Koyo, labeled on the box 62012RDC3 but marked on itself
only C3; the dust covers have 6201RD, KOYO, and
JAPAN on them, once side also has 555
and the other has 519.
Thursday, July 1, 2010
Reassembly time! I cleaned the shafts of the rotor and put it in the
freezer, and put the bearings and housings in the shop oven at
200 °F. They just slid together after that, with only a
little tapping with a hammer and some deep sockets to seat the
bearings fully in place on the rotor. You definitely want to make
sure to remember to put the captive retention plate on the front
shaft before you put on the bearing! The body reassembled
easily then, the worst part was getting the little half-round key into
the shaft's notch. It is interesting that the belt pulley is two
separate sheaves, I didn't notice that before. The alternator spins
smoothly and quietly now, it's nice. I then put it back in the car,
nothing special about that procedure.
I checked the fit of the battery in the box, and I found that with the
red plastic spacer board in place the lid didn't even come close to
fitting down over the sealing lip of the box, which explains how it
had gotten so broken up: they'd tried to buckle down the lid but it
wouldn't go, and they tried forcing it. I imagine that what had
happened is that at some point someone had put in an incorrect
battery, a small cheap one rather than the correct (and rather large)
Group 49, and that the cables didn't reach the posts so they'd
put the board in to lift the battery up a bit to reach the cables.
Later, when the correct battery was installed the board was not
removed, and thus began the destruction. With that all figured out I
then wiped the battery compartment clean with a damp rag and
reinstalled the newly-repaired battery box, then the battery. As I've
found before, the hardest part was getting the positive grommet back
in the box. I touched up the paint on the buckles, etc., and
reinstalled the hatch cover and the buckles. I brushed off the end of
the negative cable and put it back, using some anti-sieze on the bolt.
To maintain the clocks, etc. the car's been on the battery charger
this whole time, but set at 6 V to keep the voltage peaks down
since the battery wasn't there to serve as a filter. Seems to have
worked, anyhow.
I was going to put the used front bearing into the junk alternator
that's been underfoot for quite some time now, only to find that it's
not the front bearing that's loose! The bearing socket in
the front housing is what is loose, the bearing probably got tight and
spun in the housing at some time and chewed it out. It's possible
that some shimming would restore it, but it's not like I really need
it at this point.
I then fired up the car and checked the running voltage, it was
14.3 V which is right in the pocket. Done! I tested the keyless
entry fob and it was working fine, once I tried it a few times. (The
keyless system sits loose in the battery compartment, all the messing
around back there doesn't seem to have hurt it any.)
Thursday, July 8, 2010
It seemed to me that the starter barely turned the car over when Jill
drove off from meeting me today. I checked and the alternator light
is working correctly, I need to do more checking.
Friday, July 9, 2010
I measured the battery voltage, it was 13.1 V which should be OK.
I put the battery charger on, and while it did draw a charge it
dropped off fairly quickly. Nothing seems wrong there. I did put a
quart of oil in the engine, it was low.
...Jill called me at lunch from the library parking lot, and said that
the battery (that went through Hell with the alternator incident) made
a big 'pop' noise when she went to start the car, and fluid started
dripping out of the back. (It also wouldn't start, and had been
getting difficult to start recently, and could sometimes barely turn
over though the voltage and charge state always seemed OK.) Sheesh!
I got there and opened it up, and the newly-repaired battery box had
contained all the acid from the 8-year-old NAPA battery's case blowing
open! It had cracks and fractures all over the place, and had leaked
thoroughly. We got a pan of water and sluiced it off before lifting
it out onto the ground, and diluted the acid stream that was running
away from the car. I put the battery on one of the rubber winter
floor mats in the trunk of my car, and we went off to Les Schwab where
we bought another Group 49 battery for $108. (I washed off the
floor mat with their hose.) It installed easily enough into the car,
but the cables didn't reach well and I didn't have time to fuss with
it. (It's possible that the new battery is a bit shorter than the old
one.) It got her home, anyway, but the car wouldn't start again there
because the positive cable had popped off sometime along the way. The
battery box and the lid have some new cracks in them, so I'll have to
do some more gluing too. Before she drove off with the new battery I
checked the charging voltage, and it was steady at just over
14 V, which is good. This implies that it was not the
rebuilt alternator that killed the battery.
Exploding battery, that's another first for me.
The current theory is that one of the internal bus bars broke a while
ago, isolating a substantial part of one cell. That would have put
extra stress on the part that was left in circuit: both the heavy
starting discharge and the later recharging current would have been
forced into a too-small area, eventually causing hydrogen-oxygen
dissociation. The working part of the broken cell could possibly even
have been driven into reverse polarity during starting by the power of
the remaining five cells, and they really hate that. The
starting current ability of the battery would have been severely
compromised (as it appeared to be) yet the resting terminal voltage
would have been fine (as it was). She hit the starter, the diminished
cell's voltage dropped precipitously, and minute vibration and/or
thermal effects induced the bad connection to re-connect at that
moment in an explosive atmosphere of the freed hydrogen and oxygen;
the isolated parts of the cell were (let's say) fully charged and
so there was plenty of voltage difference and thus current flow and
thus a spark... Check, check, and check! Works for me.
The jouncing the car took during Jill's off-road
adventure was probably ultimately responsible for this, though it
was only yesterday that I noticed anything odd about the battery.
That battery had had a hard life, what with the parasitic drain
issues, the eventual alternator strike, and the bouncing around.
Saturday, July 10, 2010
I removed and cleaned the battery box, and began gluing again. It
won't take long this time.
...In the afternoon I finished the gluing.
Monday, July 12, 2010
I got a chance to reinstall the battery this morning. I checked the
height of the battery in the box, and it's a bit too short thus
explaining the problem with the battery cable fit. I put the
offending red spacer board back in, and it helped a lot. The battery
cables went on easily this time. I buttoned it all back up and
vacuumed out the trunk. The battery hatch knob had broken off during
this incident, it's rather chewed looking where it goes into the latch
hook, but I think it's still usable. I reinstalled it, anyway.
Tuesday, July 27, 2010
Brake fluid was low, I topped it off again.
Wednesday, September 8, 2010
Getting cold out. Put the hard top back on, and added two quarts of
oil to the engine.
Monday, October 18, 2010
Jill reported that it didn't want to go. The ATF was low, I put in a
quart.
Monday, November 8, 2010
Two more quarts of oil, and some power steering fluid. Getting
kinda thirsty!
Tuesday, November 9, 2010
On 'date night' I hit the cruise, and it didn't want to come on. Then
it did, but it was spastic. Well, why should this car be any
different? They all need this repair, sooner or later.
The motor mounts are most definitely in need of replacement, the
'frame-on-rails' sounds from up front are getting more prominent.
Sunday, November 21, 2010
Put the car away for the Winter, in favor of the Chicken Wagon.
Wednesday, June 22, 2011
The windshield wipers are very loose, but linked tightly together
indicating it's the motor linkage that's on its way out, that's what's
kept this car grounded this very rainy Spring. Also, until this week
the weather has been cold and wet and generally lousy, almost no
top-down weather, especially for the less-than-hardy like my wife, so
I haven't been inspired to work on this car. (I haven't even taken
the hardtop off of my car yet!) Anyway, we need the car so
today I started pulling out the interior; I'd better hurry as the days
are already getting shorter! I can't count the number of times I've
done this particular operation on a 107 now, and it's getting old...
Mirror, visors, top-rail trim, A-pillar trim. Glove box liner,
console surround, ACC panel, stereo. (The secret to the Sony stereo
is two sheet-metal release clips that nestle inside the bezel, they
have to be pulled inwards to release from the mounting cage.) One of
the ACC panel's mounting ears was tearing off again, I used
cyanoacrylate glue to re-secure it. We'll see. The console
surround's rear locating pin was tearing off again, more glue there.
Pull off light switch knob, 24mm wrench for light switch hex nut,
unscrew parking brake knob. The parking brake knob split, as is so
common with age. I pulled out the metal insert and wiped on a bit of
Shoe Goo and re-inserted it, then used a small MB hose clamp to
squeeze it back together as it dried. We'll see, I've generally had
poor luck repairing these.
10mm socket on long extension for the two knee bolster bolts, T27 torx
screwdriver for the airbag, large Allen socket for the steering wheel.
Three screws hold in the driver's-side under-dash panel, I removed it
and the light so I could put it in the trunk. Three tiny Philips
screws removed the plastic retainer for the steering wheel brushes,
then I could pull out the instrument cluster. It unplugs readily,
just beware of flashing the clock power lead against ground! (I do it
nearly every time and usually blow the fuse. I did it this time too,
but the fuse somehow survived.)
With the instrument cluster out I grabbed the wiper and wiggled it, I
could see that the intermediate pivot point between the motor and the
arms was coming loose from the car body. A missing bolt? Not sure,
and I was out of time to continue. I suspect that this wiper problem
could be dealt with without removing the dash, but there are other
problems under there too. I plan to continue with dash removal.
But another day, now it's time for breakfast...
Saturday, June 25, 2011
Another small session. I removed the passenger-side under-dash panel.
That's a tricky one: besides the two exposed bolts and the obvious
screw there's a screw towards the firewall, and one inside the dash
holding it to the ductwork. (That's the nasty one.) I found the
beginnings of a mouse nest under there. Not good, but it looked old
and neglected. (Thank you kitty!) With full access to the dash
secured I then had a closer look at the loose wiper pivot. It appears
that one of the two 10mm mounting bolts is missing, and the mounting
ear (pot-metal) on the other one is broken. This promises to be fun,
not! I hate pot metal...
Sunday, June 26, 2011
Today I removed the driver's seat, and then the console. It's held in
with eight screws, two of them through the carpet panels (forward, and
low, you first have to remove the false floor in the passenger
footwell). The joker is that the carpet panels glue themselves to the
tunnel with time, then nothing wants to move. They are hard to free.
With the console out you can then remove the tunnel braces. I next
disconnected all dash switches and the temperature gauge, and
disconnected the dash vent controls at the duct end. (Spring clip and
a wire coil around a metal post.) I unplugged the cabin temperature
sensor, and pulled its hose off. I lowered the steering column a bit
by removing the 13mm bolts that hold it to the crossbrace, and freed
the combination switch by removing its two screws. Finally I removed
the two 8mm retaining nuts and large washers that hold the ends of the
dash in place, and the center 10mm retaining bolt and washer. With
that done the dash was more-or-less free, but still trapped in place.
The big problem was that the windshield butyl had oozed and glued the
forward edge of the dash to the frame. I got that mostly loosened,
but I wasn't quite there yet. With frustration mounting I decided it
was time to take a break, before I broke something.
Saturday, July 2, 2011
In the morning it was cool in the garage and the butyl didn't grip as
hard so the dash loosened right up in its seat. I then spent some
time trying to do the "bend and pull" that the manual talks about, to
flex the dash enough to come out at the passenger-side corner, and
eventually I got the dash out. It's hard to do without scarring
the dash material.
With the dash out I could then get at the wiper linkage. The
broken-off mounting ear was very clean and there was room on both
sides to splint it with washers, so I cleaned it off with carb
cleaner, got two suitable 3/16" flat washers, and mixed up some
JB Weld epoxy. I glued washers on each side of the ear and
coated the break with glue too. I then doused the bolt in oil and,
using a spare nut, bolted the splint together finger-tight to set up.
With any luck the oil will keep the bolt from being glued in place,
yet will not poison the glue joint. I also scared up a replacement
for the missing bolt; Lock-tite will be a feature of the
reinstallation so this doesn't happen again.
...A couple of hours later I removed the bolt and nut to prevent them
getting glued into place, I'll let the glue set up the rest of the way
by itself.
Sunday, July 3, 2011
Oops. The glue was not ready to be on its own. The whole
thing fell apart, and the broken-off ear glued itself to the wiper
linkage. One of the two flat washers has disappeared, it's probably
glued to something under the dash. I'll have to replace it, I
couldn't find it.
Thursday, July 7, 2011
I chipped the glue off the pieces as best I could and chased the
threads of the bolt and nut. I coated the bolt with anti-seize for
the next attempt, that should work very well. There was not time to
do the re-gluing.
Friday, July 8, 2011
I cleaned off the bits with carb cleaner and re-glued it all back
together. I'll leave the bolt and nut in place until it's completely
set up this time—not that I have any choice since I'll be at
work all day. Let's hope that the anti-seize works as intended, or
this is going to be really bad. I did find the missing
washer, but only after I'd glued a new one into place.
...After work I removed the bolt and nut, cut off the glue stalactites,
and cleaned the glue off of the bolt. It looks good, we'll leave it
alone for awhile to finish curing.
Sunday, July 10, 2011
With the glue fully cured I then bolted the pivot assembly back to the
body. I used low-strength (purple) Locktite on the two bolts after I
cleaned them thoroughly.
Next was to dig into the AC venting. The service manual's Job 83.9-665 seemed the most
relevant. Ugly! I got out the MityVac and tested the four vacuum
circuits. The center vent and both sides of the defrost vent
actuators were dead, big surprise. The footwell and recirculation
actuators were fine, which is also fairly typical.
Monday, July 11, 2011
The instructions are easy, the execution is not! Removing
the bottom and front pieces of the heater box sucks. I had to remove
the left- and right-side ducts, which the manual fails to mention, and
also the airbag crash sensor. There are a lot of spring clips holding
the heater box together, I removed quite a few, and the drain hoses.
I think one big spring clip was missing from the start, and I hope I
didn't lose any more. There is a lot of wiring in the way that is not
easy to work around, I was able to shift it some to get a little
clearance. Even with all that I had to pull pretty hard at times. I
have no idea how I'm going to get it all back together so that it
doesn't leak, squeak, or freak. On the other hand, I don't give up
easily... so we'll see.
The center vent acutator had torn itself loose from the heater box.
I've seen that before, and after I glue (or perhaps weld) it back
together I'll bolster the front with a piece of sheet metal to spread
the load. (The actuator mounting bracket serves that purpose on the
back side.) I drilled out the bracket mounting rivets to free the
torn-out chunk of box plastic, I'll replace them with bolts. With the
plastic box material sandwiched between two large pieces of metal and
secured with bolts it should be very strong.
The box bottom was full of crap that had fallen down into the heater
over the years. The box pieces look like they were sealed with
something like rope caulk, which I will try to use upon replacement.
If you don't get the sealing right then cold water (condensate) tends
to drip on your inboard foot, which is surprisingly unpleasant.
I then ordered parts (buymbparts.biz).
Both vacuum pods and a black dash cap.
Tuesday, July 12, 2011
I got out the plastic welder
and welded back the broken-out piece of the Behr HVAC box front.
Black (ABS?) plastic, easy-peasey. Turns out I didn't really seem to
have a matching plastic in the welding kit, but the black rod seemed
to stick well enough. I got it welded in place, then cut a piece of
sheet metal from the scrap pile. I think it was a slot cover for some
kind of computer server, it had bent lips along both edges for extra
rigidity. I cut it to length and drilled an extra hole in it (there
was already one), and ground off a corner to ensure there was
sufficient relief for the vacuum connector. I then used brake cleaner
to clean off (and soften) the plastic, then glued the spine to it
using Shoe Goo. I bolted it all together, using 4mm hardware and
purple Lock-tite to secure it, and then smeared a fillet of glue
around the outside edges. It should hold well, and distribute the
load much better than before.
Sunday, July 17, 2011
Yesterday the new vent components I ordered came. The defrost vent
actuator (000 800 32 75) has been changed, and requires
a new linkage arm (107 805 06 74) and an E-clip
(N006 799 003 202) to install. The center vent
actuator (116 800 19 75) is supposedly a direct
replacement.
So I went out to try to install these things. The 'direct
replacement' center vent actuator is not the same thing at all. The
mounting plate is similar, but does not line up with the holes in the
plastic, nor is the actuating arm the same. (The original is long,
and pins to the plastic flap with a plastic expansion pin. The
replacement is short, and has a metal pin protruding from it.) The
defrost actuator looks OK, but there is nothing to pin the replacement
arm to it, the E-clip doesn't go anywhere. I hit the EPC, a truly
miserable piece of Windows-only software, and found the defrost
actuator's replacement callout wants a 007338 004205, whatever
that is [this DIN number calls out a rivet, sayeth my parts guy], not
the E-clip. I also found that the EPC only knows about three vacuum
element types, not the four that the car has, and that the other
actuator I got is the one for the footwell flaps. (I checked, and it
is indeed that one.) There is no sign in the EPC of the center vent
actuator, that's because it believes that there is only a manual
center vent lever. Great. Officially I can't replace
either of the old vent pods, though I'm sure that if I
wanted to go on a fabrication binge I could.
Monday, July 18, 2011
I called today about the vacuum element problem, and after much
scratching around it was determined that the "fresh air" element
listed in the EPC (107 800 26 75) is indeed the center
vent element. (No sign of the recirculation flap actuators, which is
what I/we thought was what was being described by this term and
corroborated by what was shown in the manual's parts diagram.)
We shall be exchanging these parts.
...Today the dash cap came, but I'm not ready for that part of the
project yet!
Tuesday, July 19, 2011
I decided to thoroughly check out the footwell flap element since I
have a replacement in-hand, so I opened it up. The diaphragm was not
yet torn, but there were cracks encircling it where the tears always
happen, so it was close. I decided to keep the new footwell element
rather than return it, so I opened them both up and exchanged the
diaphragms. (That's easier than replacing the entire element, given
the way the plastic posts are held to the bracket with speed nuts, and
the way the bracket itself is riveted to the case. The secret to
opening these is a small screwdriver and a butter knife, use the
butter knife to pry a little between the two case halves while using
the small screwdriver to release the clip tab. Then, while
maintaining the butter knife pressure, go over to the next clip tab
and release it with the screwdriver. That'll 'pop' the case apart
enough that the other two tabs are then easy. Be gentle, and watch
out for the big spring!) The attachment to the flaps was made via a
speed nut on the metal post of the element's link. I worked it off
using the knife and screwdriver, with a rocking motion. The nut was
re-usable, it didn't break. (This trick doesn't really work on
plastic posts, the nut digs in too much, which is why I usually swap
vacuum actuator guts rather than the entire thing as these are usually
held in place with speed nuts on plastic posts.) The nut was easily
replaced by nestling it into a suitably-sized box-end wrench and
pushing it back over the post.
The irritating part of all this is that the Behr diaphragm itself is
fairly easy to replace, and would be a cheap part if you could get it.
If only the diaphragms were separately available!
Thursday, August 18, 2011
Managed to find a bit of time so I moved the diaphragm and spring from
the new center element (107 800 26 75) to the old one
that's mounted to the HVAC box. (Swapping the innards is usually
easier than swapping the entire thing, and is sufficient.) The
scooped side of the actuator arm must be oriented upwards, as it was
before, so that it doesn't interfere with the edge of the slot it
pokes through on its way to the flap. I put the bad diaphragm in the
new unit, labeled it, and put it in the parts pile for eventual
discard by my heirs.
Friday, August 19, 2011
Same exact thing as yesterday, but with the new defrost element
(000 800 32 75). (In this case it's only the green
plastic shell that's mounted to the HVAC box that's preserved during
the swap, everything else is the new.) For whatever reason the new
element doesn't come with the linkage arm riveted to it anymore, you
have to use the new arm (107 805 06 74) you are
encouraged to order and find your own way to secure it to the vacuum
element. (The E-clip you are also encouraged to order is useless,
there's nothing to clip it to.) I used M4 hardware: bolt, nut, two
flat washers, and a lock washer, and purple Locktite. I
do not want that nut to fall off in operation! (As before,
the scooped side of the arm must be oriented upwards to clear the slot
in the HVAC box.) I attached the new arm to the flap with the
original plastic pin, and tested it with vacuum. Both stages worked
correctly, the flap has three discrete positions. I set it aside to
dry. Once I'm convinced the hardware is secure then reassembly of the
car can begin.
Monday, August 22, 2011
I trial-fit the HVAC box bottom, it goes in easier (with experience)
than it came out, but you have to be pretty firm moving cabling and
hoses out of the way. I cut some new pieces of rope caulk for the
side sections where it meets the main HVAC box body, the front edge
caulking (where it crosses the hump) looked fine as-is. I also spent
some time shaking loose a rattly bit that was trapped in the bottom
somewhere, it turned out to be a small piece of caulk. (I needed to
partially operate the footwell flaps with the MityVac to release it
from captivity.)
Tuesday, August 23, 2011
I got the HVAC box bottom installed in place, making sure the caulking
was all in good shape first. There are two fat metal slide-on
retaining clips at the forward edge, they went on easily. I also put
the evaporator temperature sensor back into place, and clipped the
two-terminal block to the rectangular hole in the front of the box
bottom. That all actually went pretty well. I then used duct tape to
cover the holes in the vacuum-element-bearing box front where the
factory duct tape had failed, and repaired the caulking along its
edges. The evil part was next: trying to install the box front in
place. The wiring harness of the car is badly in the way, manhandling
it even after loosening all the car's zip ties and removing all the
non-factory electrical tape didn't quite do it. I decided to stop
before my mounting frustration caused me to break something.
Wednesday, August 24, 2011
The secret to getting the HVAC box front into place is to splay its
leading edges outwards so that it can go on over the main part of the
box 'too far' at first, which lets the trailing edge get past the knot
of wiring. Then you pull it back a bit and jostle it into place,
moving the car's wiring harness as necessary. Takes a bit of
fiddling. To get the long, narrow sliding metal retaining clips that
secure the box front to the box bottom into place requires that you
first remove the fat sliding metal retaining clips that hold the
bottom to the main box, else you don't have enough wiggle room to get
the lips to mate correctly. There was a lot of wiggling and cursing
involved in this step, and I ran out of time, but I believe the pace
is going to pick up from here.
Friday, August 26, 2011
I got the rest of the HVAC box clipped together, and the center outlet
horn attached as well. It took a fair bit of fiddling to get all the
surfaces to mate, but once they had the clips went on easier than I'd
thought they might. (I only dropped one and it didn't go far.) Make
sure that the smooth sides of the two toothed clips that tie the
defroster duct outlet halves together (up on the inboard top) face
outwards so there's no interference with the mating ductwork in the
dash. I then hooked up all the vacuum lines, including snapping them
into the clips on the HVAC box, and then attached the two hard side
ducts. It's starting to look like itself again!
Wednesday, April 18, 2012
Time, and past time! As I recall the next step is to glue the dash
cap onto the dashboard. Today I bought a roll of 3' 4-mil clear
plastic, the thickest they had at the hardware store, laid out a
double length next to the dashboard, cut it, and rolled and taped the
edges to make a generously-sized vacuum bag long enough to hold the
dashboard easily. (Daniel helped.) When we hit it with the vacuum it
didn't work very well. The cheap masking tape I used to seal didn't
stick well, mostly because it was NFG to begin with. (Masking tape
should come off again, allowing re-use of the plastic.) The plastic
is also thin enough that some of the metal bits of the dash tore it,
but some duct tape patches took care of that. (Real vacuum clamping
bags are more like 30-mil in thickness.) I think, however, that with
a bit of care the bag will help clamp the cap to the dash, but I'll
need to drape weight over it to do the bulk of the pressing. (We have
some bags of garden dirt that ought to do.) I think I'll need to put
damp rags into the bag as well, since it is moisture that initiates
the cure for most RTV products such as the caulking tube of black
gasket material I procured earlier for this purpose.
Monday, April 23, 2012
I used ammonia and alcohol to clean the dashboard top in preparation
for gluing.
Sunday, May 6, 2012
Not having had any better ideas, I proceeded with the bagged gluing.
First we re-did the bag, this time using a good wide roll of 3M blue
masking tape I'd found we had. (Fold and tape the edges, twice.)
Much better than the cheap Chinese crap I'd tried before. I think
this time it'll work a lot better. I then used most of the caulking
tube of black RTV gasket material to line and criss-cross the shell,
leaving open spaces no bigger than an inch. I smeared it around all
the various edges, to prevent ooze-out, then pressed it over the dash
and clamped it into place with a few spring clamps along the leading
edge. We then slipped it into the bag, threw in a wet shirt, taped it
shut and turned on the vacuum. There were no obvious leaks, but the
best vacuum we could get in the bag was about 7" of mercury,
whereas the pump's maximum is about 25". Still, it sucked down
OK, and with noticeable (though diffuse) clamping pressure, so let's
hope it works. I then laid the thing over so the dash's own weight
helped to push things together. (The bags of dirt had all been used,
so there's no backup clamping. That'll teach me not to procrastinate.)
Monday, May 7, 2012
I put air in to inflate the bag some, then pulled the tape and slipped
the dash out. Things were very wet inside, as I'd hoped, and the RTV
has all seemed to cure. There are a few places that didn't seem to
pull down like I'd intended, but mostly it looks good, and I doubt
it'll start pulling off like the last one I did. (For which I
followed the official directions.) I guess we'll see. I ran the
vacuum pump for awhile to air it out, let's hope the acetic acid
emitted during the cure didn't corrode the inside!
Wednesday, May 16, 2012
I used a 5/8" Forstner bit to drill the cabin air temperature
sensor hole in the dash cap. (I hate doing that!) It made a
very clean hole. I then used a 3/4" twist drill to ream the hole
larger by hand, and a razor blade to cut the orientation notch for the
sensor. It went together well. I believe the snap collar on the
bottom has to go on upside down in order to mate due to the
now-thicker dash, but that should be harmless.
Friday, May 18, 2012
There were a few 'loose' places along the leading edge where the
clamping was insufficient, so I pushed in a bit more RTV and used the
spring clamps. Maybe tomorrow I can put it in the car? There is some
loose sound batting in the car, and I can't seem to find my yellow
weatherstrip cement.
...Found the cement, it was exactly where I would have put it. Not
sure why I looked right at it and didn't see it the first time.
Monday, May 21, 2012
I used the weatherstrip cement to glue back the loose sound batting.
The hard part is not getting glue all over the place where you don't
want it.
Tuesday, May 22, 2012
Dash day! But first I had to properly hook up the extra ground wire
from the rear fog light switch. (I'd just wrapped it around a nearby
bolt before.) With the dash still out it was easy to run a long wire
over to a ring terminal I added to the ground cluster at the right
side of the dash. I soldered and taped it together, and threaded it
through the tie-wraps that were there for the factory harness. It
looks as good as it's going to get, though I did have to use black
wire, not brown.
Anyway, I opened both doors and fetched the dash from its
ersatz workbench (the nose of the Chicken
Wagon) and carried it into the car. I put back the left-hand air
duct, and the center mounting bolt. I washed the rubber center air
duct, it had a lot of oil and dirt on it. I used a small screwdriver
wedged into the air box in the car to hold the defroster flaps closed.
(That's one of the secrets to this!) Then, contorted so I could both
support the dash well and control it, I was able to start worming the
dash into place. The left side goes on first, you have to snake it
over the steering column, being careful not to scar anything against
the various sharp bits of the column and the window frame, the right
side of the dash has to be somewhat 'down' as you work it in on the
left side. Then the right side is worked into place, there's a lot of
gentle back and forth and wiggling in order to get things to mate.
You have to watch for wires getting out of place, the side air ducts
and control cables, and the defroster ducts. With luck and a bit of
care you can then get the three mounting bolts to go into place, and
then shimmy the dash into final position. I decided to stop there and
clean up as I was nearly out of time, and this was a good point to
take a step back and have a good look at everything before beginning
to hook everything back up.
Wednesday, May 23, 2012
Day 2. The worst part of this entire procedure is the left-hand vent.
There is a bracket that holds the flexible duct (pipe) away from the
windshield wiper mechanism, and though it's easily visible you can't
quite reach it; it is best to start with that, so that the least
amount of junk is in your way. Start with the loose pipe and slip the
bracket over it and get the screw started in the hole. (With the pipe
loose and bent away from the area you can have room to see and work.)
You can barely swing a short 8mm box-end wrench in there, or maybe a
1/4" drive socket system might fit, I used the wrench. Once the
bracket is tight you can wiggle the pipe into place and get it pushed
onto the vent eyeball. (That all took me quite awhile to get right.)
Once that was in place I was able to re-connect the brake release knob
by pushing the rod through the hole from behind, then putting on the
grommet and E-clip. The repaired knob went on
easily, but its label is now clocked wrong, that's the least of my
problems.
I then was able to snap in the headlight switch bezel lamp, and then
attach the headlight switch itself to the dash with its big nut. I
then re-attached the left-hand speaker's wires, which had pulled off
the speaker. Their spade clips were loose so I re-crimped them to fit
tighter, then I connected the speaker plug to the wiring harness. The
turn signal switch was next, one of the horn wires had pulled out so I
reattached it first. The switch then nestles back in place in the
column, two screws secure it. The rubber cover then clips over its
retaining ears on the column. I then reattached the steering column
to the cross-brace under the dash, two large 13mm bolts from above do
the job. I was then out of time.
...After work another session, and time for that other evil
part of the left-hand vent: attaching the control cable to the shutoff
flap. (This has always been a difficult task. This time I had Daniel
for company, and help.) When I tried to connect the cable to the duct
I found that I had again managed to get it on the wrong side of the
parking brake release mechanism. (I do this a lot!) I was able to
undo my brake work of this morning, and with the mechanism all the way
retracted I could manage to get the cable moved to the wall side where
it belongs. I then put back the parking brake mechanism. The cable
was easy enough to lay in its bracket, but the retaining clip
is very tough to snap into place. Fingers won't quite do it,
and you can't get regular pliers in there. I wasted a fair bit of
time trying. I then remembered that I had once made some fanged pliers for
exactly this task. I dug them out, and almost immediately "snick",
and it was done. It's sure nice to use the right tool for a job, even
Daniel was impressed! Regular needlenose pliers took care of putting
the loop on the flap control. The duct itself was easy, except that
it had gotten deformed and one part of the lip kept wanting to fold
into the duct instead of going on right.
Daniel and I then slipped the rubber center vent duct into place, two
more hands made that essentially trivial. It then seemed like it was
finally time to attach the three dash mounting nuts and bolts. This
went well. I then went to hook up the cabin air temperature sensor,
and decided I had mounted it backwards since it didn't want to stay
flush with the dash. (The grid should be oriented to prevent sunlight
from getting into the sensor.) This necessitated cutting another
guide notch in the new dash cap with a razor blade so that it could be
rotated 180°. In the correct orientation the retaining collar
underneath was now just able snap on its last notch when
right-side-up, with the wide edge against the dash, instead of upside
down as before. The foam hose was next, and went on uneventfully. It
was then dinnertime, but first I had Daniel pull the screwdriver that
had been holding the defroster flaps closed.
Thursday, May 24, 2012
Day 3. The right-hand speaker wires were loose on its speaker too, so
I re-crimped and re-seated them, then plugged it in. The right-hand
vent cable was next, it's easiest to remove the duct from the car
altogether and clip the cable on with it hanging down, then slip the
duct back into position. The vent duct itself was easy.
Moving to the center of the car I began by putting back the brace
between the heater box bottom and the floor of the car. This brace
also carries the fiber-optic light source. With that in place the
airbag controller can be bolted down to the hump using its two Torx
screws.
There's more to getting this car ready than just the interior, it was
time to take care of that leaking LR tire. I jacked up the car and
put a jack stand under the rear sway bar mount. (I needed the jack
elsewhere too.) I put the tire in the trunk of the SEL, which I have been driving lately. I dropped it
off at Les Schwab.
...After work I picked up the tire. It was rim corrosion, of course.
(No charge, especially for a loose flat.)
Friday, May 25, 2012
Day 4. I put the tire back on, that was easy enough. I then moved
inside and connected the outside temperature gauge. The three in-dash
switches were next, fortunately it was fairly easy to tell the order
they go in, and I'd set them in order on the back shelf. I connected
the wires to the glove box switch, and put the bulb back in its lamp.
I connected the dome lights again, and noticed that they didn't work,
so I replaced the fuse (#12, 8A) that I'd managed to blow somewhere
along the way, then they worked with the switch. Things are
definitely starting to tidy up! I put the two heavy braces back
between the dash crosspiece and the hump, then it looked like it was
about time to put in the console.
That was not fun. I ended up tearing the front mounting tab off of
the left-hand side carpet too, to match the right, because it just
grips too tightly. I needed to be able to slip the carpets in and
out. Anyway, after trial-fitting the console once I convinced myself
that the recirculation vacuum hoses would get in the way of the radio,
so I removed the console and re-threaded the hoses behind the
crosspiece, against the heater box. I tried it again and it seemed
like they'd be too short to attach to the switch when putting the
control panel back again, so I did it all again, this time threading
them through the wiring lashed to the bottom of the crosspiece to get
a little more slack. That finally looked plausible. I got the
console slipped into place, carpets attached, and all the wiring and
hoses in their respective cubbies. The console's not attached yet,
though, as I was out of time. The car's starting to look a little
like a car now!
...After work another session with Daniel. We started by screwing
down the console, side carpets and all. We then pushed in the radio
frame, then the radio. (Replacing that Sony with something more
likeable will have to wait.) I left off the original Becker's
security ground slider. We then moved down a space to the HVAC
control panel, which went in fairly easily. There is a 2-pin
connector, of the small variety much like the one that is on the
evaporator temperature sensor, that is unconnected, and I'm mystified.
It's part of the HVAC cable harness, and can't really reach that far,
but I just don't see where it could go. (No time to fool around, so I
made this note of it and moved on.) The connections to the
recirculation switch, both electrical and vacuum, were tight.
Nonetheless it went together OK. Next up was the shifter surround,
the connectors to the switches went on, then we slipped the surround
into place and screwed it down. Then it was the ashtray surround and
ashtray, and the console was done.
The window trim was next, you must start with the A-pillar pieces, I
started on the left. I used a bit of weatherstrip cement to fix the
anti-squeak felt on the bottom of the lefthand piece. With the A
pillar cover on you can then put on the sunvisor, two screws, and also
connecting the electrics, and then the top trim. Repeat on the other
side. Then we put in the mirror socket, then the mirror. This thing
is starting to look a lot more like a car! We then installed the
instrument cluster, then the plastic trim ring on the steering column,
and then I set the steering wheel in place, though I did not tighten
it down. Last thing before we broke for dinner was the main light
switch knob and rear fog indicator lamp, and then I put the car
battery on charge. I checked the dash lights, and the light in the
temperature wheel was out, but everything else looked good.
...Time is running short, so after dinner I had one more session. I
dug out the key and programmed some channels into the radio, just to
prove it was working, and I set the dash clock. I replaced the one
dead bulb behind the temperature wheel, and then figured out where
that loose Becker mounting bracket belonged, it was easy to see the
site next to the glove box once the light was on in there. I also
tucked the Becker's loose security ground slider into a corner there
so it wouldn't get lost. I then got out the passenger-side underdash
panel assembly and threaded the lamp back into it. I got it pushed
into place and then secured it with its five screws. The one
difficult one is inside, tying it to the HVAC duct through a
small brace. With the face panel in place the foot-side panel was
easy to clip into place. (This was much easier with the false floor
removed, but I'd say even better would be to clip them together before
installing them as a set.) I checked the area to make sure things
were secure, then cleaned out the footwell and put the false floor
back, and the floor mats. The final step was to reinstall the glove
box, the passenger side is done!
Saturday, May 26, 2012
Day 5. The cruise control was spastic, I see from my notes, and Jill
won't like it if it isn't working for a cross-State trip. (Nor will I
the next week, assuming I take this car as planned.) If I'm a-gonna
fix this too then now is the time, since I'm down to putting the
underdash panel and seat back into the car. I tried to remove the
bracket holding the amplifier, and again found that the 10mm bolt was
sufficiently hidden as to make removal difficult. Again I found it
easier to just bend the retaining ears of the enclosure and slip the
board out of its case. I removed the foam damper strip from the PCB
and then poured paint stripper on the back of the board. Once the
varnish had all crinkled up I washed the board, then resoldered it.
It went smoothly, and I dug out the bench test rig afterwards and
checked the board for functionality. It seemed to work, and was not
sensitive to banging on the PCB while operating. I then glued the
foam strip back on the PCB and slipped it back into the enclosure and
bent the tabs back, the fanged pliers were actually a bit of a help
here. (As was a hammer, and a flat-blade screwdriver.) With that
back in place I then installed the driver's-side underdash panel:
three screws and a light threading job. The knee bolster was next,
and I tightened its two 10mm nuts and put the cosmetic snap covers
over the access holes. I then tightened the steering wheel and
installed the airbag. There, all done except for putting the seat
back in, and the testing. It was, however, time for breakfast.
...A busy day, and I didn't get back to the car after
9PM, whereas I had planned on needing most of the day
to get the car ready to go. This afternoon it came to me: the mystery
plug behind the HVAC panel was for the cabin temperature
sensor, which I had plumbed but not connected electrically! Doh!
Even worse, the unattached plug didn't reach to the sensor, what I had
done was connect that sensor's cable to the evaporator temperature
sensor down below, which the mystery plug could reach easily. I
removed the HVAC panel, glovebox, and radio, and after I disconnected
one of the rubber tubes to the lefthand center vent I could then reach
everything I needed to put things right. It only took about 20
minutes to do this and put it all back together, I guess practice helps.
The seat was next, and it was as crappy a job as always. There is a
large stepped washer that goes in the front hump bolt hole that you
have to remember, but the real problem is getting the seat tracks to
connect to the jack. You put the entire seat in place to the rear of
its normal position and slide the tracks forward into their sockets on
the jack. It takes a few tries. You then put in the front hump bolt,
that has to be first or you'll never get it in. Then the other front
bolt, then check the action of the slides and the jack. If that's
right you can then connect the rear track guides, making sure to put
back any spacers that had been there originally. With that done only
the seat belt bolt remained, which took mere seconds. The car was
then assembled. Finally!
I grabbed the keys and started the car. It made some absolutely
horrid noises, a weird thumping and not something I associate
with a leaked-down chain tensioner, nor anything else I could
recognize. The indicators were all wonky and dim, perhaps the belts
were slipping? I think I have a cluster grounding problem too, the
way all the cluster lights and gauges were interacting. I stopped the
car and popped the hood, and didn't see anything wrong. When I
started it again it sounded right, and looked fine. Huh. The
indicators were still kind of weird, but the brake light was on
solidly so I checked the reservoir. Empty. I filled it, it took a
lot. This car definitely has a slow leak somewhere. When I put it in
gear it wouldn't move at first, eventually it started creeping, but it
shuddered a lot and didn't really want to move. I think the
transmission fluid has also leaked down since it was last driven.
None of this is particularly disturbing, nor all that unexpected, nor
likely even very hard to deal with, but this car is supposed to hit
the road tomorrow! I really needed today to finish
the job and road-test the car, but I didn't get it. I hope I can get
up early tomorrow and finish.
Sunday, May 27, 2012
Day 6. I woke up about 4AM in order to finish. I
pulled the transmission (now cold and settled) dipstick and found the
level only just on the tip of the stick, which means it is, indeed,
very low. I poured in a quart of ATF and started the car, it then
moved forward and backwards normally. Good. I'll get the car warmed
up some time this morning and then check the level properly.
I checked the car's schematic and found that the only instrument
cluster ground is X1-1, which is a 3-pin connector on the speedometer.
I hit the emergency flashers and the indicators lit normally, but the
fuel gauge pegged every time they came on. Yes, I think the ground is
blown. I recall that if you, let's say, flash the clock power against
the instrument cluster case (which I did when I
first took the car apart this time) you can blow a ground trace inside
the cluster. (The preventative is that this clock power line should
be first-connected and last-removed.) This is an easy remedy, and
I've even done it before.
I removed the airbag and steering wheel again, and the black plastic
trim ring on the steering column. (The airbag is easiest done with a
1/4" socket wrench driving the correct Torx-30 bit.) I was able
to pick at the lower-left corner of the cluster with my fingers and
get it to start to come out, whereupon I could pinch and pull it out
of the opening sufficient to reach the connectors. I used the Fluke
to check the ground continuity to the tachometer's metal shell, and it
was bad, so I removed the cluster from the car. The speedometer is
easy to remove from the cluster, four 1/4" screws and two Philips
and pull out the lamp harness. There are four more screws holding the
speedometer in its plastic shell, and once the shell was removed the
blown trace was easy to see on the PCB. I soldered a piece of wire
across the breach. Since I was there I brushed a coat of Tangerine
paint on the yellowed needle, restoring its original color. I then
reassembled the cluster and put it back in the car. The flashers then
behaved normally. Since the SRS light has been stuck on I removed the
bulb, no sense causing unnecessary consternation. I plan to check out
the airbag power supply backup accumulator that's located in the wall
of the storage well when I get a chance, this had gone bad
on my convertible causing this lamp to stay on.
(It doesn't disable the system, it only reduces its ability to
function if power is cut early in a crash.) I then replaced the
steering wheel and airbag, and we're back to normal. Again. This
time for sure!
I backed the car out into the lawn and washed it, it was filthy. I
filled the washer tank with water, diluting the blue that was in it,
and refilled the coolant tank, it needed quite a bit. I used G-05,
with a water chaser. The steering was groaning, when I checked it was
foamy and low, so I filled it. Every fluid except engine oil was low,
that's annoying. Time for a test drive! I drove a couple of miles
and back, and the car worked fine. The heat behaved properly, so far
as I could tell, and when I put it on AC/MAX it cooled off and the
compressor cycled. (It's a cold day, so it won't/can't run
continuously.) When I got back I let it idle and turned the heat to
normal. I checked the transmission fluid and it was low, so I put in
a half quart I had. That didn't do it. I noticed the windows were
fogging so I turned on the AC compressor. I put in another quart of
ATF, which put the level to slightly high, which is probably good if
it does have a leak. The windows had cleared by then, so that works
right, and I turned the AC compressor back off. I noticed that the
air intake snorkel pipe was torn in half so I smeared Shoe Goo on the
tear and put it back.
Ready to go! I gave the keys to Jill, along with the first wild rose
of the season.
Tuesday, May 29, 2012
Jill's back, and reports:
- Burning oil smell;
- Occasional flashes from the low-oil light;
- One dash light out;
- Headlights cut out intermittently, cycling the combination switch
restored them. I cleaned this once, but I
didn't use Caig De-ox-it (which I didn't have at the time). Maybe
I'll try again, with that stuff, as a new switch is pretty
expensive;
- Pesky creaking sound from the right of the dash. A-pillar cover?
Other than that the car did well.
Wednesday, May 30, 2012
I pulled the steering wheel and the instrument cluster, and found that
the offending dash bulb was still good, and must have been making bad
contact. It works again, anyhow. Harder was to pull out the
combination switch far enough to spray in Caig De-ox-it. Before I did
this I could get the low beams to go out by pushing the stalk slightly
to the high-beam side. After the spraying, and some cycling, the
intermittency was gone. We'll see how this holds up. With Daniel's
help I was able to identify the creaking sound as coming from where
the upper-right window frame piece rubbed on the hardtop, you could
push on it with your thumb and make it emit the sound. I pulled the
piece off and it stopped, and with it replaced the sound was back.
Lifting the hardtop loose a bit stopped it too, I need to look into it
more.
Friday, June 1, 2012
There was a small tear in the vinyl on the trim piece where it
squeaked, so I glued it back down with a tiny dab of weatherstrip
cement. I then smeared a very light coat of vaseline there and on any
other spots that looked like they could creak, and put the trim back
together again. With the hardtop tightened down I could no longer
make the piece creak by pushing on it with my thumb. I then put the
interior of the car back together, and checked the lights again.
(They were still good.)
The oil was down to the fill mark on the dipstick, so that would
explain the low-oil light. The car is overdue for an oil change,
however, so I will not top it off. I loosened and re-tightened the RH
valve cover, it looks like it might have been leaking. The
transmission was quite full, cold and not running, so I can't really
determine if the burning oil is coming from the transmission or the
engine. Certainly the engine lost some oil somewhere on this trip, it
was probably the cover leaking. (I believe I have a spare new gasket
if I should need it.) I'll keep an eye on it.
Monday, June 4, 2012
Yesterday I took the car for a drive, it behaved well. I think there
were still some hot oil smells, but probably less. The lights were
fine, which was the main thing. (I do think the car needs new motor
mounts, and the driver's seat may have lost a spring on the outside.)
When I got home I put on the oil sucker and removed all the engine oil
while it was still hot. Today I jacked it up and removed and replaced
the oil filter, then refilled the engine. I then took the hardtop off,
we'll be making the next road trip (tomorrow) without it.
Tuesday, June 5, 2012
Road trip day! I woke up early, so one of the things I did to fill
the time was to fabricate another cigarette lighter adapter cable for
the rear window defroster plug. (I use lighter sockets from 114/115
cars, they work out well for this.) I plan to use the cell phone
amplifier with it, since it won't mind the timer cutting off power
from time to time. (I still don't have my Road Trip Relay for this
car.) I threw an inverter into the trunk along with the various
chargers for the techno-toys we're bringing along, just in case. It
is raining today, so I put up the soft top. Sigh.
Sunday, June 10, 2012
Back from the road trip, the car behaved admirably. So far as
top-down weather goes: the rain was, at times, nearly Biblical.
Yesterday I got an opportunity to have the car's exterior detailed,
while we were at the beach and not using the car. My brother's friend
does this for a living, and came out to the house to do it. It took
him most of the day and it looks great. Shiny. He charged $125, I
thought it was a great deal. He notes that the car really needs a
repaint, and I can't say that I disagree. Not gonna happen,
though. Today, however, the weather was gorgeous for the
trip home, so I had the top down. Finally. We caught a tiny bit of
rain at the end, but nothing significant.
Wednesday, June 13, 2012
Ordered new motor mounts (107 241 26 13 left, $75.35
and 107 241 22 13 right, $44.45) and a washer pump
grommet (123 997 36 81).
Friday, June 29, 2012
I installed the new windshield washer pump grommet, and filled the
tank with water.
Friday, August 3, 2012
I rotated the tires preparatory to Jill's road trip to Wyoming. The
outsides of the front tires are heavily worn, they should have been
rotated long ago. Sigh. I also checked all the fluids, they were
fine.
Wednesday, October 3, 2012
Yesterday night I sucked out the oil, this morning I put in new. The
low-oil light was going on, but it was time to change it anyway. The
washer system was still leaking a bit, it was the hose where it
attaches to the pump. It had gotten swelled and hard and no longer
sealed, I cut off 1/4" and put it back on, and refilled the tank
with water. If it holds up I'll replace the water with cleaner.
Thursday, April 18, 2013
Almost time to get the car out of storage. I put the battery on
charge, it wanted quite a bit.
Friday, May 3, 2013
Started the car and washed it, and drove it to work. It was
(finally!) a beautiful day for it. The engine made some horrible
knocking at first, it wasn't lifter noise, and there was oil flow
visible in the filler hole. Very disturbing, but it eventually went
away.
Monday, May 6, 2013
The day-night mirror flipper broke. Crap. It's a nasty little
flexible plastic joint. It doesn't last forever, I've broken
those before, and I'm as gentle with them as anybody could be.
Saturday, May 11, 2013
I tried gluing a rubber spine over the broken mirror flipper joint,
and it didn't really work to restore normal operation. Still, it does
stop the loose flopping, so it's a minor improvement.
Friday, August 30, 2013
Needed oil today. Nearly 2 quarts in 2,000 miles. Burning? Leaks?
Friday, January 31, 2014
With the wreck of the Frankenheap and my inability to start the 560 SEL I needed another car. This one started
readily, but wouldn't move until I put in a quart of ATF. It also
needed power steering fluid. The car's got summer tires, so I was
very careful driving on the snow and ice. There was no real problem,
they had spread sand and de-icer over my routes for today.
Monday, November 17, 2014
Had to drive this car today, after both the SEL
and the truck let me down.
Tuesday, March 31, 2015
My parts order from Autohaus AZ came yesterday. A
107 460 06 05 Lemforder center drag link, $58.61, and
some 480mm Bosch wiper blade inserts, $6.71. I could swear I already
bought the drag link a couple of years ago, but I've never been able
to find it. I put these in the car's trunk for later.
Sunday, May 31, 2015
Long-deferred, but finally I had some time and inclination to tackle
the car, so I changed the oil (and filter), and since the car was up
in the air I replaced the loose drag link too. I think I spent about
2 hours on all this. It went fairly smoothly, the Harbor Freight tie
rod press was again more than worth its negligible cost. Things were
very oily underneath, it looks like the steering box is leaking. The
steering damper was OK, it doesn't need replacing.
It needs the AC recharged again. It's been four
years, that's not too bad.
Monday, June 1, 2015
The corrugated air intake tube has split, so I'm using Shoe Goo to
patch it. It's not the first time for this aging thing! (Plastic
sucks.)
Saturday, June 6, 2015
I had a few moments in the early afternoon, so I recharged the AC.
(It always takes longer than I think it will.) On the road later it
was 88°F out, and I was getting 35°F vent temperatures.
Having put maybe 150 miles on the car now, the steering is definitely
tighter than it was.
Monday, May 9, 2016
Jill was complaining of tire wobble on her trip to Seattle, and when
examined the tires were done. She bought new ones at Les Schwab. The
worn-out tires went on in 2007, I wonder if
they made their rated 80kmi? Checking the records I see that the car
had 96kmi on it then, and now it's 133kmi. That makes roughly 37kmi
on the tires, which is less than half what they should have done,
according to the sales critters.
Wednesday, July 26, 2017
Jill's been driving this car in place of the X5
since it lost its engine. The passenger sunvisor clip (male, on the
visor itself) broke some time ago, and I've been wiring it up. The
wire would break periodically, and I'd patch it up again. Last night,
while riding along, I found that while it had been hanging loose
'somebody' had been winding it up so that the cable for the vanity
light was tight, very tight. Tight enough that they've apparently
broken it, as the light no longer works. That will be very difficult,
if not impossible, to fix.
Anyway, I used two black zip ties to secure it instead of wire. Nylon
is a bit tougher than thin wire, we'll see if it holds up.
Thursday, July 27, 2017
Jill reports that the blower fan is squeaking. I lubricated it 12 years ago, I guess it's due again.
Friday, November 3, 2017
Yesterday the X5 went in for a new radiator and
she drove this car instead. Later she called me and said there was
almost no heat, but that the gauges were fine. I looked this morning,
and yup: Monovalve! Torn across. I raided the
parts box and found a glued one that is basically incapable of turning
the heat off, and put that in its place. This time of year
too much heat is better than too little.
Good replacement monovalve inserts are NLA, what seems to be out there
is a nasty MTC one, of which I already have some experience.
Sunday, July 15, 2018
Jill had been complaining of poor AC, so when I had a few moments in
the early afternoon I checked the charge on the AC. It looked pretty
good, but I did slip in a little more R290, just in case. Vent
temperatures were excellent, in the 35°F area.
Thursday, August 2, 2018
Yesterday the AC quit, it blew the fuse. Today I cleaned contacts and
replaced the fuse, and removed and oiled the blower motor, just in
case. (Only a year since last time.) It spins
smoothly. (I managed to lose my stubby Philips, where it lodged on
top of the transmission. That was a pain to retrieve, I had to put it
up on ramps.)
We took the top off and went to the company picnic, in style.
Tuesday, June 23, 2020
I don't think we drove the car last year. Jill's started driving it
since the X5 got sick, and today we took off the lid. (Long, cold wet
Spring.) The transmission fluid had leaked down and I already put a
quart in when we started it up. Jill says that it's still delaying
engagement, so I had her leave the car running when she got home. I
checked the level and it was still substantially below the fill mark.
I added more than a half quart, which brought it up to full. For
extra fun I accidentally slopped a bit on the exhaust manifold, and
not only did it vaporize it also burst into flame! I blew on it a lot
until it went out, but at least I kept the flames down to where it was
only cooking the metal of the manifold itself and not something nearby
that was substantially more flammable. Scary!
Tuesday, July 21, 2020
Today the car got a long-overdue oil change, done by Daniel. It's hot
out so I then recharged the AC, which was weak. (Last time
was two years ago.) I added a can of
R600a/R290 mix, and topped off with more R290. While slopping water
on the condensor I got vent temperatures down to 40°F when
stationary in the driveway, which is pretty good.
Thursday, July 30, 2020
Disaster! They oiled the road again today, and Jill was attempting to
drive on the side in the un-oiled swath. She missed. She called me
and I dashed down with the truck and a tow
strap. I arrived to find the car nearly completely off the road, and
at a very precarious angle in the "almost tumble sideways down the
hill" attitude. Very scary. She was frozen. I added my weight to
the uphill side and had her stop the engine and put it in Park, then
gently let loose the brake. It lurched a bit and then stopped. I
opened the door and held it open so she could climb out of the car.
Once she was out we could both breathe easier. We called down the
neighbor so that we had a second set of eyes available, to
help guard against mistakes. Jill was pretty rattled.
I had a look underneath at the front, and I couldn't find the tow
hook. It looks like it had been broken off, and long enough ago that
there was nothing there but rust. Huh. On to Plan B. I wrapped the
strap around the lower control arm on the uphill side, the steering
was already cranked over to 'drive' back onto the road. We tied off
to the truck and I had Jill and the neighbor climb into the bed for
additional traction, and forward enough to stay away from the strap if
it should snap. I then put it in first and 4wd and eased out the
slack, then slowly pushed on the throttle until it was floored. It
didn't move, but I don't think we could build RPM enough to get
maximal torque. I then backed off and put it into low range and tried
again. This time it walked forward without any fuss, dragging the car
completely back onto the road; there was no slipping, even on the oily
gravel surface. After that we just unhooked and everybody drove home.
Jill then washed the car, and I washed out the truck, whose carpets
had gotten filthy with road oil. (Not petroleum, I believe. Sticky,
black-ish, and smelly.) I used orange Goop and a scrub brush, and a
hose. The Shop-vac did much of the drying, the sun is finishing the
job.
I believe that a taller vehicle, like the ubiquitous SUV, would have
probably rolled under these circumstances. This is the second time
(see here) that I believe this car's low center
of gravity has prevented a worse accident. (Though to be fair, if the
convertible did roll that would be very bad.)
Monday, August 3, 2020
The repaired parking brake release knob split
apart again recently, and today I took the remains and cleaned out the
Shoe Goo from the last repair, then potted the aluminum insert in
5-minute epoxy and put it back inside the pieces. This time I cut a
length of 16-gauge shotgun shell casing (heavy plastic) to serve as a
permanent collar, and slipped that over the shank of the knob over
more epoxy. Once that set up I cut off the excess length and cleaned
it up a bit, and screwed it back into the car. It seems very secure;
the repair is not particularly noticeable, either to the eye or to the
touch.
Wednesday, May 25, 2022
The battery got cooked by mistake a couple of weeks ago when the charger's
switch got knocked off of the "Automatic" position. I'd been trying
to restore the battery since then, by adding more distilled water and
charging it on the tender, but a couple of days ago I noticed the
battery was warm, and the voltage was dropping. The charger
eventually dropped out, and when I checked the voltage today it was
zero. Putting a dumb charger on it resulted in a pegged current
meter, and eventually its thermal breaker popped. The battery is
toast! However, it's also 12 years old, so I
guess we're due for another one. Bought for $159 at Home Depot,
though I suspect it's been sitting on the shelf there for quite some
time. Possibly a few years as there were two there when
I bought one last time, and now
there was one there. (This is not a commonly-used size.) I put it on
charge when I got it home, and it's still pulling significant current
four hours later, which is not a good sign of freshness.
Thursday, May 29, 2025
Charged up the AC for Jill's road trip. I had to do it 'blind', as it
wasn't warm enough to get it dialed in correctly.
Thursday, October 30, 2025
Jill says the heater's been intermittent, which is probably the
monovalve insert, which has been bad for at least 8
years. I ordered a new one. $24 from FCP Euro, taxed and
shipped. We'll see if this URO garbage (all that's available, now) is
any better than the last one I tried.
The windshield washer nozzle on the interior passenger side fell apart
quite some time ago, and I decided to have a look at it. The heating
unit is now $82, so I'm trying to glue the original back together
using Shoe Goo. It looks like the heat from the element decomposed
the plastic body, so there's a chance it can be put back together.
The plumbing part is intact, it's only the heating attachment that
fell apart.
Tuesday, November 4, 2025
The monovalve repair kit came, so today I installed the new diaphragm
assembly. I did not use all the parts in the kit, just the main part
with the diaphragm. (The diaphragm itself is what always fails.)
It's very easy to install. I made sure to work all the water out of
the solenoid first. (It should not get wet, but once the diaphragm
tears that's what happens.)
Unlike the last URO monovalve I bought, this was only the seal parts
and not the entire solenoid assembly, which is what did not actually
fit last time.
I also installed the repaired (glued) windshield washer nozzle heater
assembly.
Sunday, December 21, 2025
The throttle was starting to stick on, I cleaned and lubed the
(complicated) under-hood throttle linkage. Much better!
Return to Site Home
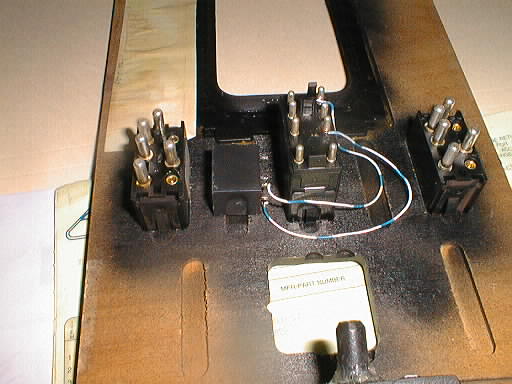